Building diary
While building the house, we blogged about interesting (to us) events and experiences.
This way family and friends (and other interested parties) could follow along with the process.
At some point after finishing the actual house build, we stopped doing so. There are still things
happening (we keep on building stuff, mainly in the garden or the basement), but those regular updates
in chronological order just don't happen anymore. Perhaps we'll be publishing new stuff about the
things we build at some point on this site. Until then, here's the last content of the house blog for
you to read.
This diary has always been bilingual for different parts of the family. See here for
the german version
We're building a house...
Von: Markus am 01/23/2011
 "We", that are Manu and Markus, two computer scientists from the green heart of
Germany, Thuringia. We both studied in Ilmenau and returned here after a (not so short) time elsewhere. As we're
sure about staying here now, we want to build a house. We're nerds, meaning that we can't go without writing
about the progress online (mainly for family and friends that are not close by). Parts of the family are the
reason for the multilingual version of the articles as some of them don't speak german. For those that are
reading the english version: we will try to translate the stuff as good as possible but please bear with us if
there's anything unclear (especially regarding the legalese that might show up here and there). That's what the
comments are for.
"We", that are Manu and Markus, two computer scientists from the green heart of
Germany, Thuringia. We both studied in Ilmenau and returned here after a (not so short) time elsewhere. As we're
sure about staying here now, we want to build a house. We're nerds, meaning that we can't go without writing
about the progress online (mainly for family and friends that are not close by). Parts of the family are the
reason for the multilingual version of the articles as some of them don't speak german. For those that are
reading the english version: we will try to translate the stuff as good as possible but please bear with us if
there's anything unclear (especially regarding the legalese that might show up here and there). That's what the
comments are for.
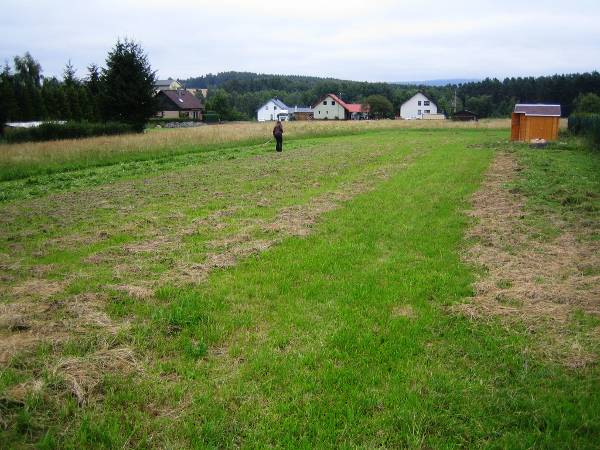
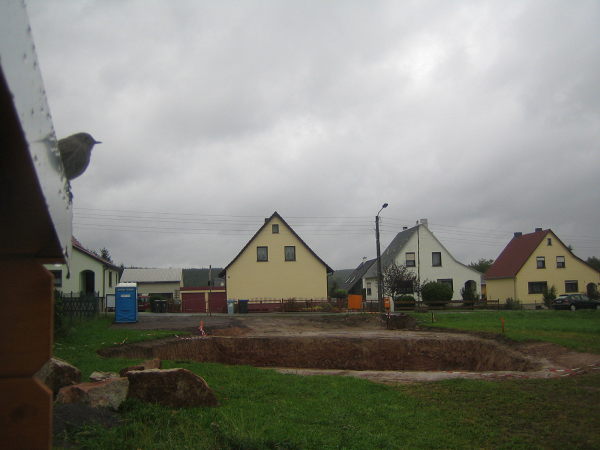
There have already been some preparations. We started about one year ago looking for a lot to place the house on.
The lot should be somewhere in or near Ilmenau of course. After you found a matching piece that does not mean
that everything is ready to go. Buying land in Germany is a huge undertaking where uncounted numbers of
governmental bodies have a say in. Until everybody said something (and got paid for it of course) some months
will already have passed. This part is coming to an end now so that we can finally go on.
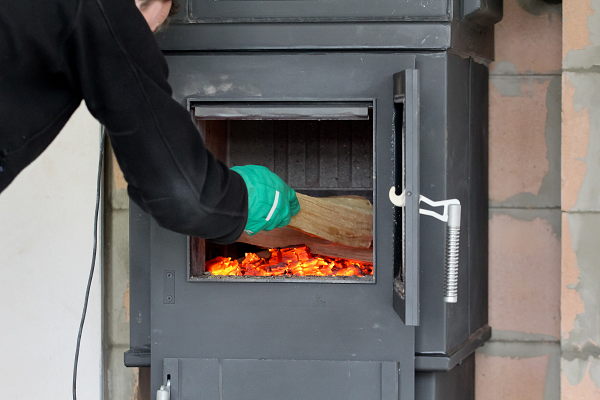
What kind of house are we planning? The main focus was on a guaranteed future especially when talking about the
heating. We started with a passive house to do away with the heating once and for all. Alas, this does not mix
well with the wish of having one or more cats which have to enter and leave the house quite regularly. We did
some research regarding the way of building that thing: the prefabricated houses that Dennert offers, wooden houses just like they are usual in California or New
Zealand, the classical version with stone put on stone... The options are basically endless today. Finally we
settled for a simple yet intriguing idea: which energy provider does not send an invoice? Right: the sun. Well,
Ilmenau is kind of famous for its weather (They have a saying here that translates to "In Ilmenau where the sky
is blue and the billy-goat dances with his wife" - rhymes in German...) although its not only sun (the other
option the city is famous (or rather infamous) for is the rain coming from all sides (including below).
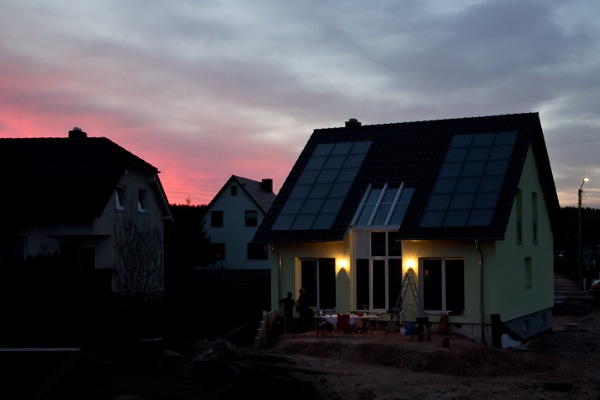
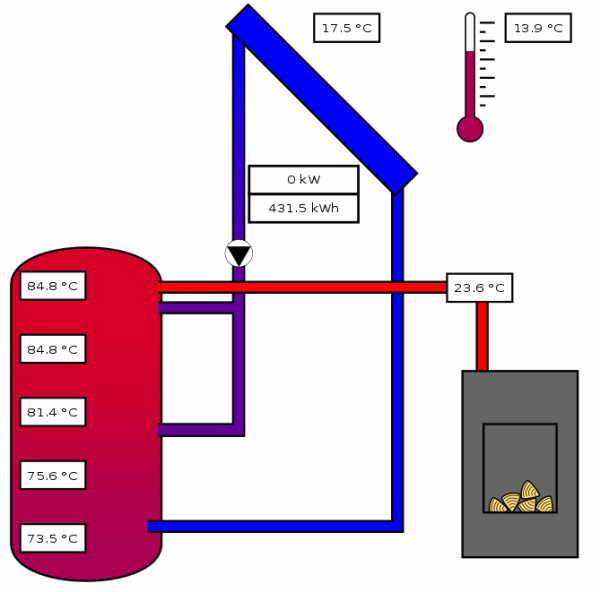
Nevertheless: having lived here for quite some time now the idea of using the sun for heating and warm water
seemed (and seems) logical to us: a "normal" house with a bunch of solar collectors on the roof, a big buffer
for storing the heat, the sun as an energy source which is likely to outlast us all and there you are (well
nearly. Some additional heating will be required but that's another article) with a heating system. On this
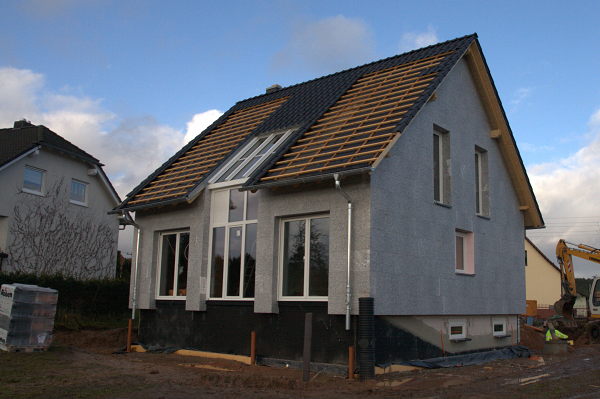
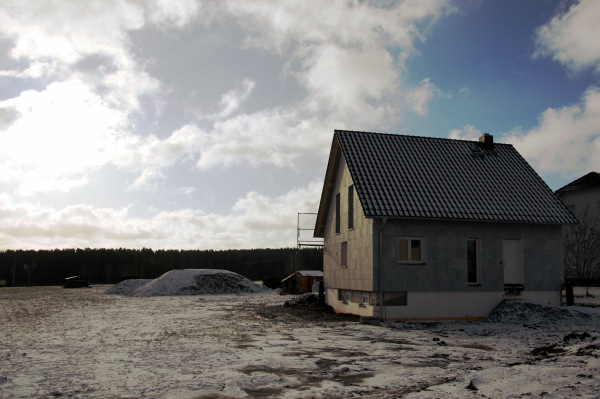
train of thought we arrived at the "sun house" concept. Our
house is to be built by Helma, a company which a) has already built some of
those houses and b) has a local dealer here giving us somebody to talk to if problems show up.
As already hinted: there has been some progress in the past (more to that later), but there will hopefully be
much more progress in the coming year. We're kind of excited...
What happend so far...
Von: Markus am 01/23/2011
As already mentioned in the first article there has
already been quite some activity since we decided to build a house. In
order to provide an overview on where we currently stand here's a short
(kind of) recap what happend so far.
Everything started mid/end 2009. Somehow the idea
came up to build a house. We both quite like the area but didn't want to
live in a flat all our lifes. Then there's always the question of
having something for when you get old and of course I need room for the
drumset. Something like this. Anyway, we started to do our research on
what we would like to build and what we could afford. You can get a good
introduction by visiting the model house park in Erfurt.
There you have a whole bunch of model houses from different vendors
using different technologies etc. so you get in impression on what is
possible (although that is just the start). Additionally we did the
research on the net and discovered some interesting things there. As
already mentioned we're looking for something "future-proof" and first
thought about the concept of a passive house. The – quite logical –
reasoning: no heating system, no ever increasing costs. So we looked
into this a bit deeper. The problem: call us conventional thinkers, but a
house where you're not supposed to open a window in the winter (or
anything else where warmth might escape) left us with an uneasy feeling.
If it works, perfect... but if there's something wrong (or you're away a
bit longer. Passive houses use human body warmth for heating among
other sources). We were quite sceptical.
While looking for vendors Manu ordered some info
material from Helma (among others). Along with this we received a
voucher for an introductory house consultation service as well as an
invitation for a lecture about solar heat, a technology which we didn't
have on the sheet before. We accepted both invitations and where quite
fond of the solar heat (but then again I'm easily impressed when it
comes to technology...) Our main problem would be solved: we could "use"
the house like normal, would not need to have any worries about the
stuff that makes a passive house work (I would be sceptical whether the
ventilation system would be quiet... but then again I'm not an expert on
this) and would be independent of the wishes and ideas of
gas/oil/energy suppliers (ok, partially. We would still need energy for
some of the stuff.) We quite liked that idea.
In order to get an idea on what the house could look
like we had a look around the Helma website and saw the house "Leipzig".
Well... that was it for me. The big window, the gallery... very nice.
After we visited the model house in Baiersdorf there was no longer a
discussion about it. When I entered the living room there, I thought:
"This is it." Well, that simplifies the decision but complicates other
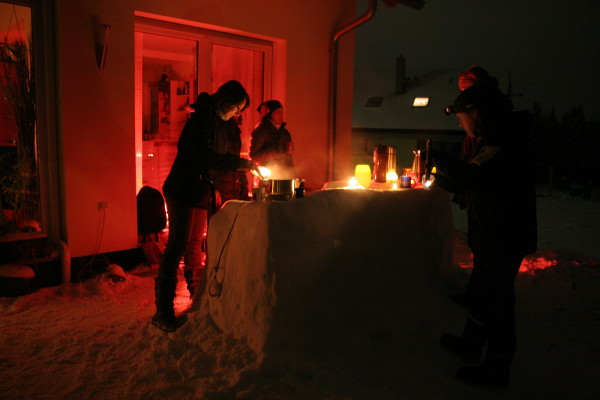
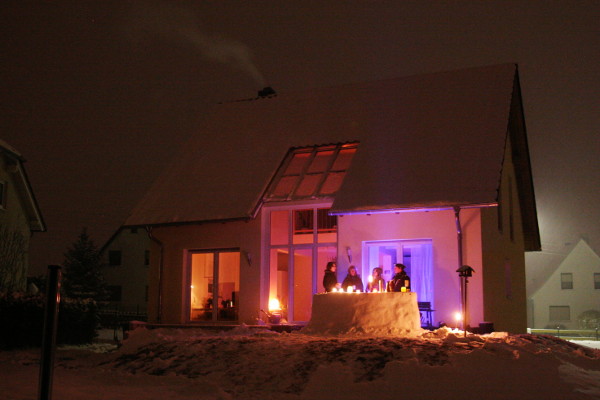
things (more on that soon). Our friends jumped on the ideas of the sun
house with its large buffer in the middle and made one for my birthday:
The problem: I knew how the house should look like, but then again
I'm quite touchy about my privacy. The big window needed to point away
from the street and there should be some room towards the neighbors.
This side of the roof also had to point southward as it carries the
collectors later on. This severely limits the choice of the lot: no
north slope (obviously), the long side pointing north-south (for the
room towards the neighbors) and the street north (so that the south side
is the back of the house). Of course there must not be anything
blocking the sun on the house. Hm... We had a look at quite some offers
(you develop good skills to locate the lot on an aerial picture just by
looking at the pictures in the ads) and rejected nearly all of them.
Sometimes the lot pointed in the wrong directions (would have had the
big window showing towards the street), then the distance to the
neighbor would be to small (those new building areas are real masters in
packing the houses close together); sometimes a north slope which had a
derelict mine shaft underneath (Ilmenau is a t the north slope of the
Thuringian Woods and was a mining center in earlier times) or the price
was just too high (I know that the prices here are ridiculously low
compared to bigger cities). In the end it took more than 5 months and
quite some busy estate agents until we found out piece: pointing nearly
nort-south, street nearly north, much room and close to Ilmenau
(although not in the city itself). There are (of course) some
disadvantages: the size was unclear (ok, actually an advantage as we got
to choose our size), the price (subject to discussion), no connection
to sewage works (we have to build our own small one) and last but not
least the approval of the authorities on the direction of the house (the
lot runs towards 160°, the house has to point to 180°. Building the
house not parallel to the street might seem like a non-issue in some
countries, but this is Germany, you know...)
Despite those small issues (at least one of which was bigger than
expected) we met with the estate agent and the owners in june 2010 to
talk about price and size. We reached an agreement and continued like
this: we start to prepare our part and commission an architect with the
planning of the house and something called "Bauvoranfrage" (a
preliminary permission to build which resolves some of the most
important issiues) to fix the turning of the house and therefor know
whether it is possible at all. The owners reserve the lot for us until
we are ready (which took quite some time in the end). We started right
away (first time paying big money. Although we have to admit: the
architect will be payed by Helma when we sign the contract). In july we
got the geological survey and the first designs of the house. As always:
we had to change things. What was very nice: our architect works fast
and flexible and even turns our amateur drawings into something that you
actually can build. That way we make it mid of august and hand in the
"Bauvoranfrage". That one will keep us busy for quite some time to
come...
In the meantime we need to answer the question of getting a mortgage.
The first cost estimation from Helma gets us thinking: we can't afford
that, we think. After we talked to our financial advisor we're a bit
more optimistic. Should be possible. End of october (after more than two
months!) the first appointment with the notary has to be cancelled as
we're still waiting for the result of the "Bauvoranfrage". As far as we
know our local Helma guy really had hard discussions as the wish for
turning the house southward was not really liked well by the
authorities. In the end they decided to leave the decision to the
village council and they were happy with it. We picked up the decision
in person at the council to ensure that everything goes as planned. On
November 3rd (remember: end of june the owners and we had an agreement
on how to proceed!) we finally could sign the contract. That settles
everything... or so we thought.
In order to have such a contract become legal there are a thousand
things that need to be checked, yet more authorities have their say (and
get paid) etc. Neither we nor the owners expected this to take that
long (especially the check whether the lot was disappropriated between
1933 and 1990 takes some time). In order to have some progress at least
we ordered the lot to be measured (it still is part of a bigger lot
which gets divided). That doesn't work out also: November 24th, the
first snow. By and large Germany sinks into chaos (we're used to the
snow in the area here, so it was ok) and in our little world we have to
wait as the surveyors can't work in the snow. December 12th: no
measurements. But we talked to the bank and are quite optimistic
regarding the mortgage. And it keeps on snowing...
As we don't want to be bored (and are on holiday the week before
Christmas anyway) we have the kitchen for the house planned. First of
all we want to know how much money we have to put aside for this and
second we would have the unique opportunity to change parts of the floor
plan if necessary. It is necessary and we add another wall in the
kitchen. The surveyor tells us that he put us on top of his list, but
the snow is still there yet. Well, we plan another kitchen for
comparison...
The time between Christmas and New Years Eve is a bit busy again. We
want to have the lower prices and bonus programs of the old year and
need to get the contract ready. There are some last minute changes in
the floor plan (thanks to discussions with some people), some things are
taken out of the contract, others brought in and on the last day we
sign the contract. Well, we sign it conditionally of course are we're
still not through with the mortgage and buying the lot (just as a
reminder: we're still waiting for this check with the compulsory
purchase).
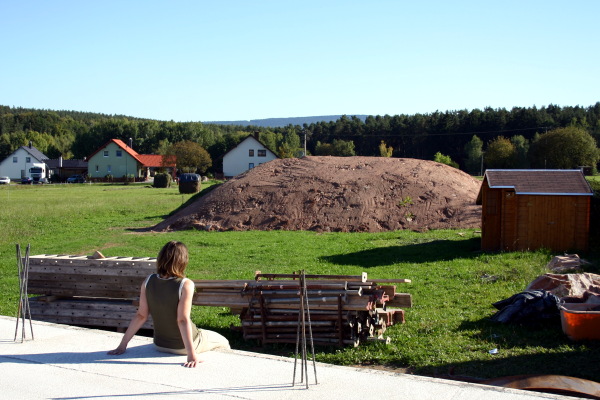
The new year has something positive for us: it gets warmer. We have a
look at the lot just in case and are quite impressed: three meters of
snow (well the biggest heap anyway). The neighbors put all their snow on
our (still empty) lot... Nevermind, the surveyors can work and the
measurements are done on the 12th of January. When we meet them at the
lot (with the corner stones in) I realize for the first time just how
big 1200m² actually are. I need a ride-on mower... We also could finally
hand in all the stuff for the mortgage. Well, we're still waiting for
the lot. But there's good news there also: we got a registered letter
(well, we got a notification that we are to get one but weren't there,
but nevermind). That can only be the letter from the notary that
everything worked out and we can continue.
Getting rid of some money "with relieving effect" ...
Von: Manu am 01/24/2011
... at least that's what the sale contract for our piece of land says. Yes, today was the day: we received the
letter from the notary telling us to transfer the money because all preconditions are fulfilled now. And so we
did: transfering the money "mit befreiender Wirkung" (with translates to "with relieving effect" if you do not
look at the official juristic meaning). Really relieving to get rid of that much money, yes it is.
... and there is some more I want to tell: MINE, MINE, MINE ... at least one half of it ;-)
What's the fuss about?
Von: Markus am 01/29/2011
What are we doing the whole thing for anyway? What do we want to have in the end? Well, a house, obviously, but
what should this look like?
Let's start our virtual tour on the ground floor. We'll skip the basement. It is – like most basements – not very
interesting yet. All sketches are exactly that: sketches. They are not to scale. They
are supposed to give a rough overview how we divided the house on the inside. Additionally all sketches are
"upside-down", i.e. north is on the bottom of the pictures.
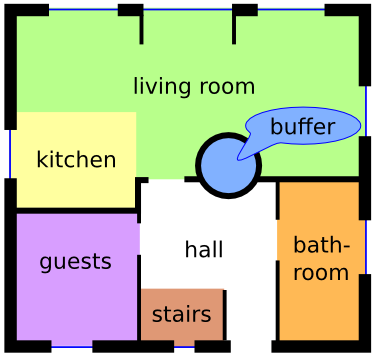
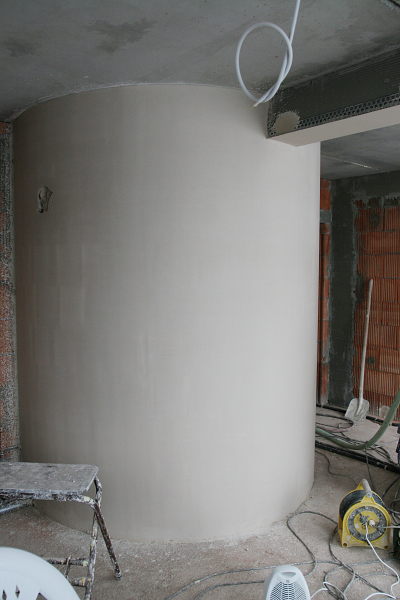
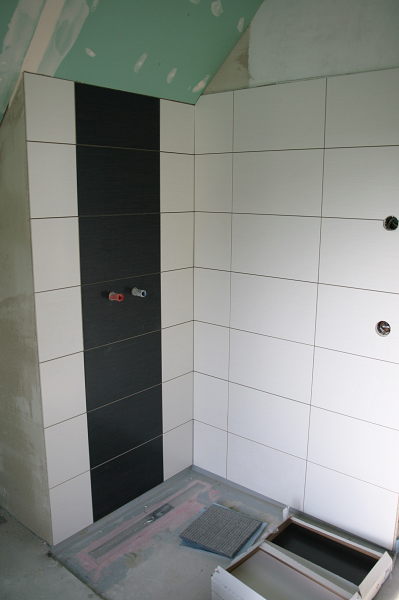
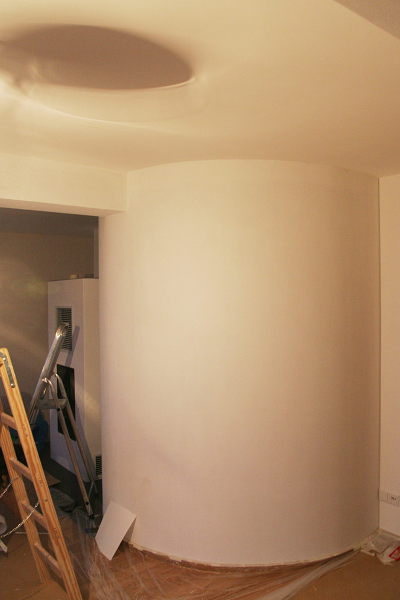
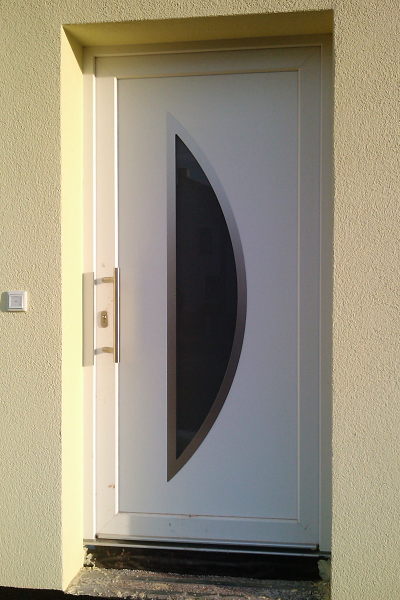
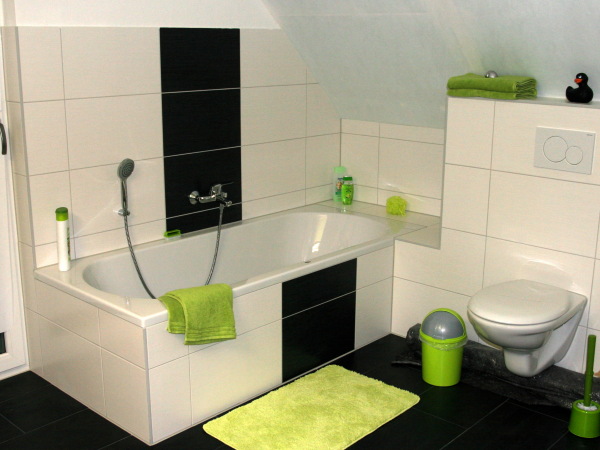
We enter the front door and find ourselves in a rather big hall next to the stairs. Most people will most likely
notice the round wall at the opposite end of the room. Behind this hides the heart of the house's heating
system: a solar heat buffer filled with 7-8m³ of water which is heated by the collectors on the roof. On our
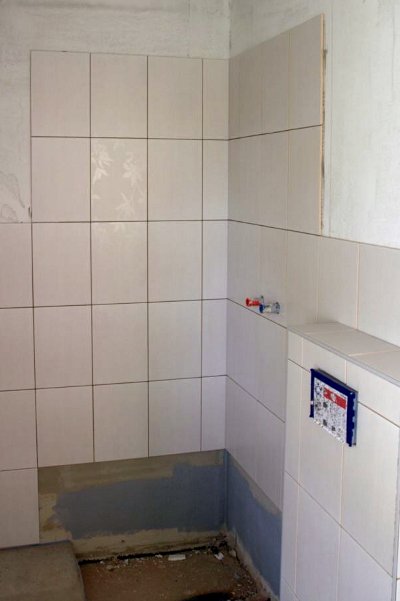
right side we find the small bathroom. This one's intended as the guest bathroom (although I don't think that
we'll go upstairs every time to use the "real" one). On the left the room for guests. You have to put those guys
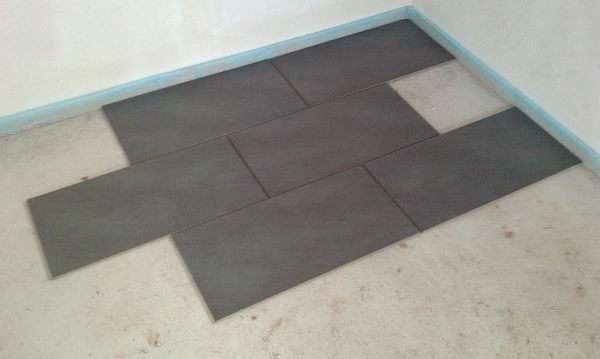
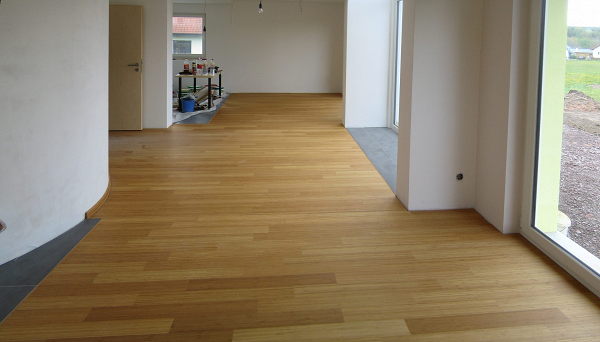
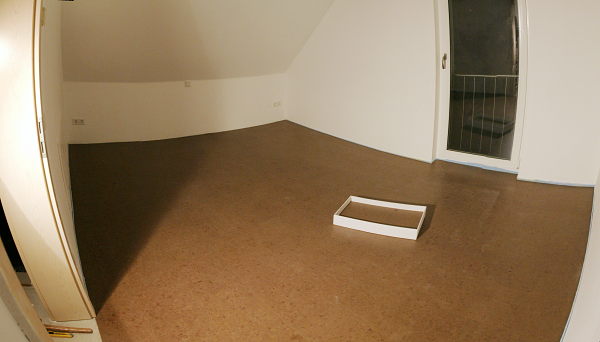
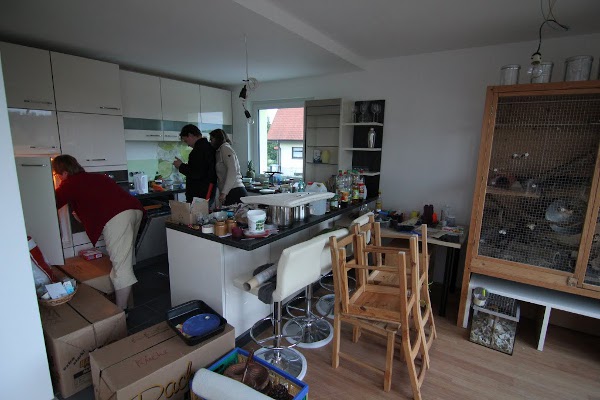
somewhere... On to the living room: we wanted to have an open architecture which much light coming in (who
doesn't these days?). So the first thing you see: a 2.5m wide glass front spanning two storeys which along with
the two big glass doors lets much light stream into the room. Which kind of floor this light will shine on is
subject to (big) discussions between the sweetest of all wifes and me, btw... One of our knock-out criteria: an
open (american?) kitchen. We both don't like it when one is in the kitchen while the other is entertaining
guests. The simple solution: an open kitchen where everybody can be curious what's going on. Also you can use
your guests to help you prepare stuff that way ;-)
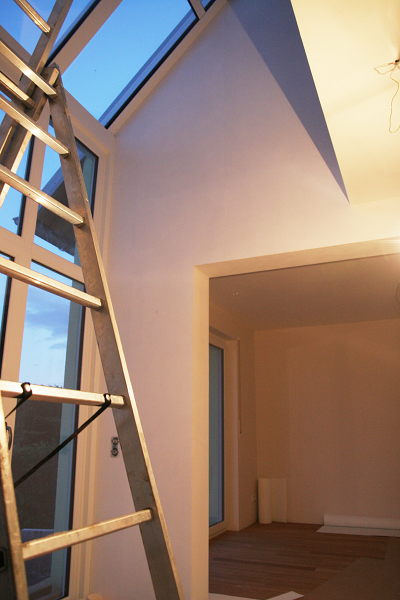
On to the upper floor (I'll take the stairs but the more sporty one can also climb up the gallery):
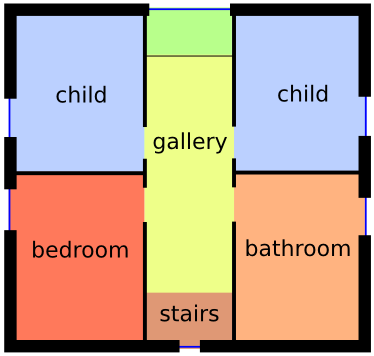
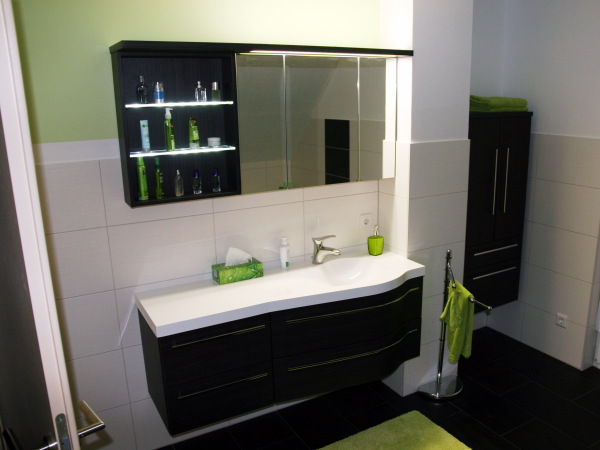
When you come up the stairs first thing you see is the big window and the garden outside. On the right side the
main bathroom, this time with a bathtub. On the left we have the bedroom, not that much interesting. The two
southward rooms are labelled child rooms for now. Dear family: don't get ahead of yourselves, we could write
something like "office" or anything there as well. Ehm...
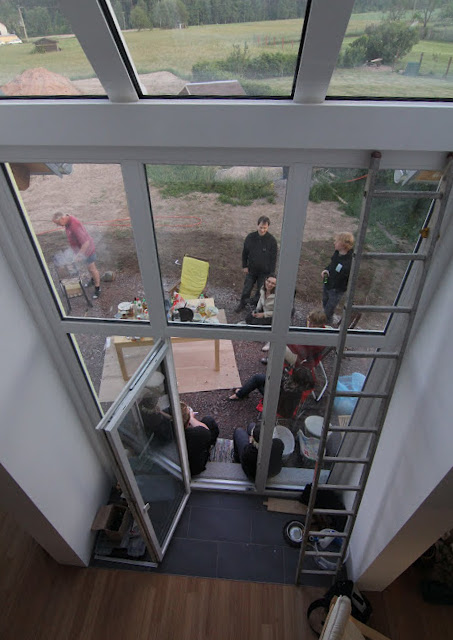
Reaching the end of the gallery you can have a look at the living room again (and see the ones that tried
climbing enjoying themselves).
The basement is similar to the ground floor btw. One big, heated room which I want to remodel a kind of "music
studio" for my drum set etc. later on.
What will it look like?
Von: Manu am 02/06/2011
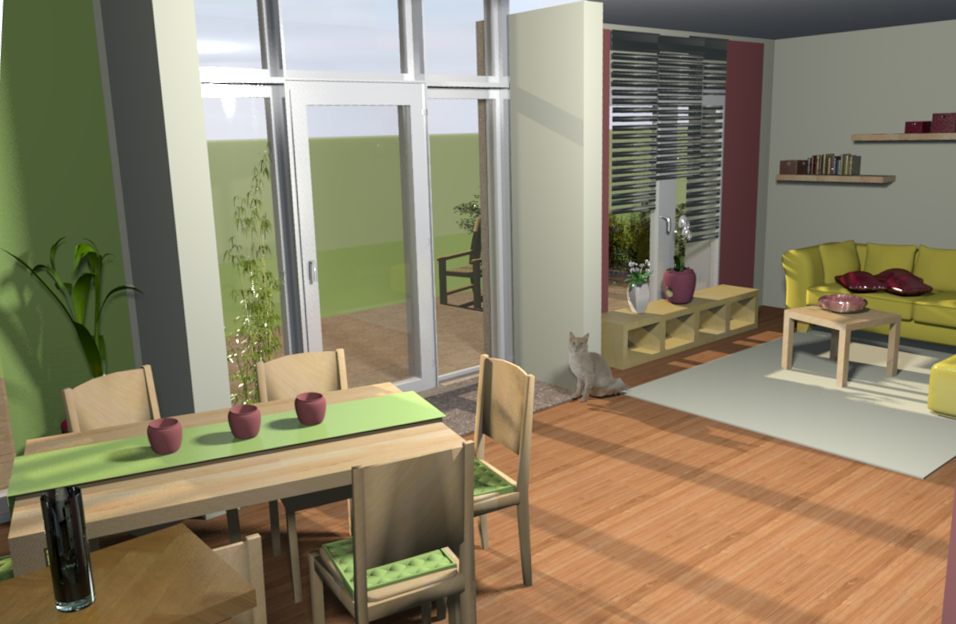
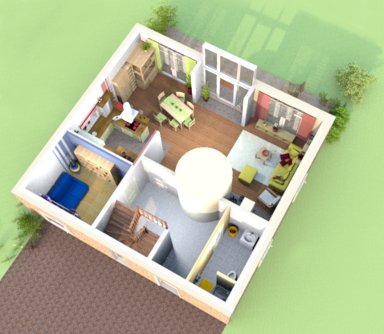 To get an impression what the whole
thing will look like we've put our existing furniture into the floor plan using Sweethome3D.
To get an impression what the whole
thing will look like we've put our existing furniture into the floor plan using Sweethome3D.

Do you want to look
into our living room? If you do so be sure to look for our future pet - it was absolute must in our 3d model :-)
We got the order acceptance
Von: Markus am 02/19/2011

Yesterday in the mail: the order acceptance by Helma. We had no doubt that this would come, but now we have it in
black and white: Helma wants to build a house with us.
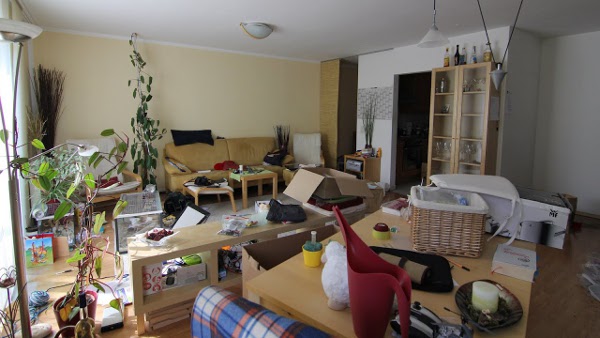
Cleaning out - Round One!
Von: Manu am 02/20/2011
With the years a lot of things keep laying around in covers, especially after some movings. So we've decided (or
better: I did so) to clean out the whole stuff in the upcoming months. Today it was the turn of my honey's
clothes and of some packing boxes of the last moving. The result: two big bags of clothes for donation, the
return of my missing Easter decoration box and one box with things to give away.
There's no way back now
Von: Markus am 03/03/2011
Today we had an appointment at the bank to sign the credit agreement. This means that we've sold our work force
to the bank for the next... about 25 or so years. On the bright side: this enabled us to sign the contract
agreement with Helma putting our contract from "on hold" to "let's go". Now Helma can prepare the building
application and we're on track to start building soon (with "soon" meaning "somewhen in the next 2-3 months").
Hooray!
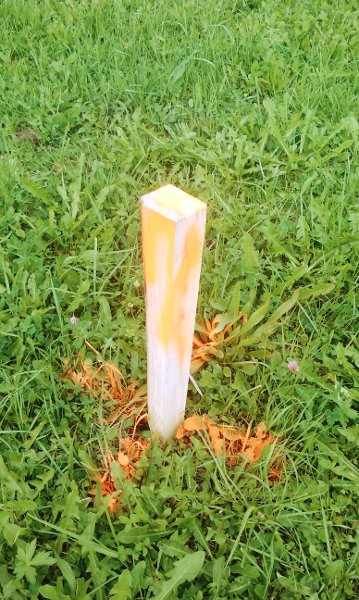
Measuring the ground level
Von: Markus am 03/08/2011
 Again a small step forward: the ground levels on our lot
have been measured und we decided where to place the house exactly.This is needed for the building application.
So we've been out on the lot with our consultant, the civil engineer and the construction manager, sprayed red
crosses on the grass (and my fingers) and took the height all around. Now Helma will finish the building
application, send it to us for a final check and we'll hand it in.
Again a small step forward: the ground levels on our lot
have been measured und we decided where to place the house exactly.This is needed for the building application.
So we've been out on the lot with our consultant, the civil engineer and the construction manager, sprayed red
crosses on the grass (and my fingers) and took the height all around. Now Helma will finish the building
application, send it to us for a final check and we'll hand it in.
"Hier entsteht ein HELMA-Haus"
Von: Manu am 03/13/2011
 ... that's what the sign says - "A HELMA house will be build here".
A little surprise at our building lot today - someone from Helma has been at our place and put up a sign telling
everybody what is going to happen there: Our house will be build there by Helma.
Now let's see if the building application will be there as fast as the sign at the lot.
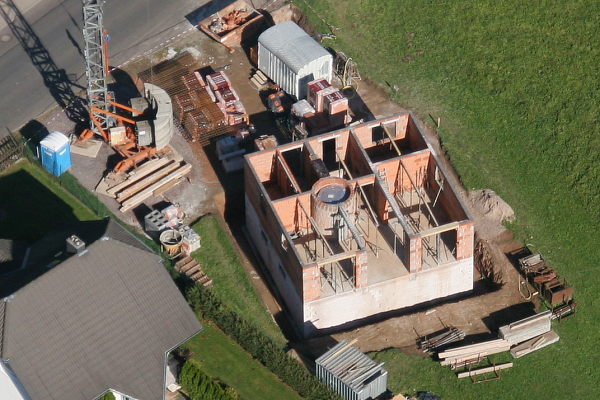
An aerial view...
Von: Markus am 03/20/2011
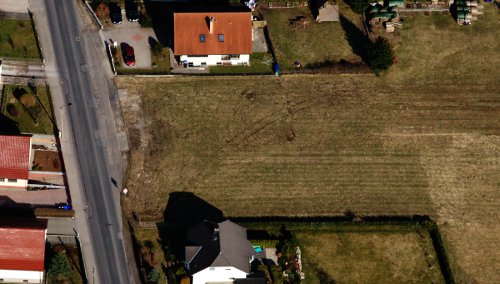
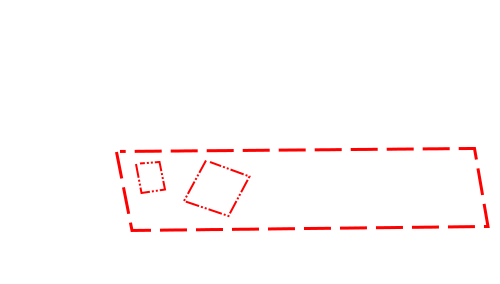
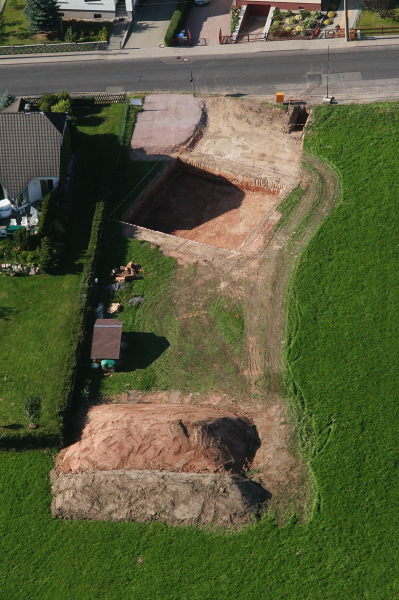
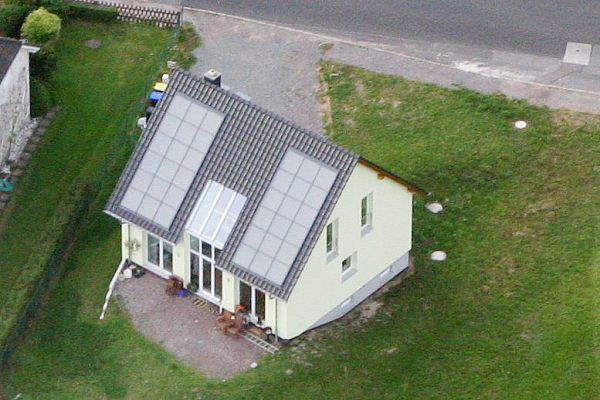
Just to give you an idea about the surroundings of our new house: an aerial picture. I took advantage of the
great weather today, went flying and took pictures. It was really, really f***ing cold (the dictionary says
something about brass monkeys?), but it was worth it. If you hover with the mouse over the image you should see
the border of our lot, the house (bigger rectangle) and the garage (smaller rectangle). At least that's the way
it's planned... Just in case anybody notices: yes, we do own a small part of the street. Not going to put up any
gates there though.
Things I can't translate...
Von: Markus am 03/31/2011
There has been some progress on the legal front. And, as always with legal things, it's rather hard to translate
it. Let's try: the land-registry office sent us a notice that from their point of view our lot has been devided
and now has an own number. Now we're just waiting for the registry of deeds (? Kind of hard to explain.
According to the translation this might be the same in other countries. In Germany you have two offices: one at
state level and one at municipal level. We're waiting for the latter.) If this is through we fully own the lot.
In other news Helma sent us the first versions of the plans for the building application. There were some
problems which are being fixed right now. Our contact persons are quite fit concerning those issues. Everytime
there's something they don't stop working until we're satisfied.
Handed in the building application
Von: Markus am 04/18/2011
And again some legal stuff done: we handed in the building application. We got 4 copies of this on the weekend in
a (rather big) package in the mail from Helma. We signed 3 of the copies (felt like about 75 signatures…) and
handed them in in our lunch break. The contact person there assured us that it won't take long as all the
complicated stuff has already been decided in the preliminary application we filed some time ago.
On related news: we need a certificate about the infiltration on our lot. That's why we stopped by there on our
way to the building authorities and met with the engineers preparing that one. The certificate is needed because
we have to (and want) to drain away the rain water from the roofs on our lot. They check this stuff in quite an
interesting way: the drill a small hole, fill in water and stop the time it takes to drain. You learn something
new everyday…
The first bill is paid...
Von: Markus am 04/21/2011
Well, actually not the first, but rather the first "real" (i.e. from Helma for the house itself). As the
contract said we got the first bill over 5% of the total price after the building application documents were
finished.
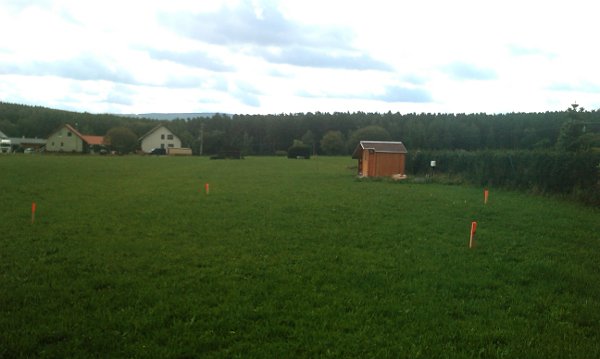
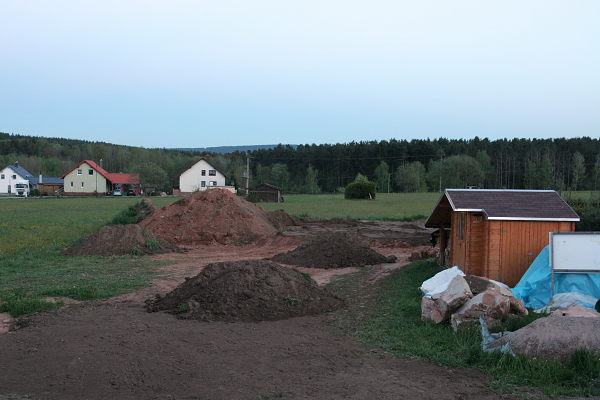
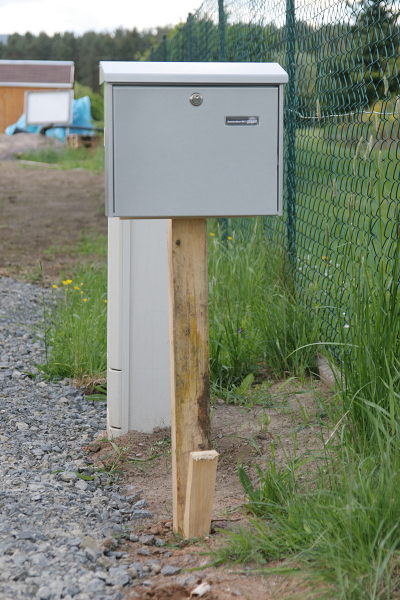
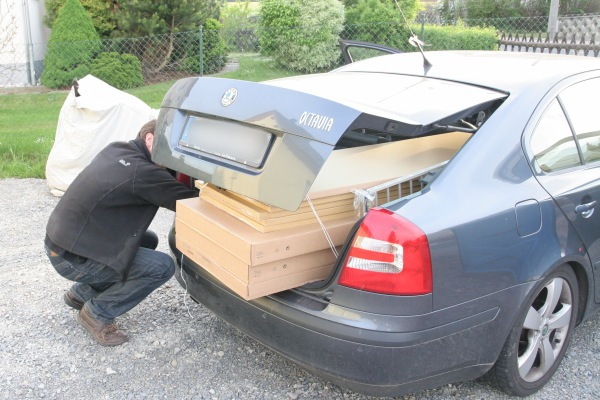
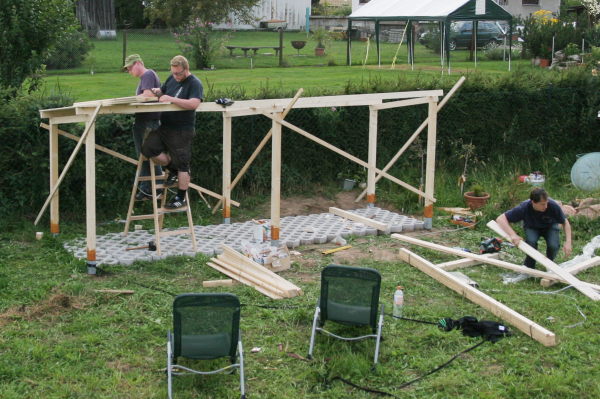
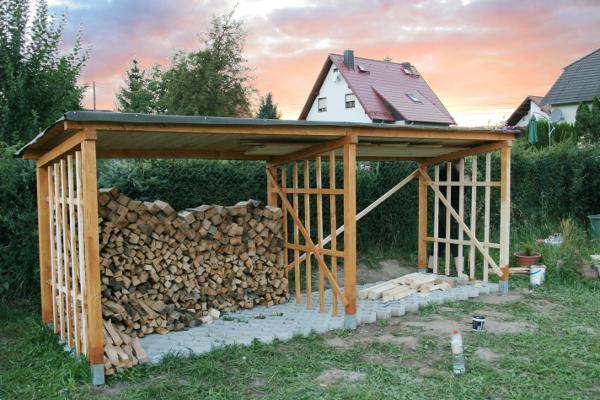
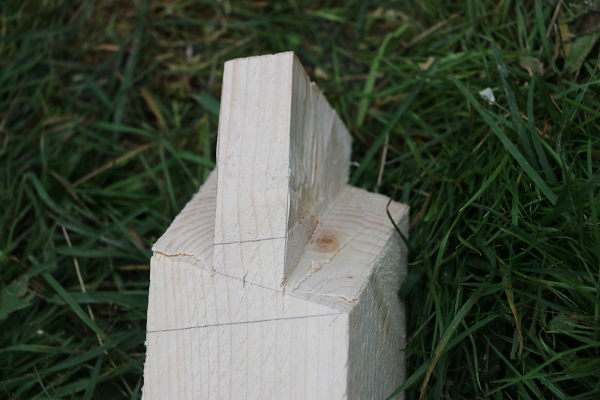
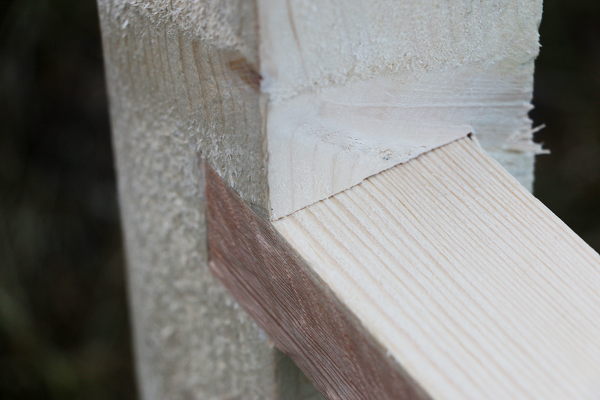
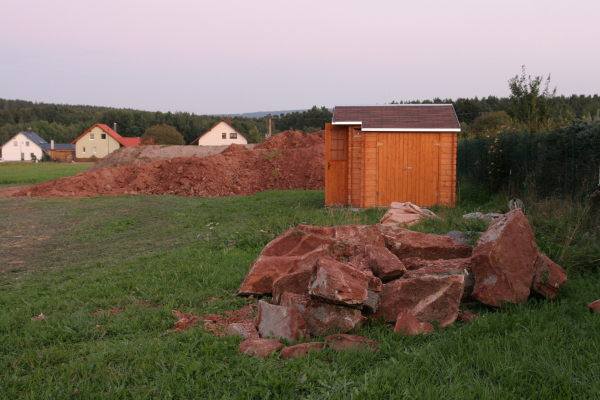
Building a garden shed
Von: Markus am 04/26/2011
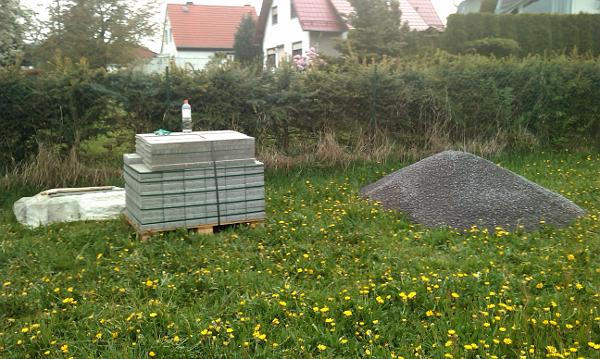
There's this little problem with our lot at the moment: it's just a meadow. You can't store anything there, at
least not when you want to lock it away. Therefor the plan was to build a garden shed before the house gets
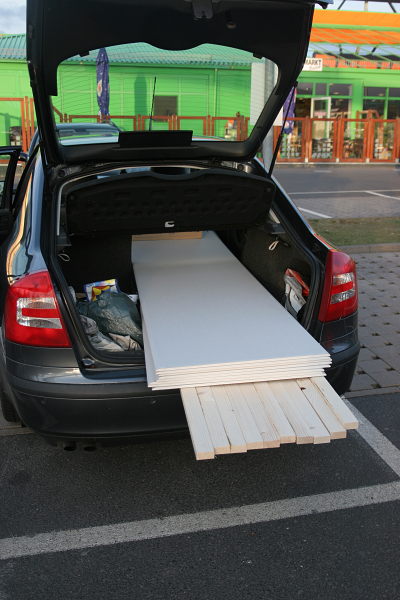
built. We had a look around the net to find something that fitted our needs (and budget) and wanted to order it.
The next hardware store which has the type of shed we looked for is in Arnstadt, so we got there to place the
order some weeks ago. They had some sheds out on the car park so we had a short look around and discovered one
that fitted even better. Same price, but much more features and a bit bigger. It turned out that Hellweg (the
store) turned 40 that week and they sold the stuff as a kind of special birthday offer way below the normal
price (40% below to be exact). Of course we placed a different order than intended that day.
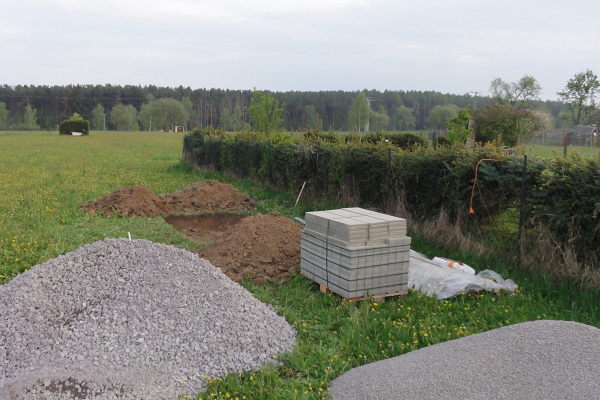
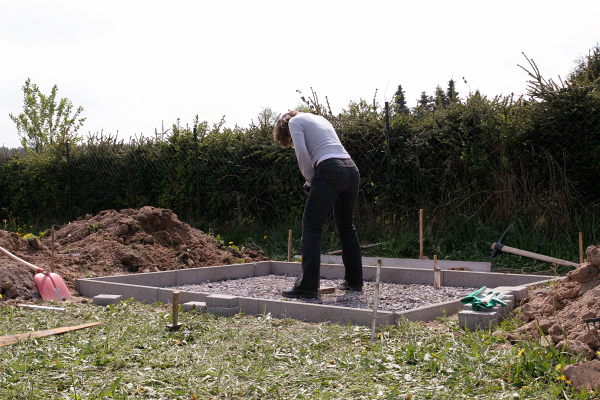
A foundation is also needed, so we ordered some ballast and paving at the local store. Today we went to the
hardware store again and bought stuff for the roof. So now we're proud owners of a set of shingles, some roofing
and (most likely) a severe muscle ache. Man, that stuff is heavy...
The next weekend is reserved for building the foundations. Seems like the delivery of the shed itself takes some
more days.
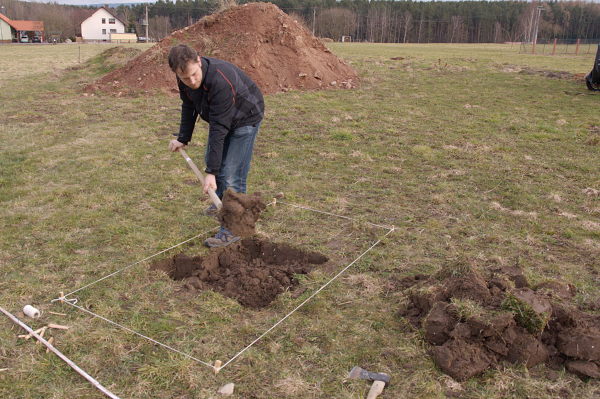
Tonight at half past seven...
Von: Markus am 04/28/2011
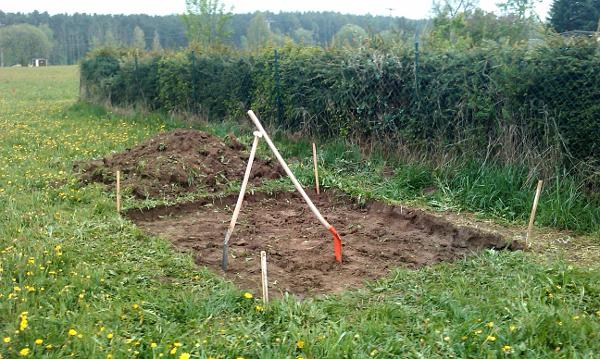
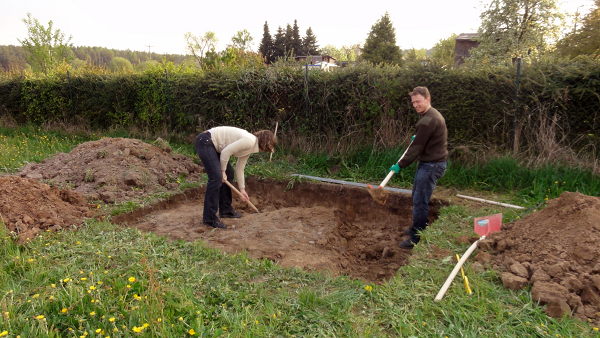
Phew... We're just computer scientists after all... but: the grass above the future foundations of the garden
shed is gone. Just took us about an hour...
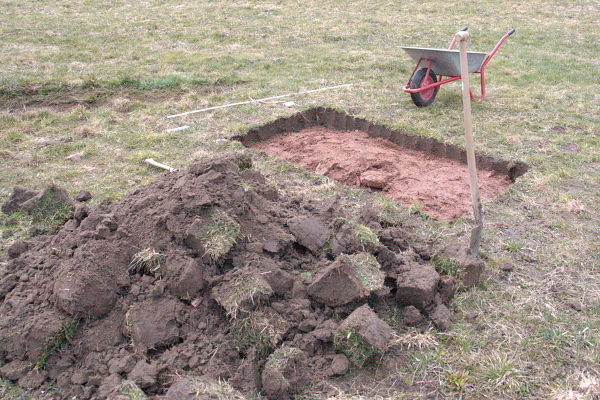
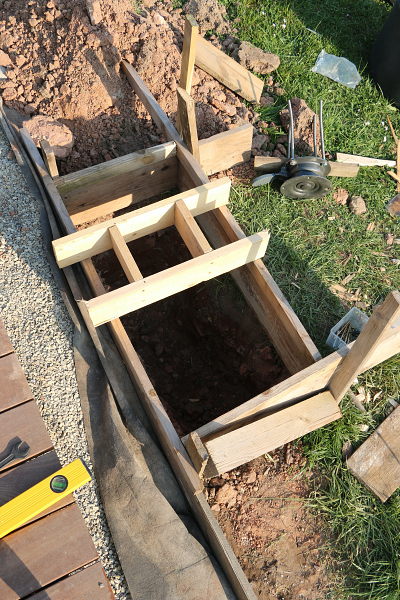
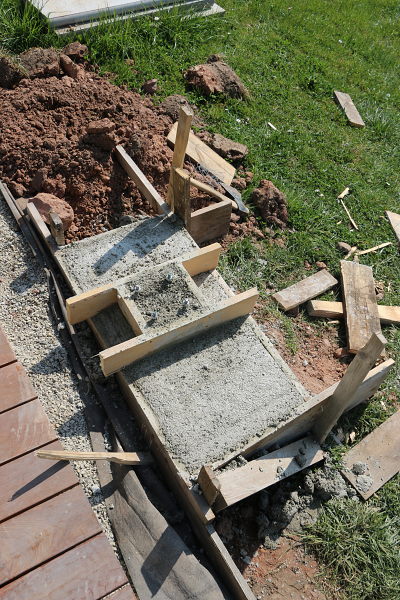
Und fertig ist das (Gartenhütten)Fundament!
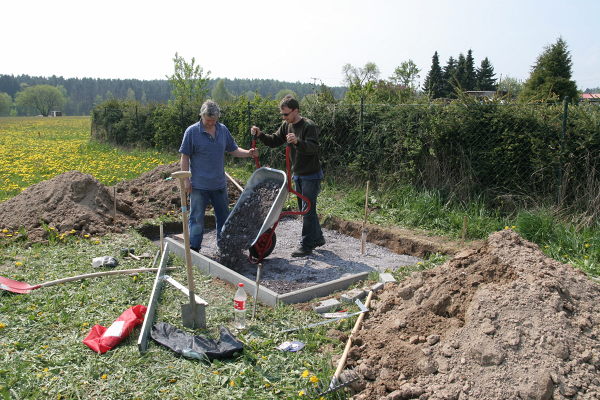
Von: Markus am 04/30/2011
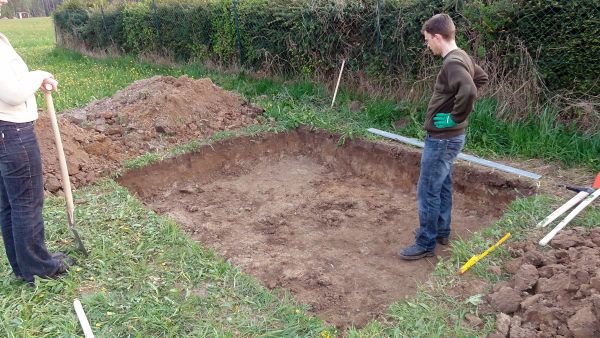
What a day (well, two actually)! I feel muscles I didn't know I even had. And I'm not the only one with that
problem. Today we finished (with much help from my father) the foundations for out garden shed. But let's start
from the beginning. As a reminder: the day before yesterday we removed the grass on the future foundation.
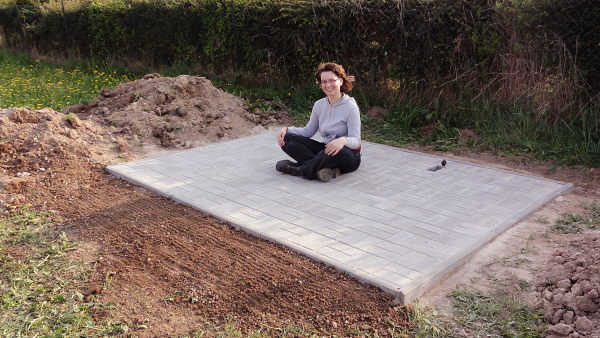
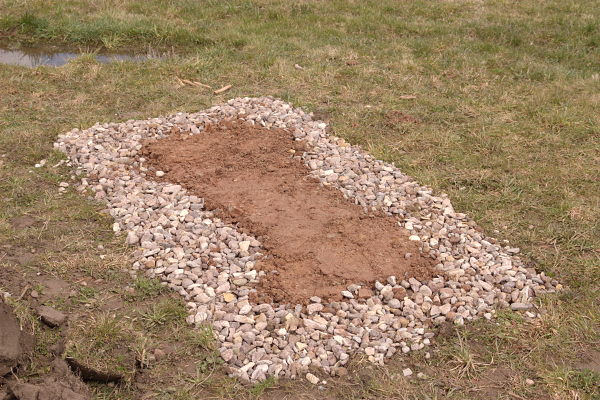
To sum up the day: a finished foundation (level, with preparations for the power outlet and looking quite
nicely), many blisters (even my father was happy to finish in the end) and a massive sunburn (had sun screen on the
face and neck but somehow forgot about the arms). Thanks to all the helpers (including the neighbours who generously
provided electrical power)!
Discussions, discussions...
Von: Markus am 05/04/2011
... are time consuming but they pay off. We've been at Helma's today to discuss about all the stuff in- and
outside the house that we want to have like where are some pipes running, what kind of doors do we get, how do
the windows look like, what's on the roof etc. Took us about five hours of discussions and descisions but should
leave us with a house we really like.
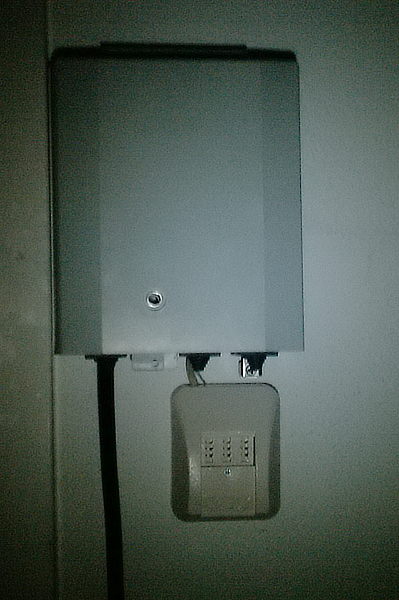
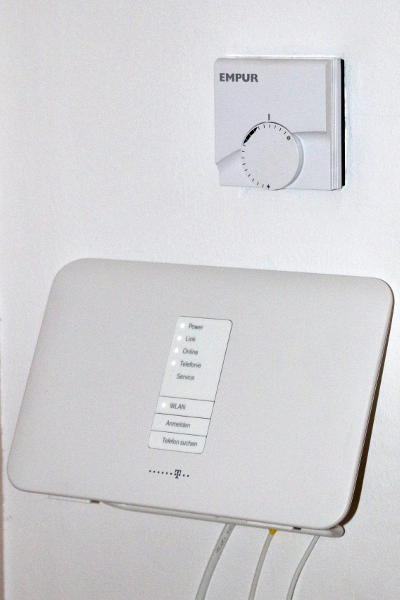
Der Telekom-Bauherrenservice
Von: Markus am 05/10/2011
You need phone/internet connection at the house. You contact the appropriate Deutsche Telekom service to get the
necessary cables. You enter all data there and ask for contact. Before accepting your request, the Telekom
system tries to "help":
Sadly they don't make it clear where to install the virus scanner: on your computer? On the lot? On the
Telekom system? Som many questions, so little answers...
Surprise mail from our bank
Von: Manu am 05/07/2011
Today we received financing acknowledgment from our bank - Hooray! Precondition No. 1 for starting with the
building - and even that precondition I assumed to be the last one we get.
So, if you're asking now "What? Shouldn't you already have the acknowlegdment from your bank because building is
starting soon?" - Yes, we already have signed everything with the bank some time ago, but Helma wants to know
that they get their money for building the house. The bank has to acknowledge that to Helma, but they only do
that if all the legal stuff concerning the re-measuring of the lot is done - and that took quite some time.
Drumroll, please ...
Von: Manu am 05/12/2011
[translated]
Hello Mrs. Brückner,
building licence is on it's way,don't need any other
document,
Have a nice day
[/translated]
That was the answer of the building authority to my my question if they any more documents.
So the building licence should be here in the next days :-D
The building authority was quick...
Von: Markus am 05/14/2011

We can't really complain about the speed of out building authority. We handed the application in on April 18th
and today already got the reply. We are allowed to build the house (as expected). The whole thing weighs about
360 g. Ok, it's the whole application with all plans again.
Along with the stuff we got the construction sign you can see on the left. German bureaucracy at its best again.
This has to be on display at the construction site. The red point shows that the building is built on permission
(as opposed to being permission free which would be a green dot).
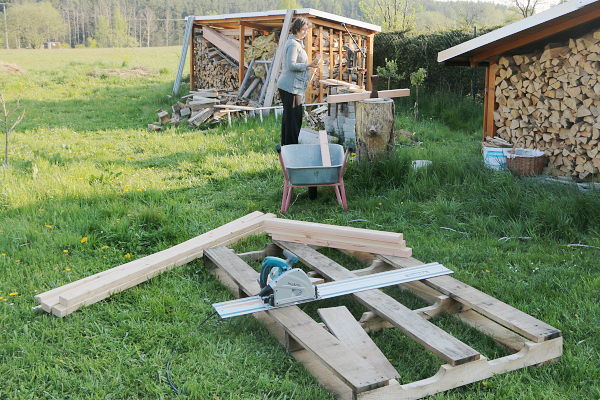
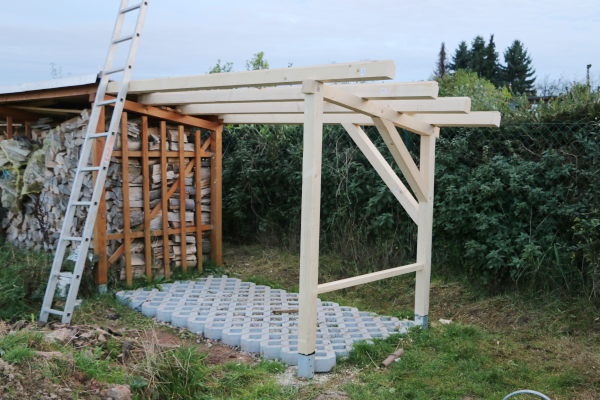
Garden shed in 2:57...
Von: Markus am 05/15/2011
You can be this quick in building a garden shed:
Well, ok, in reality this has been two days and as you could see in the end we're not done yet. We just didn't
want to stress our neighbours' patience by hammering all Sunday afternoon to finish the roof. Normally you can
be faster in building such a shed but sadly we had to fix nearly all parts of the shed (which is why we tear it
down again at the beginning of the video). Additionally we quite modified it: left out the floor and having no
door sill (which changes the foundations quite a lot) and added the wood storage on the left. We need to find
some time to finish the roof in the next days bug appart from that we now have a house on the lot.
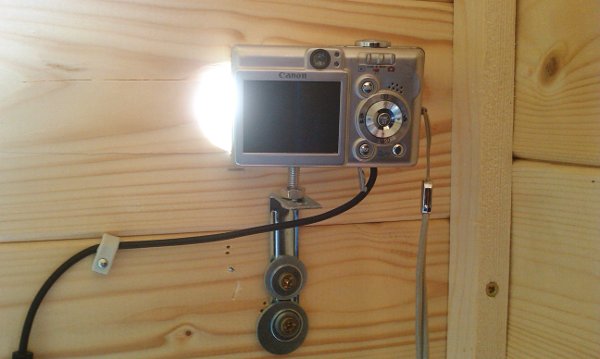
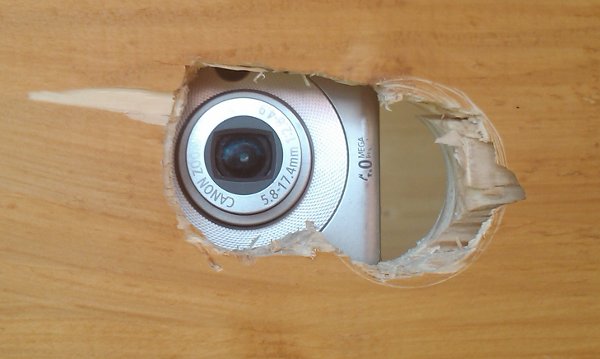
The film has been created with a Canon IXUS 40 (cheap used one from ebay) and CHDK.
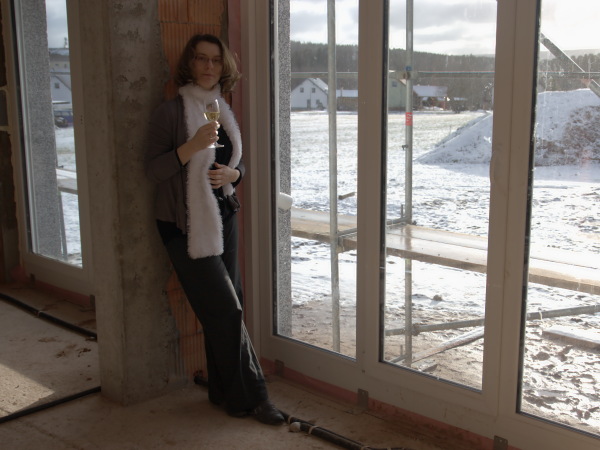
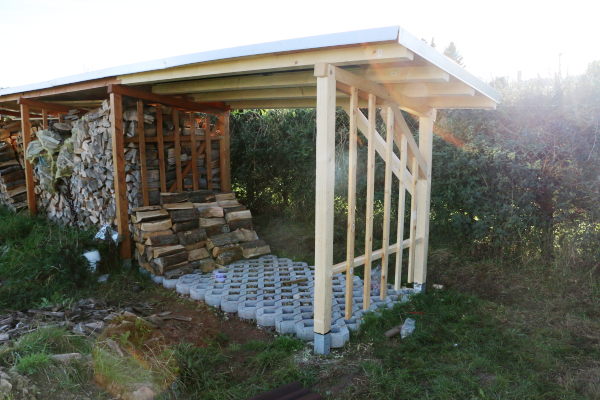
Roofing for dummies
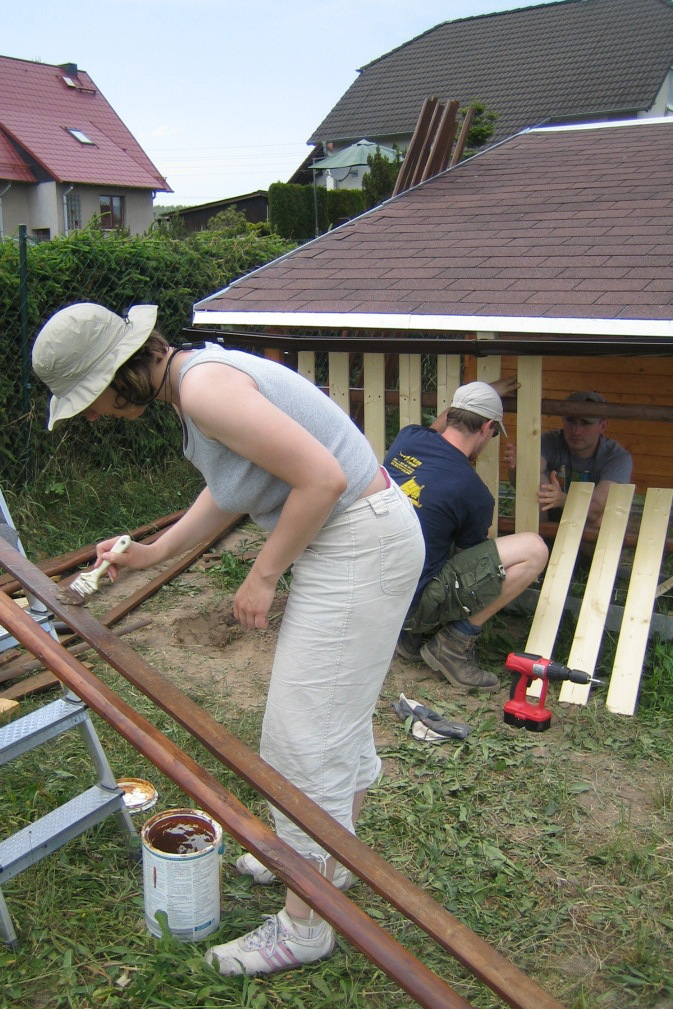
Von: Manu am 05/18/2011
It can't be that complicated to put some shingles onto the roof of our garden shed. So, we took half a day off
from work and at 2 o'clock in the afternoon the misson "roofing the garden shed" was started.
First of all the roofing paper got fixed and now we wanted to start with the shingles. But right at the end of
the first row we faced a problem: we could find all kind of tools in our new garden shed but nothing to cut the
last shingle of the row. What to do now? Hej, let's take the bread knife we had with us for lunch! ... Well,
the bread knife did his job! But now it really needs some very special treatment ;-)
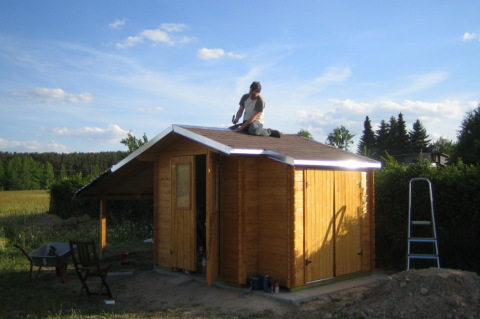
But at least the result is really respectable - especially with my honey as a decorative element at the
ridge ;-)
About house numbers, rain barrels and bets
Von: Manu am 06/05/2011
We have got our house number! Surprisingly unbureaucratic - now we are just waiting for the official mail from
the local authority.
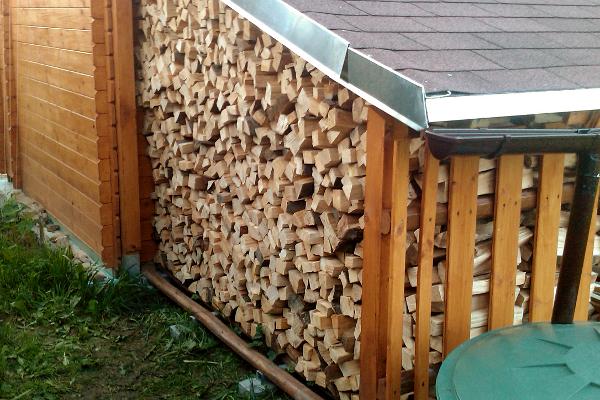
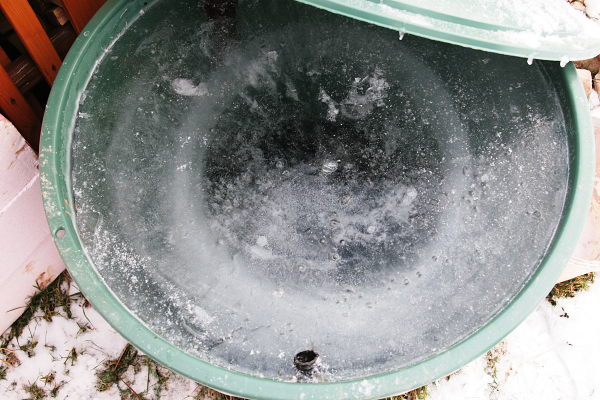
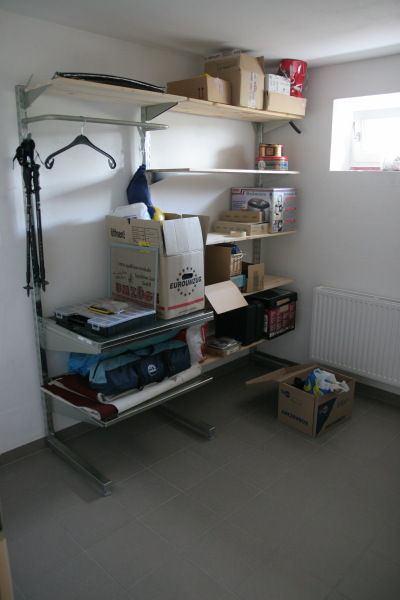
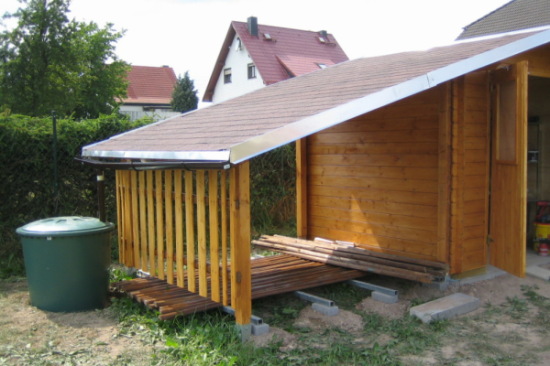
Beside that a lot of things happened during the last few days: we now have a rain gutter and a rain barrel, a
boundary and coated baulks for the wood yard, hooks and fittings for the doors, a completed roof and a shed that
is arranged properly inside.
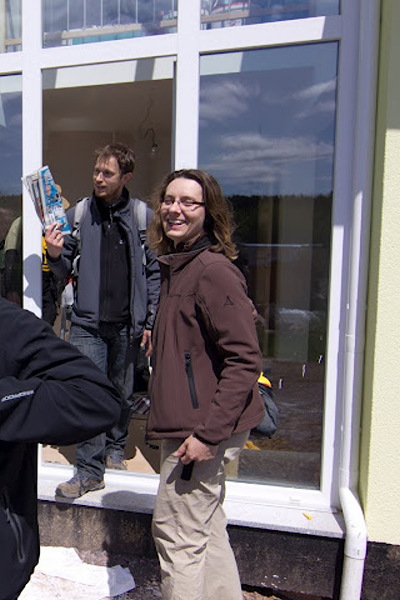
Saturday right after the lunch break two of our friens visited us. So we had some helping hands and got a lot of
new photos.
And ... surprise, surprise: Today we finally had rain and our rain barrel got its first water.
The only that we are waiting for is the next steps with the house itself - the chances for my bet are quite good.
I still believe that they are not starting building in June (what do not like anyway).
Hummeln im ...
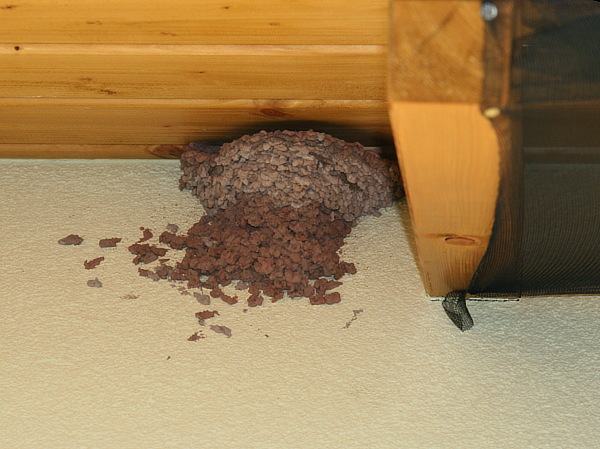
Von: Manu am 06/11/2011
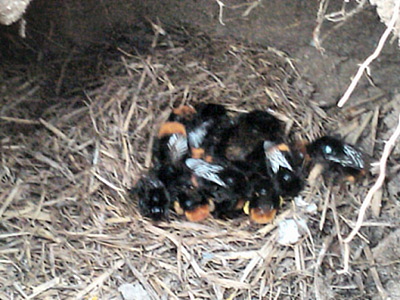 Yesterday we found a nest full of small
bummle-bees when visited our piece of land. They are soo cute ;-)
Yesterday we found a nest full of small
bummle-bees when visited our piece of land. They are soo cute ;-)
Unfortunatelly
for the bummle bees the gras got cut off yesterday, so there is bit of
chaos in the nest today. Let's see how it will develop in the next time.
I read that there could be about 300 bummle-bees in one nest during
summer time.
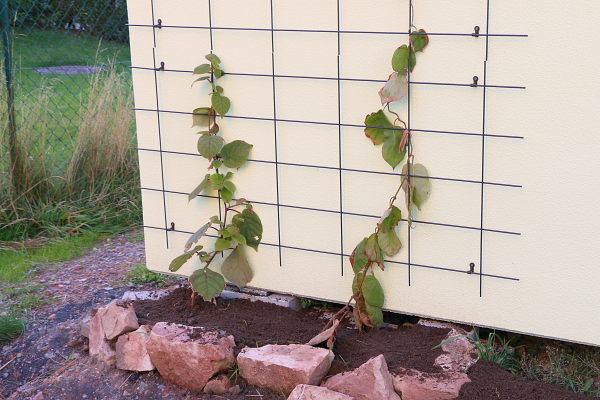
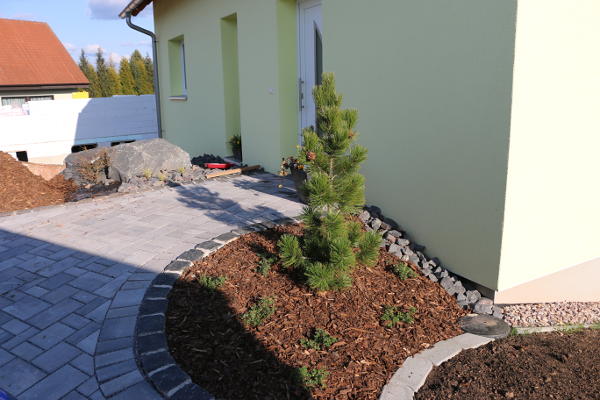
 Ok, anything else to tell? Yes of
course: as I
told the gras has gone now and the little staghorn sumac tree we've
planted seem to be still alive after those really hot and dry days.
Finally we got ready with our wood yard so we can order firewood now ...
Ok, anything else to tell? Yes of
course: as I
told the gras has gone now and the little staghorn sumac tree we've
planted seem to be still alive after those really hot and dry days.
Finally we got ready with our wood yard so we can order firewood now ...
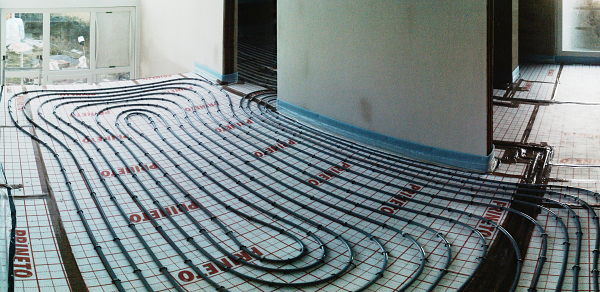
Construction drawings and first on-site activities
Von: Markus am 07/05/2011
Unfortunately we've been waiting for quite some long time now for the construction drawings. Apparently the
structural designer is in overload. That's why I've lost the bet that we'll start in June, which amuses Manu
quite a lot... Anyway, in the meantime the drawings arrived and we found some things that need changing (which
we knew before). We're going to discuss them on friday with Mr. Ziegler (our construction manager whom we
apparently didn't introduce yet) and hope that everything work's as planned from that point.
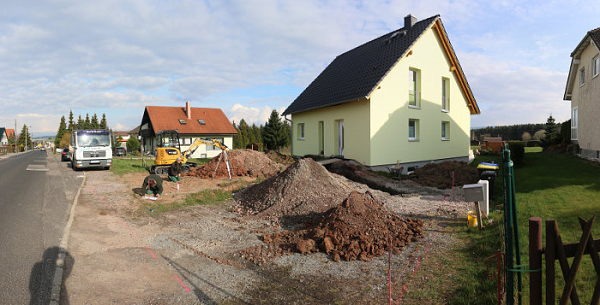
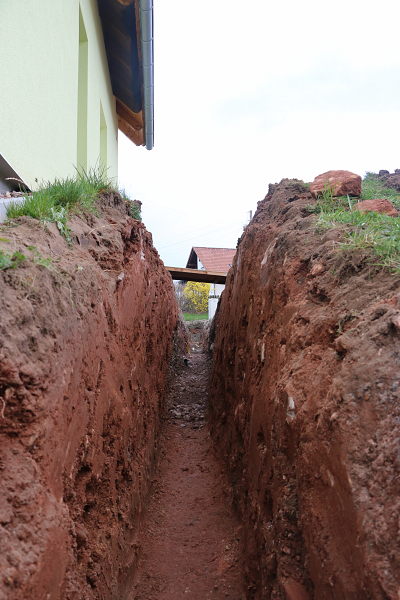
What we've also been waiting for for some time now is the acknowledgement of the WAVI (the water works guys) that
they are connecting us and how they want to do this. They don't seem to be the most communicative guys but
rather build things. When I crossed by the lot on a short after-work bike round with friends yesterday, I was
quite surprised: there's a hole where there used to be street. The dug up parts of the street and our lot, water
and sewage pipes are visible and prepared to be connected. To our luck they've hit the right spot: as far
down-hill as possible. We explicitly asked to be called in order to talk with them about that but at least the
managed to do the right thing (although not calling us).
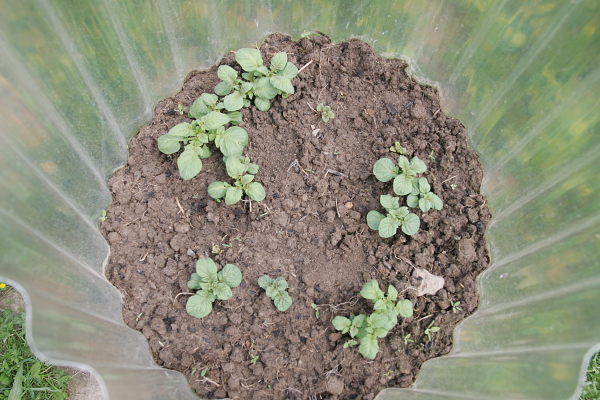
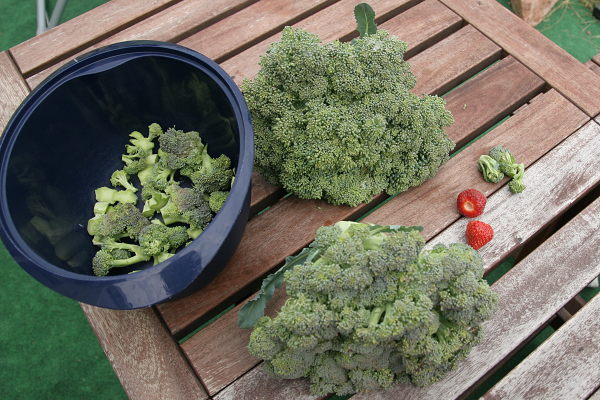
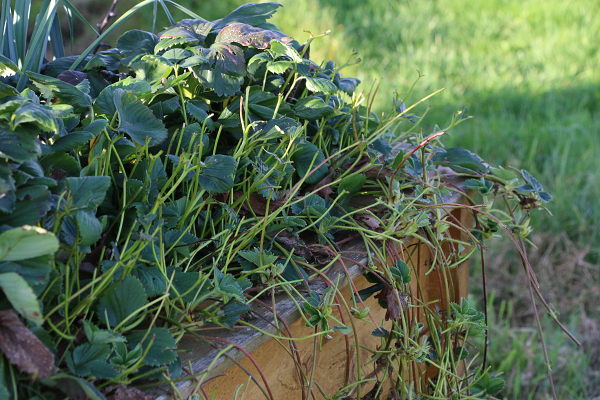
Mmmhmmm ...
Von: Manu am 07/07/2011

... yummy!
Coming up in some days: First time picking berries from our "garden"!
Let's see what recipe I'll choose for those little berries then.
Neue Hausnummer und Verzögerungen
Von: Markus am 07/15/2011
First the positive news: another bureaucratic step done, we have an official document with our new house number.
This might sound trivial but actually helps quite a quite a bit with companies like Telekom etc. They don't
react really well to plot numbers.
In other news there's no real progress at the moment and this is again due to the construction drawings. Where
there are people involved errors happen and some of them hit us at the moment. With a house being a rather
complex thing to plan, corrections can be overlooked when changing the plans and so we're at the moment stuck
again with plans that we can't sign as they're still not fully correct. Some windows suddenly changed place,
some things that should be in are not and some of the areas don't fit. And another round...
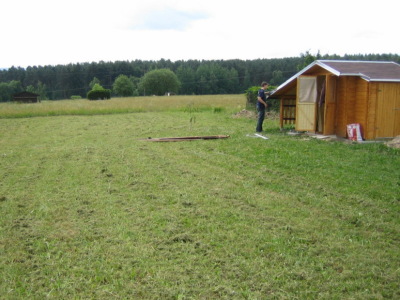
Mowing the meadow (again)
Von: Markus am 07/30/2011
First time we had the meadow mown we've been a bit too optimistic about the progress. So now the grass is tall
again and has to go. As I always wanted to try out a scythe, I bought a good one (ofter several failed attempts)
and scythed 1100m². One absolute plus: as there's nearly no noise involved you can scythe anytime you want
without annoying the neighbours. And it's fun and a work-out...
In other news: the construction drawing are signed (after some addition 1.5 rounds) and Helma is currently giving
out the contracts to the builders. It has to start anytime now...
Aaaand mowed the lawn again...
Von: Markus am 08/10/2011
Seems like it's getting a regular activity for me. This time we tried the new lawn mower and mowed half of the
lot in one run. Thanks to the mulch system you don't have to pick up the cut grass and take it away but it
rather stays on the ground in small pieces and rotts away (acting as a fertilizer along the way). Quite handy.
On the other hand the scythe is much quieter...
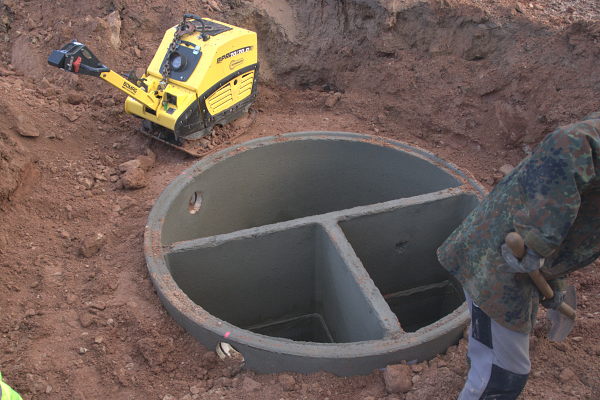
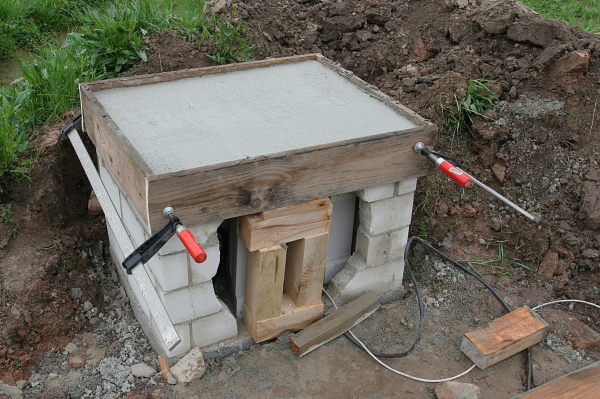
In related news: we do have the final offers for the underground work outside, we decided for a small sewage
works system and if all goes well the construction process will start the week after next week according to the
predictions of Mr. Ziegler. Can't wait till it starts...
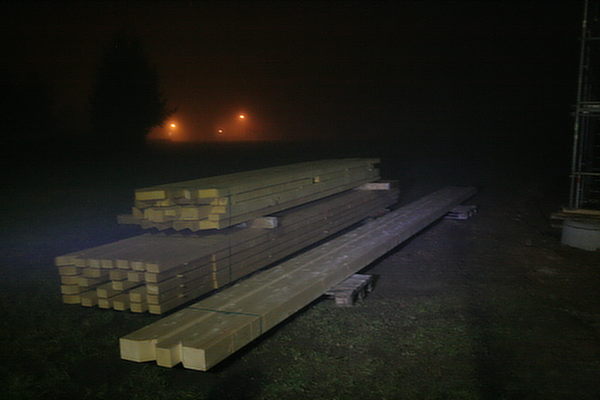
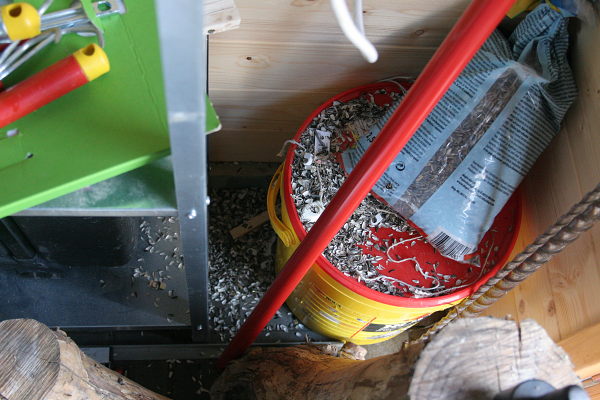
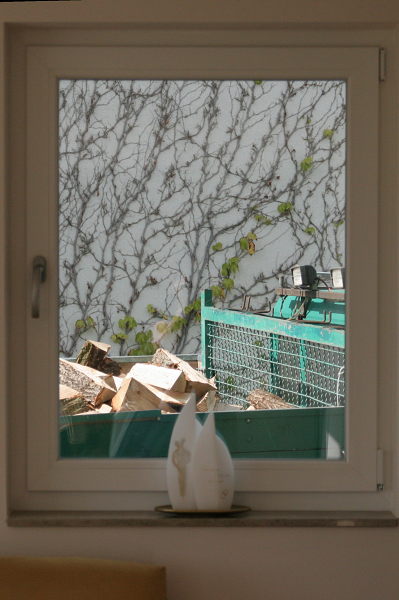
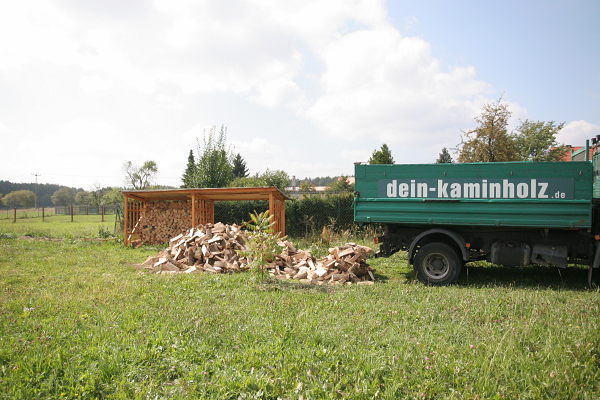
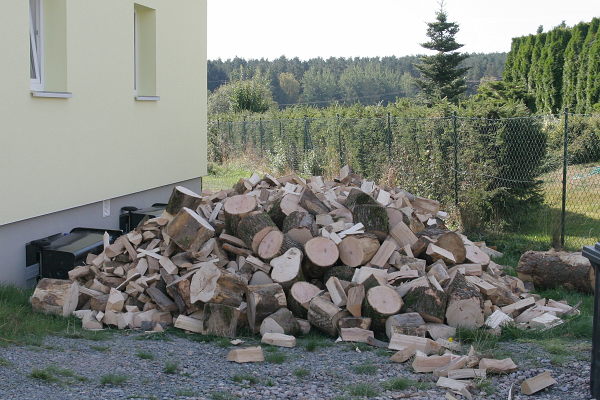
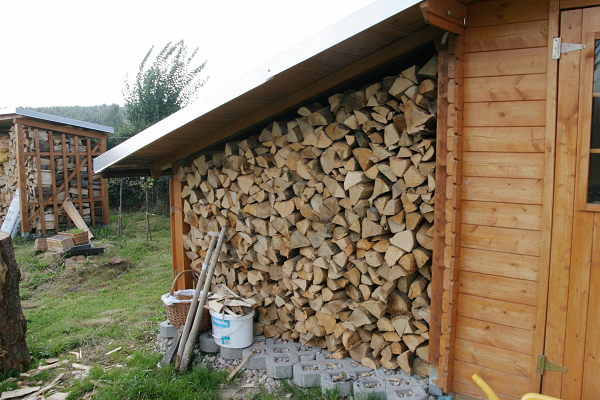
Firewood delivery #1...
Von: Markus am 08/17/2011
Seems like we should get used to delays with all things connected to the house. I wanted to fill up the firewood
storage before the basement gets dug out to have one additional summer to dry the stuff. This nearly failed due
to delays of the delivery, but today finally the first of three deliveries arrived and I neatly packed it away
in our self-designed storage area. Two more to go and I already have numb fingertips...
Roll camera and... Action!
Von: Markus am 08/28/2011
The edges of the house are marked and tomorrow morning the digger starts moving. "Finally!" I want to exclaim. I
put the blog online on January 23rd thinking "The whole thing will start soon" and a mere 7 months later we
finally get going. We kind of underestimated the amount of necessary things to do. In order to document the
whole building process I've set up everything for a time-lapse now. A small digital camera will do a picture
every few minutes. In the end I'll create a time-lapse from those pictures where one (hopefully) can see
everything from the marked edges up to the finished house. As of tomorrow, it's essential that this thing works.
Let's see…
Further delays...
Von: Markus am 08/30/2011
Seems like we're out of luck at the moment: on the weekend somebody broke into to compound of the
construction company and stole tools for about 30,000 €. Now they have to get new ones which delays the start until
Thursday. Some more days to wait.
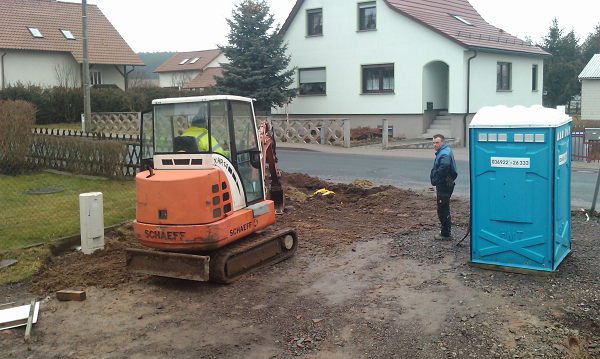
... let's get started finally!
Von: Manu am 09/01/2011
Writing a lot is not neccessary today - the picture is telling everything:

Update: and there we are again a few hours later around noon:
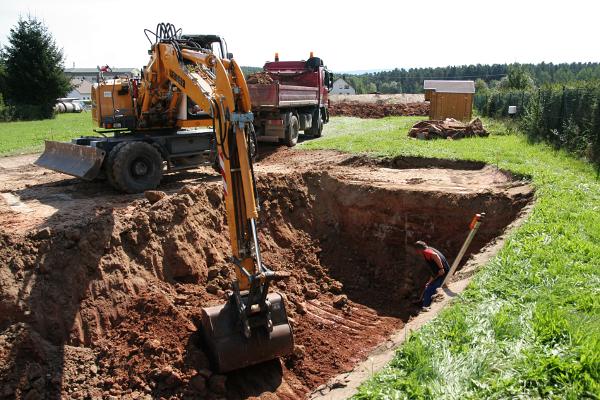
Update 2: In the evening the hole is rather impressive, just like the heaps of dirt that were moved out:
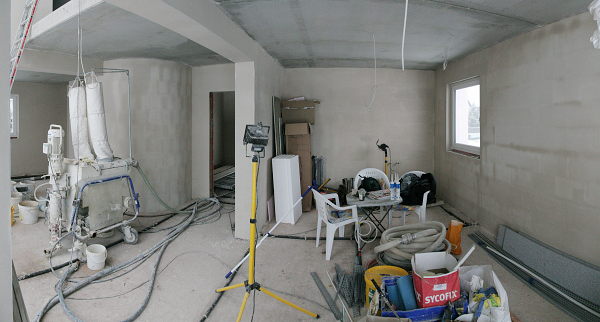
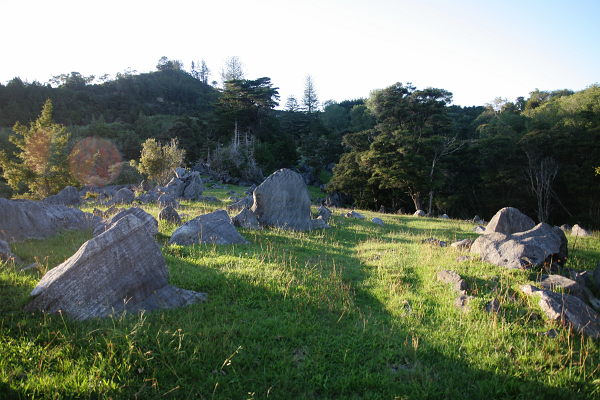
And last but not least: a panorama of the lot done from Mount Dirt, as we could call it (click to zoom. It's a
bit bigger):

One of the advantages of building on a sand stone ground: enough stones for decoration.
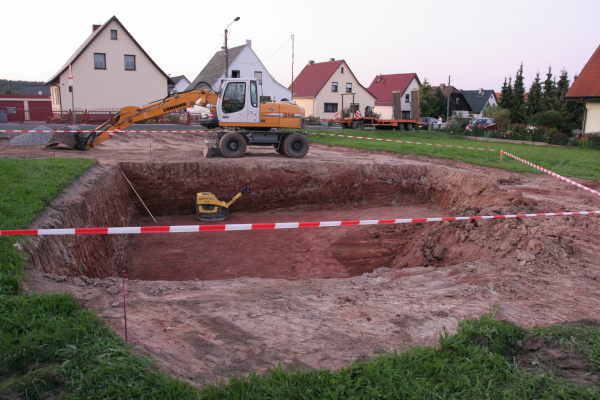
Building pit done
Von: Markus am 09/02/2011
So far we battled some delays but now the builders really hang in and do their job. Instead of taking a week for
the building pit as planned they finished in two days (thereby making up for the delay from Monday to Thurdays
when their stuff got stolen). We now have a finished building pit and access "road" for the next step.
Additionally they dug out the water connection again. On Monday we'll get the meter for the construction so they
can start making the concrete foundations.
A short wrap-up: some of our plants did not survive (got buried), the neighbour is a bit irritated (they
flattened his meadow with the truck. He's not that irritated anymore once we talked to him), but everything went
faster then expected and the ground is very well suited for building a house on it.
Please have a look into the "basement" of our house (click to zoom):

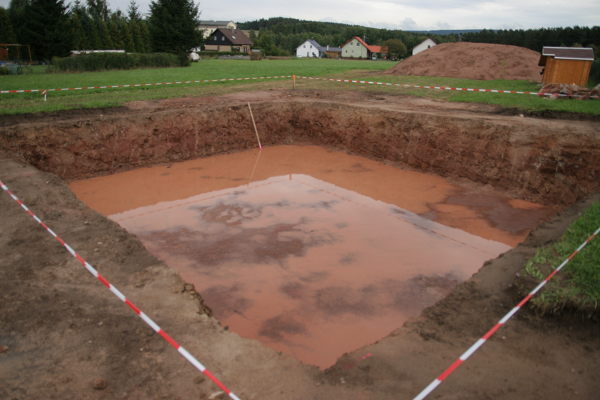
And delays again...
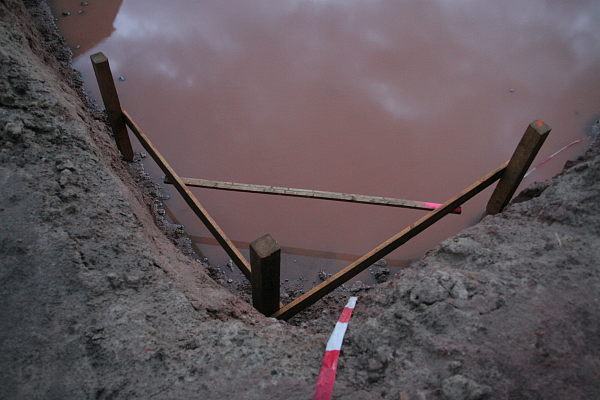
Von: Markus am 09/05/2011
Well, it started off quite good with the diggers, but now we're on hold again. The drawings for the reinforcement
of the foundations are missing. They should've been here long time ago but somebody at the construction engineer
screwed up and our contact at Helma didn't nag them. Our project manager is not amused (and so are we). The work
is stopped until Thursday when the drawings should be here. Let's see if the builders can make up for that delay
again. A bit frustrating, that is...
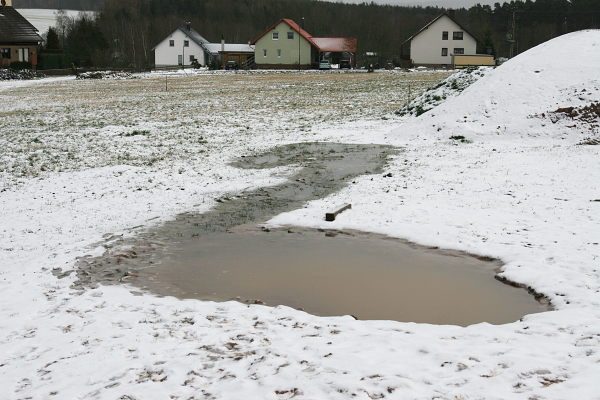
In related news: mother nature decided that she wants a swimming pool in our pit:
Schnurgerüst gestellt
Von: Markus am 09/11/2011
We've been on holiday for a few days and had hoped that there would be progress on the site while we were away.
Somewhat to our surprise this hope was in vain: we don't have the foundations as expected. At least the
necessary batter board is there, which is a start. We'll try to check why there was no more progress tomorrow.
The camera for the time-lapse dutifully did a picture every four minutes (nearly all of which I can throw away
now, as nothing happend except the wind blowing off the safety tape). There's one thing to learn from the
pictures: the neighbour's cat do like our lot, especially the big sand stones. My favorite picture so far
nevertheless shows another animal:
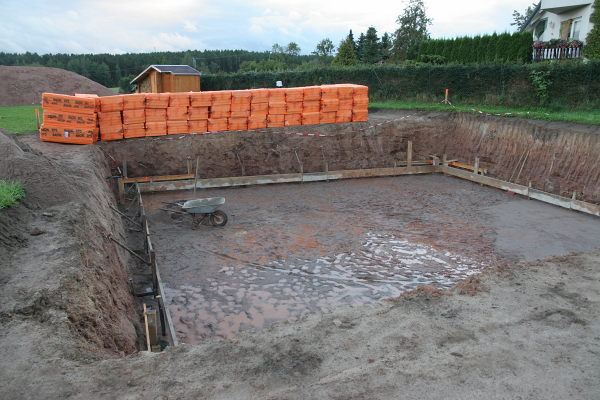
Finally progress...
Von: Markus am 09/13/2011
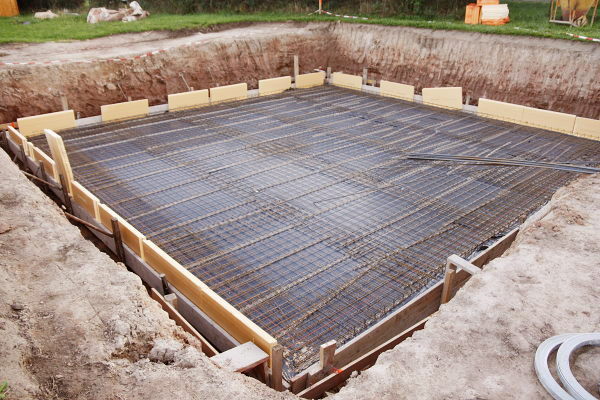
After we've had some delays due to problems with the drawings for the foundation reinforcement, there are finally
some activities again. The builders started preparing everything for the base plate. The reinforment steel and
the base insulation were delivered. The builders say they are going to pour the concrete for the base plate on
Thursday. Next week should see the cellar walls rising, which means that we have to decide where to put all the
cable and pipe penetrations. After we've sorted out some confusion with the plans today (we definitely have had
far to many versions) everything should be ready now.
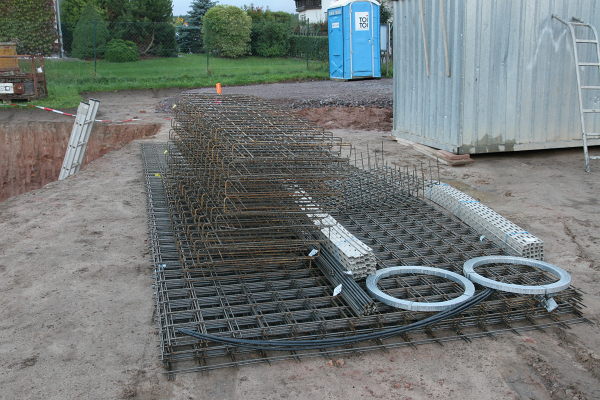
Reinforcement (nearly) done
Von: Markus am 09/14/2011
There's progress: the base insulation and big parts of the reinforcement are in. Looks like the base plate might
be done tomorrow.
Houston, we have a crane!
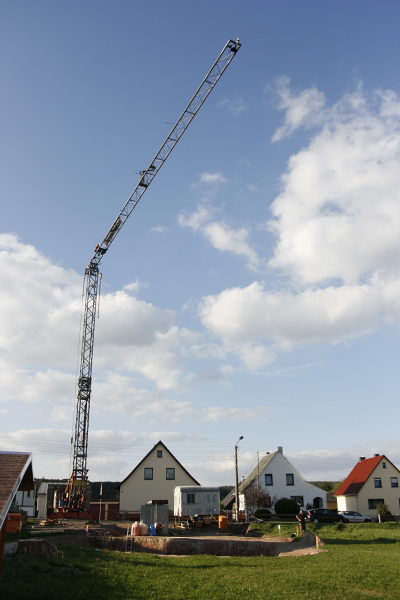
Von: Markus am 09/15/2011
You leave them alone just one day and they suddenly put up a crane on the lot... Seems like the house shall
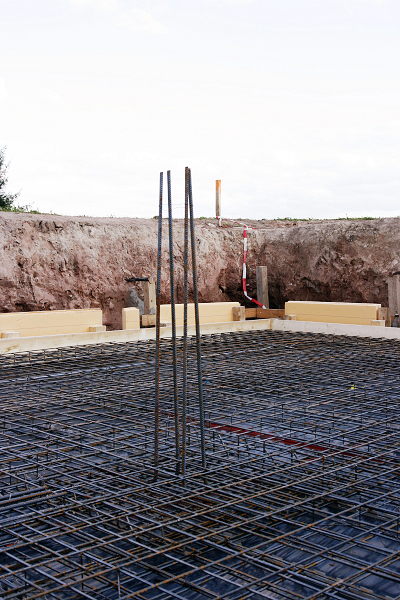
starte to rise now. They've also put in the foundation earth electrode and the rest of the reinforcement. No
concrete in yet, but it looks like that is going to happen tomorrow. Would make sense: that way it can harden
over the weekend and the walls can start to rise on Monday.
The foundation stone has been laid...
Von: Markus am 09/17/2011
... and what a stone it is: 10 by 10 meters, 20 cm high, the foundation sits on the insulation. According to the
time lapse the concrete truck was there three times. Roughly estimated 50 tonnes of "foundation stone" are
waiting for the walls to rise (which is about to start on Monday). The concrete has already hardened to a point
where you can walk on it.
A walk on the roof
Von: Manu am 09/18/2011
Yesterday we caught one of the animal guest at our plot walking on the roof of our garden shed.

And, not to forget, a little update:
After some rain today we do not have a swimming pool anymore but our foundation plate has a swim ring ;-)
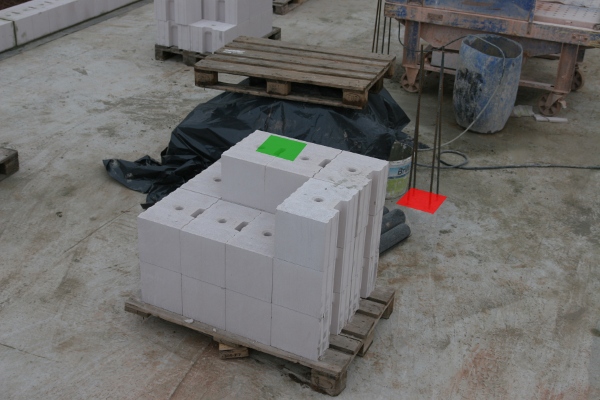
The first layer of stone and an error
Von: Markus am 09/19/2011
Just as planned the boarding was removed today and the first layer of stones was built. Slowly you start to
realize how big the house will be in the end. Interestingly it seems to get bigger as the surrounding is
blocked: the pit already looked larger than the marks in the meadow and the first layer of stone looks bigger
yet.
Manu noticed one thing yesterday: the two columns that will be in the middle are more or less in one line in the
plans. In reality though they are not. We did some calculations and measurements according to the plans
yesterday and guess what: the eastern column is off by one meter (in the picture: red = current spot, green =
intended spot). We talked this through with the builders and the project manager in the morning and as it turns
out this is a mistake. Obviously something went a bit wrong when measuring and insering the reinforcement. Hm,
bad... Well, not so bad anyway, as the column the is wrong is inside a wall and will not be visible later on. It
should not be a problem to leave it like it is and make the beams on top a bit longer. "Should" means that the
stress analyst has to take another look and decide whether that works out. We don't want the house to make any
creaking noises in the end... The builders can continue anyway as the outer walls are independent of the column,
so this should not lead to delays.
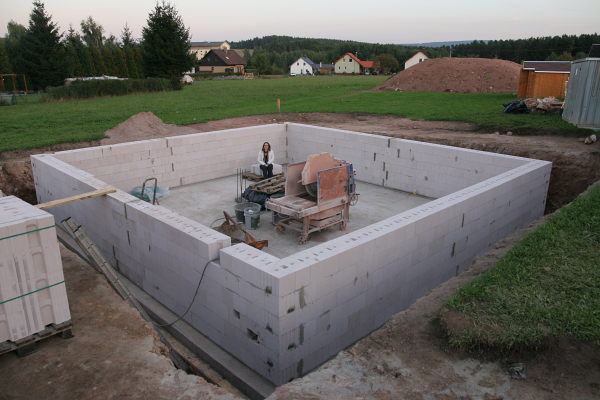
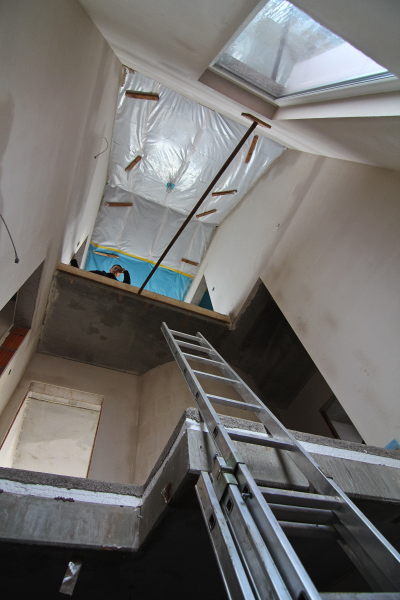
The first walls rise
Von: Markus am 09/20/2011
Yesterday speaking of "walls" would have meant to exaggerate, but today we already hat to cross the "moat" on a
plank and descent with a ladder into the house. The climbing wasn't exactly Manu's favourite today, but I could
convince her to try it. Ok, her shoes weren't the best for that kind of sport...
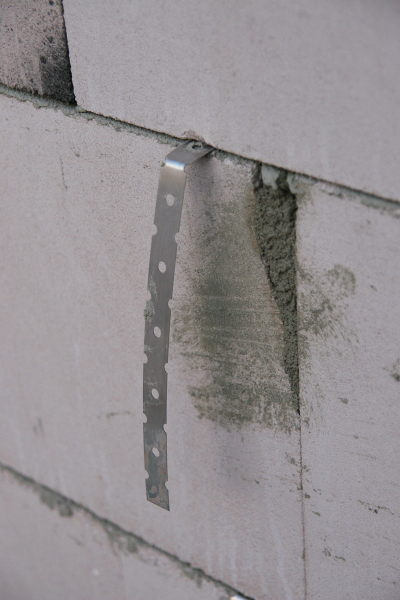
The walls now rise to 1,5 meters already. And again we see that the higher the walls are, the bigger the rooms
appear. Interesting observation. Also you can learn something new everyday: at some points in the walls small
metal bands poke out, that gave me something to think about. The solution ist actually quite simple: those are
the points where the inner walls will attach to the outer ones. The bands will be built into the inner walls,
thereby providing a firm connection without the inner walls actually protruding the outer ones.
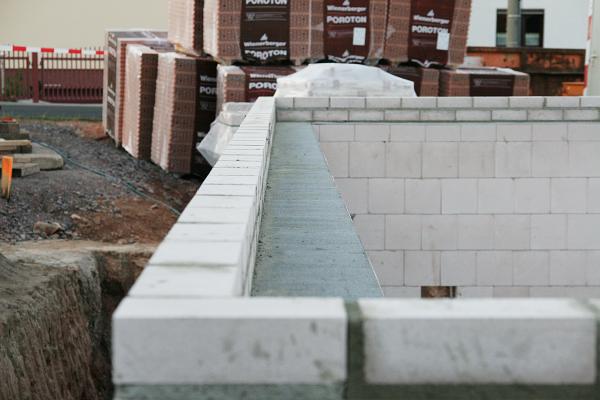
View out of the cellar window
Von: Manu am 09/22/2011
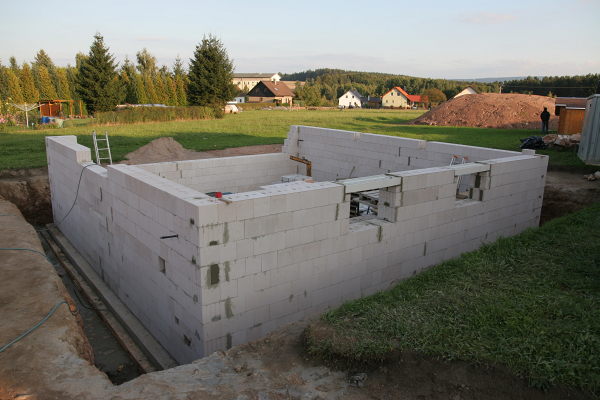
We can already enjoy the view out of our cellar window. The walls of the cellar have nearly reached their final
height. The stones for our ground floor have been deliverd, too. So, it works quite fine at the moment.
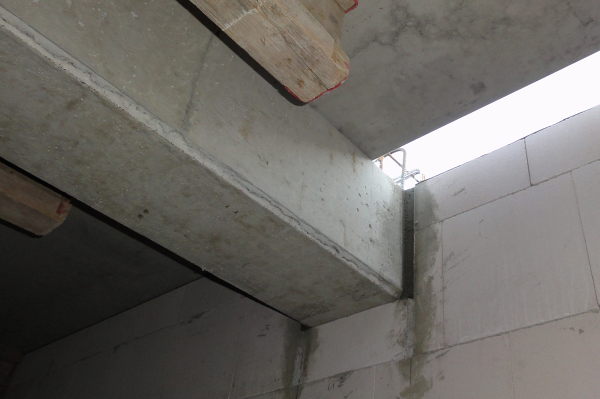
Cellar walls nearly done and other bits and pieces
Von: Markus am 09/24/2011
At the moment the visible progress is a bit smaller due to all the little bits and pieces that need to be
finished. The cellar walls have risen to their full height of 2,625 m (excluding the eastern wall which is used
as an "entrance" at the moment). The new calculations from the stress analyst are there. The pillar that was
built in the wrong place will stay and the support beams on top will be made longer. Looks like the inner walls
can be built next week. Perhaps we'll see the cellar ceiling end of the week.
Like set in the contract the next Helma bill arrived: 10% of the total price for the foundation. Now that the new
calculations are there we can regard this as done and pay. We discovered a minor inconvenience: the bank feels
due to some legalese in their contract with Helma that they can not put the money in our normal account and have
us pay but rather needs to pay directly to the company. The inconvenience in that is that we can't use online
banking this way and have to resort to pen an paper, which means getting the paper to the next bank branch
office (60km away). Inconvenient, as I said.
Speaking of bills: the diggers have sent their bill (to the construction site which caused it to be returned due
to the lack of a post box). Good that Manu checked it thoroughly: due to a misunderstanding between the two
building companies there was a point on the bill which actually never was executed. A 300-€-misunderstanding.
They corrected it and even let us deduct discount even though the deadline was already up.
On the documentation side there are not so good news: the time lapse camera doesn't work at the moment. I already
broke one SD card (literally) due to changing it all the time. Yesterday the file system of the other card was
shredded, which meant that I lost all the pictures of the day. No disaster as the visible progress is small
anyway, but not good either. Let's see if it works again on monday.
Inner walls in the cellar nearly done
Von: Markus am 09/27/2011
As I had my camera with me yesterday but forgot about the CF card (happens quite often to me. Must be the
age...), the update had to wait for today's pictures. The inner walls in the cellar are nearly there. This way
we can walk around in the cellar giving us an impression of the ground floor also which has nearly the same
floor plan (the rooms are a bit bigger upstairs owing to the thinner outer walls).
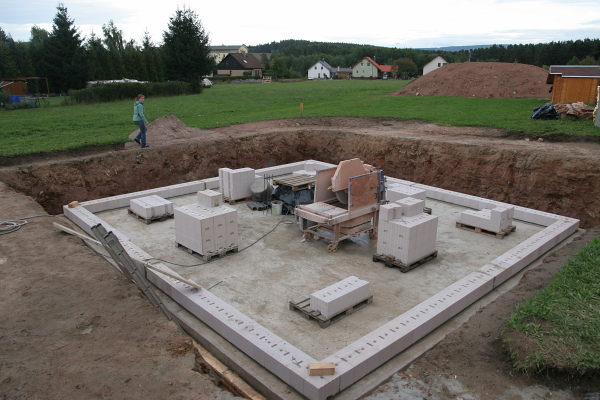
And the cellar is done!
Von: Markus am 09/28/2011
Well, the walls at least. Still no ceiling, but that should be done on Friday. The columns carrying the ceiling
were poured today so that the beams can be put in tomorrow. We'd expect the concrete ceiling to be done next.
The ceiling consists of two parts: several pre-made 5 cm thick concrete plates with one reinforcement layer
which serve as the base and 13 cm poured concrete with more reinforcement on top. If everything goes as planned
we should be able to walk on the ground floor on the weekend. This is how I like the progress...
Sadly there are some problems with the time lapse again. Due to filesystem errors we lost the pictures for today.
This is not such a big problem as you don't see much anyway, but I still lack an idea why it happens. That could
prove problematic next week when they start the walls on the ground floor, so I have to look into this
again.
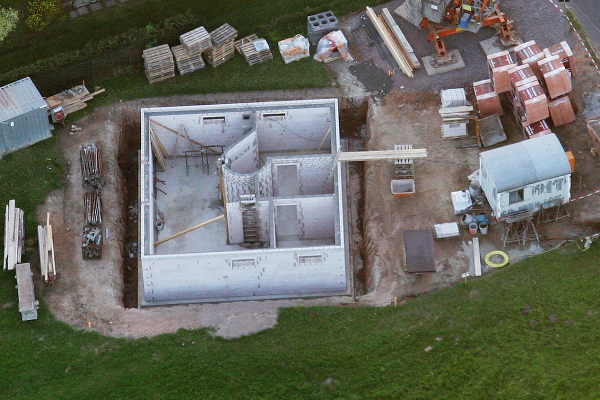
And the cellar is closed!
Von: Markus am 09/29/2011
Good that I took the aerial pictures of the open cellar yesterday. Today it would have been impossible (to my big
surprise). The first part of the ceiling was already layed. I guess tomorrow the concrete will be poured to
harden over the weekend, so that they can start with the ground floor next week. According to the current plan
this would be necessary as the heat buffer is scheduled to be delivered on Friday next week.
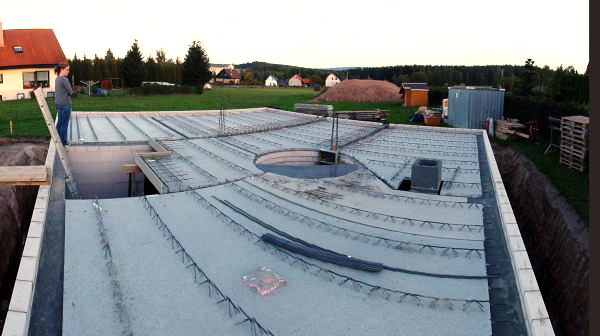
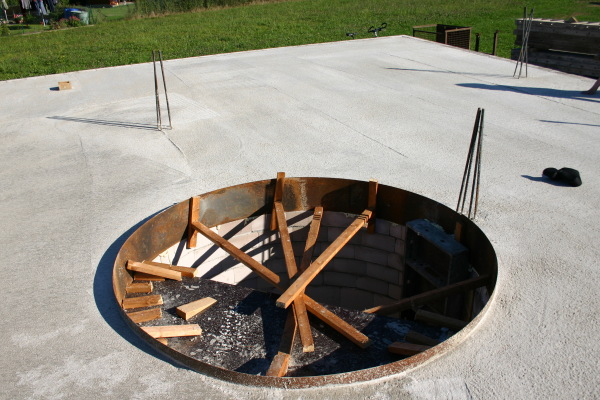
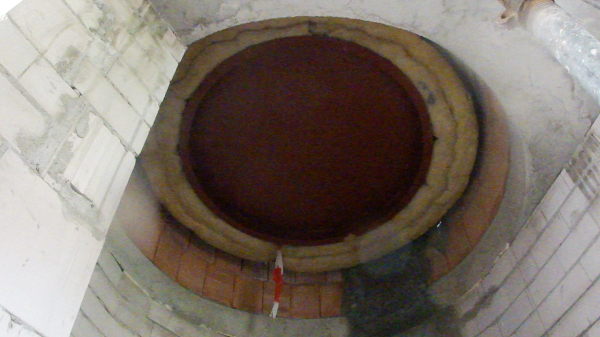
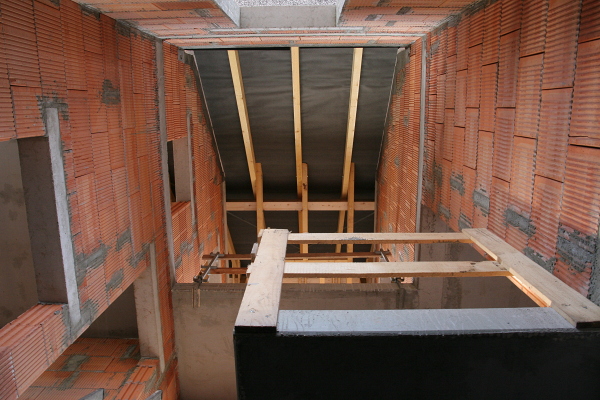
Cellar ceiling and a sunny afternoon
Von: Manu am 10/01/2011
Today we went to our building site by bike to see what's going on and enjoy the sun a little bit out there in
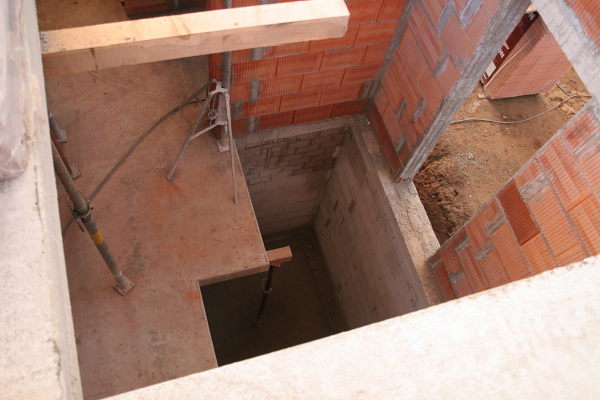
our "garden". And what did we find? The cellar ceiling is done and has some holes at the right places. So we
went for a walk inside our future ground floor (without walls at the moment) and had a deep look inside the hole
for the solar buffer.
After our every day mandatory inspections of cellar and ground floor we put ourselves onto our relaxing chairs
and enjoyed the sun. After a while our neighbour came around and we talked to him about driving onto his land
again for filling up the building pit in some days - it's ok so far. Later the old man brought me a bouquet out
of purple blooming sedum ;-)
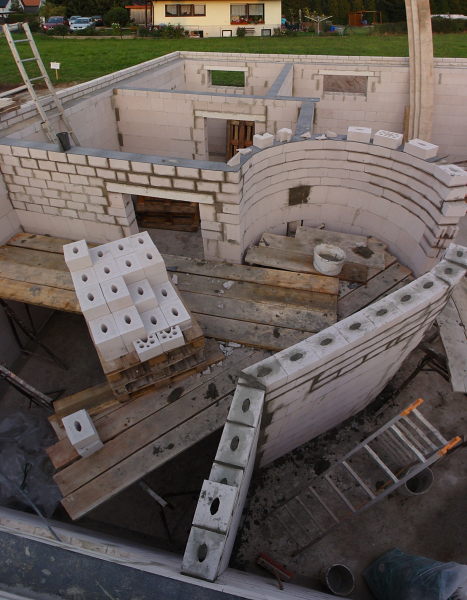
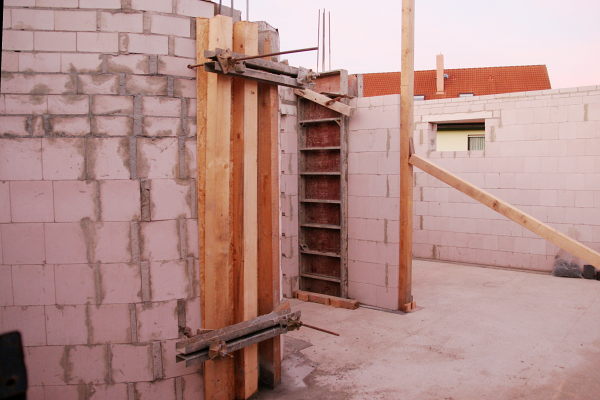
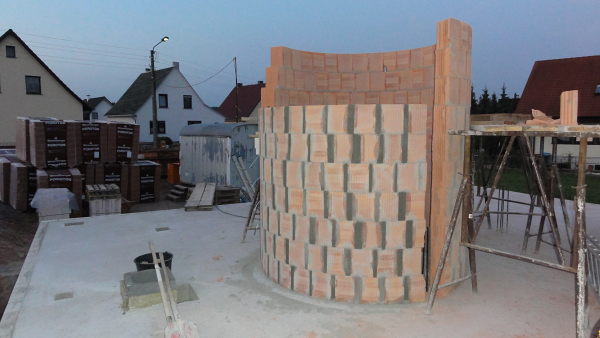
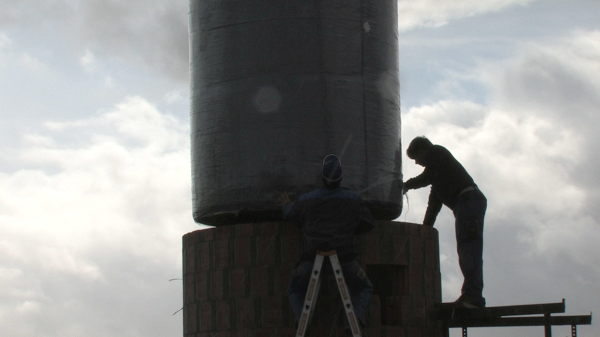
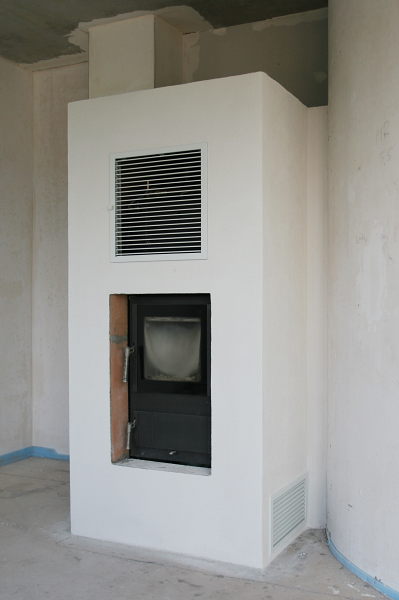
Why do they get a chimney stack?
Von: Markus am 10/04/2011
This is what some neighbours/passerbys will have thought today. The builders starting with the ground floor
walls. As they will definitely need to finish the walls around the solar heat buffer until Friday, they built
them first. It really looks like the base of a chimney stack...
Sadly we also have some negative news: the time lapse camera again decided that it doesn't like the memory card.
No pictures of the building process today. Realizing this caused me to have a severe fit of rage and kick a wood
log that was in the way (which in turn caused Manu to complain about me complaining). I really have to find out
what is causing that error (the camera failure. Not Manu's complaints.)...
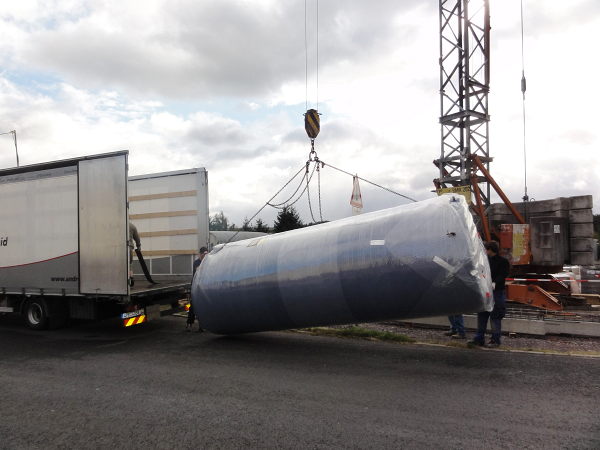
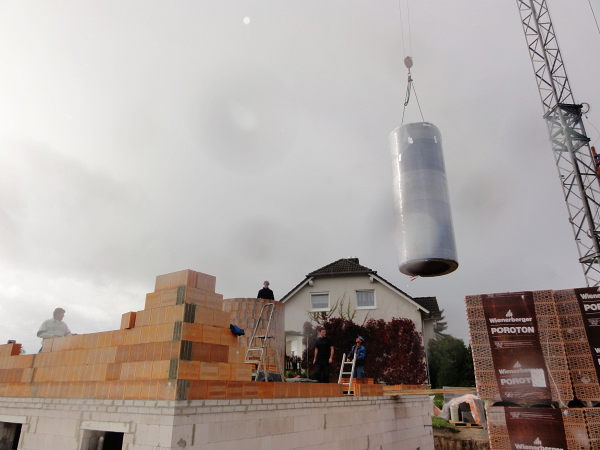
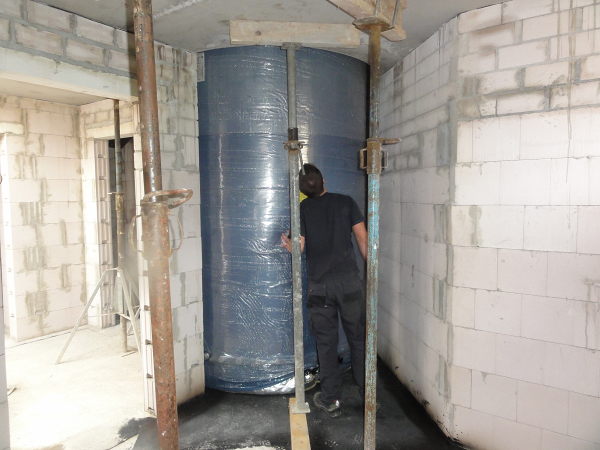
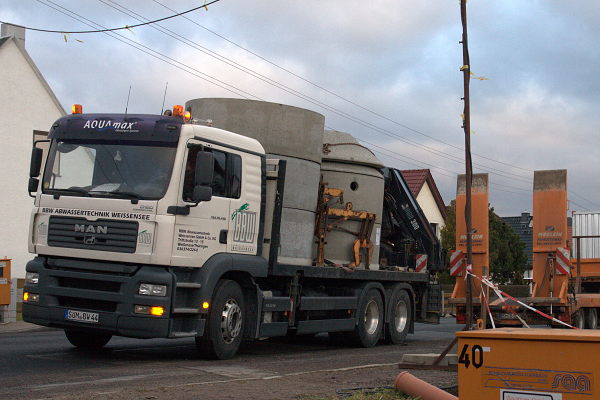
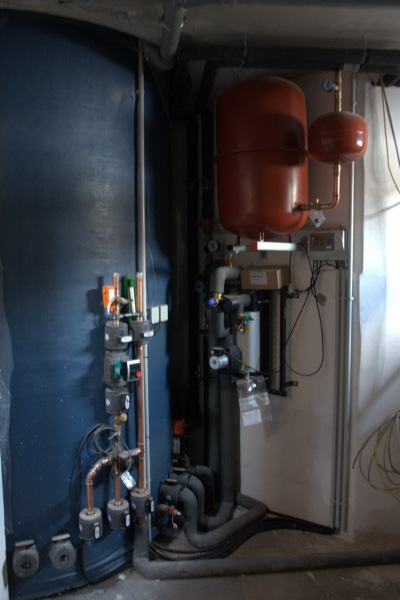
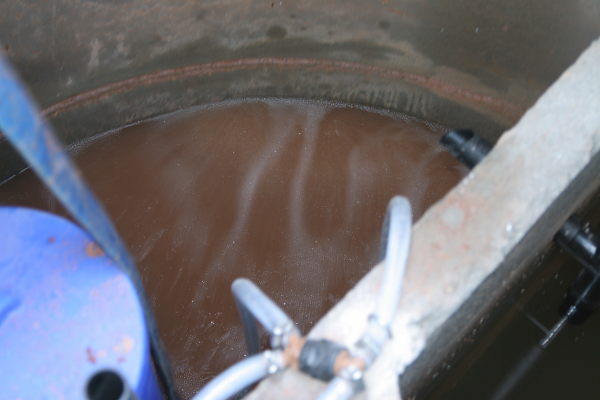
Set up the sun heat buffer in the rain...
Von: Markus am 10/07/2011
Just a short message with some pictures today. No time for much more. Today the solar heat buffer was built in.
The weather was terrible, but the guys from Drechsler Haustechnik and our builders handled the thing. And what a
thing that was. About 1 ton of steel. Quite difficult to get that into the tube they built. We filmed the whole
thing with a set of cameras (one glued to the buffer itself), so that I hope to provide a video in the next
days. Until then, some pictures:
Setting up the solar heat buffer and walls on the ground floor
Von: Markus am 10/10/2011
So, finally I'm done cutting the video that shows how the buffer was put in. We filmed the whole thing with three
cameras: two on the ground and one glued to the side of the buffer to get the "on-board view". The weather was
really bad, but alĺ of the cameras survived and the material is quite interesting. Our camera man complained
that there was no action. Well it was kind of unspectacular, but that's the kind we like in this respect. There
were already enough problems before (the biggest being that on the plans the whole in the house for the buffer
was 12 cm to small. Good that our builders noticed the problem and fixed it.)
Also there is a small overview what the wall look like at the moment. The outside walls on the ground floor are
nearly done on three sides. The inside wall will follow during the week. We expect that the first floor will be
put in on Friday (just a guess).
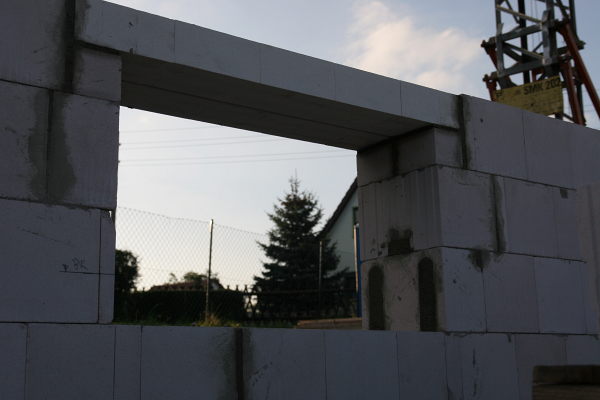
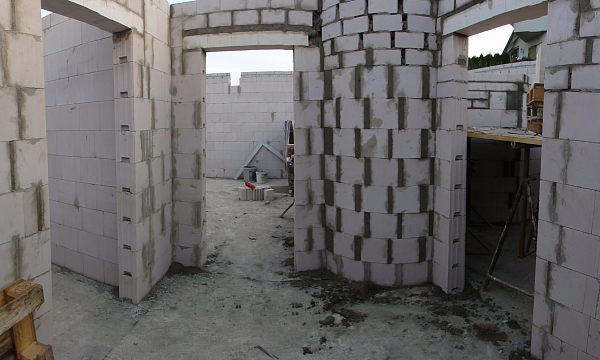
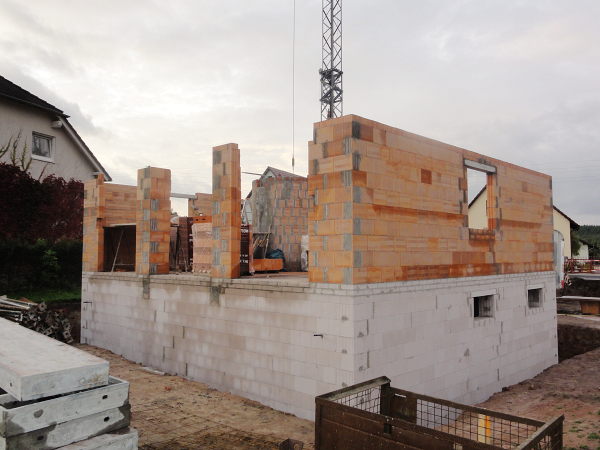
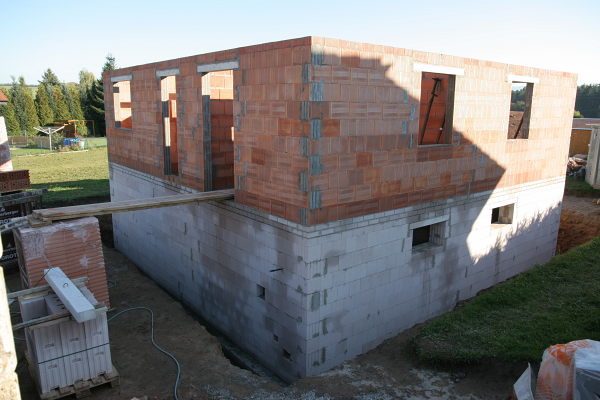
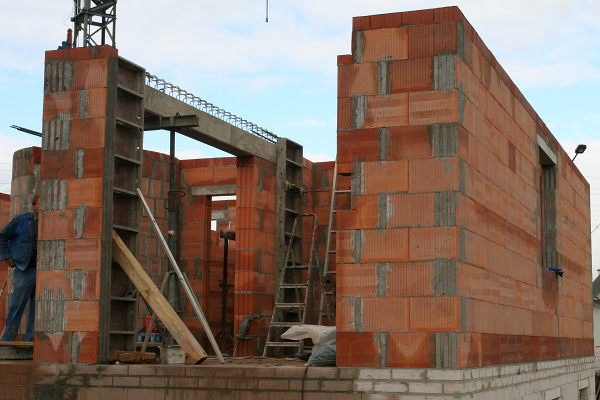
Walls in the ground floor finished
Von: Markus am 10/15/2011
I was thinking about the name "ground floor" today. For the english term, I can only refer to Bill Bryson's "At
home" where he writes that the ground floor is called that way, because in earlier times it was on the ground,
meaning full of dirt. The german term "Erdgeschoss" is even more complicated: "Erd(e)"="ground", so no surprise
here, but "Geschoss" in German not only means "floor" but also "shell" (in the sense of something that is shot
from a cannon), which does not really make sense. My theory would be that the buildings shoot up like fast
growing plants, but I'm no linguist...
Anyway, the building really goes up quite fast: the walls in the ground floor are done. The floor no longer is
dirt, but an 18 cm thick concrete plate where 12 cm screed will be put on later. Much easier to clean than dirt
and much more durable. If we were still to have the dirt floor, with all the mice on our lot, we'd have visitors
every now an then. So concrete is much better for us (although we still will be covering it in various deckings
later on).
Monday and Tuesday the ceiling will be put in. Again the 5 cm concrete plates and additional 13 cm of poured
concrete. After that the cellar will be sealed on the outside and the pit will be filled in again. This will be
a pleasure for Manu as she finally doesn't have to walk over two narrow planks 3 metes above the ground to enter
the house anymore. She did have to do it today because we wanted to clean some water out of the cellar. Problem
was: the enduring rain last week not only filled pit to the upper rim of the base plate but also poured into the
cellar through various holes in the ceiling. So today we used a brush, a snow shovel (newly bought) and a bucket
to get that out again. We removed more than 100 liters and got some training along the way.
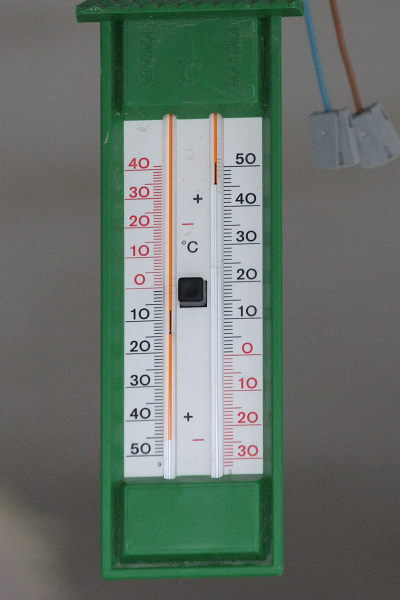
Speaking of snow shovels: as we had -0,6°C (around 30 F for the ones not comfortable with the Celsius scale) in
the morning, winter can't be that far away. We went on the save side and bought two snow shovels, just in case.
Obviously we inspired some people: when walking out of the hardware store, we quite often heard comments along
the lines of "Oh, snow shovels. We need to look for those also." We'll be ready if the winter gets as bad as
last year again (which it is supposed to according to the meteorologists).
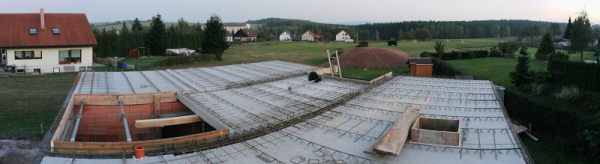
Our house - a sunny place
Von: Manu am 10/16/2011
And we have a ceiling in the ground...
Von: Markus am 10/17/2011
As expected the ground floor was closed on the top today. The plates have been put on and tomorrow the concrete
will be poured. We have a meeting with our project manager tomorrow where we decide how the landscape around the
house will look like later on. Before the pit can be filled in the builders need to seal the walls. The sealing
looks not very nice and doesn't carry normal plaster, so it's just put in places which lie underground
afterwards. We did some thinking and drawing yesterday and think we have a solution which we can hand to the
builders tomorrow.
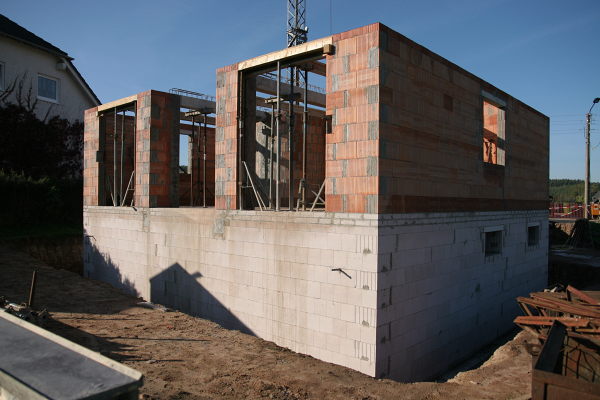
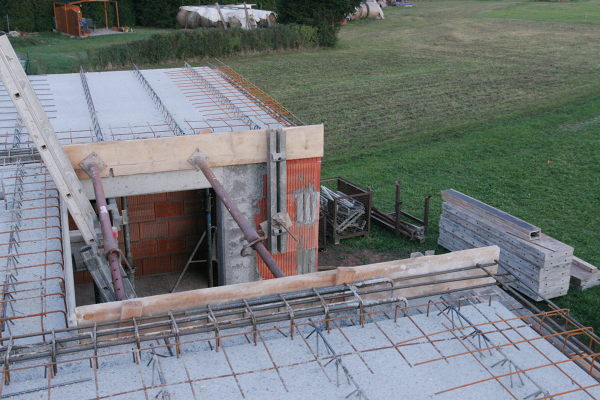
Finished the ceiling of the ground floor
Von: Markus am 10/20/2011
There was not that much visible progress in the last days. The completion of the ground floor ceiling was delayed
by strong winds at the beginning of the week. The concrete could just be poured yesterday. Unfortunately it
wasn't fully hardend on the evening, so I had to wait for today to take a picture. On Tuesday we talked with our
project manager where the sealing will be put. Our house is a pervert: it'll wear rubber pants... (ok, actually
it is an asphalt-plastic mixture). Additionally we talked to the glazier (? at least that's what LEO says. The
guy that fits the windows.) Our windows are already made and can be put in in week 45 and 46. Then we finally
can post a picture of the bit glass wall in the living room.
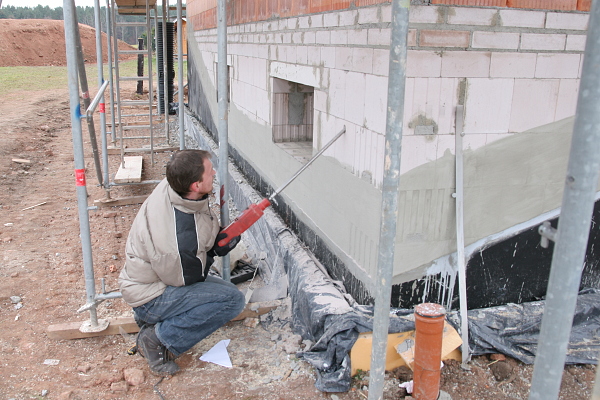
They are making the house black!
Von: Markus am 10/21/2011
Well, in German the title would be a play of words on the workers working illegally without paying taxes, but you
can't really translate this, so nevermind. They are actually starting to paint parts of the cellar black. The
ones that should be water-proof, that is. At the moment it's only the first thin layer of bitumen, but at least
you can see how the terrain will look later. There are some corrections necessary on one corner, but otherwise
it's exactly to our wishes. I'm really looking forward to the final terrain…
We also enjoyed the nice view from the first floor again today. You actually can see rather far from there.
Unfortunately most of it will be blocked again when the roof is finished, so we'll have to climb out of the roof
window to have that view later on…
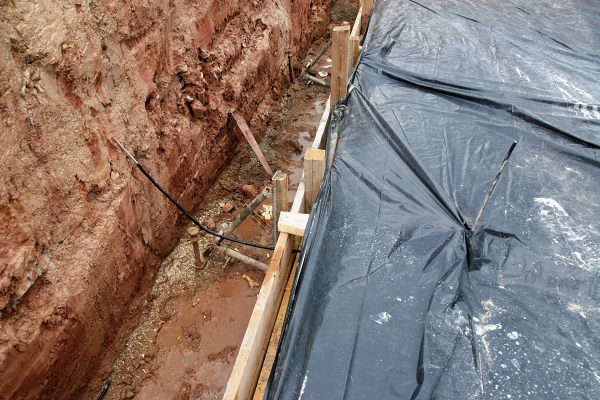
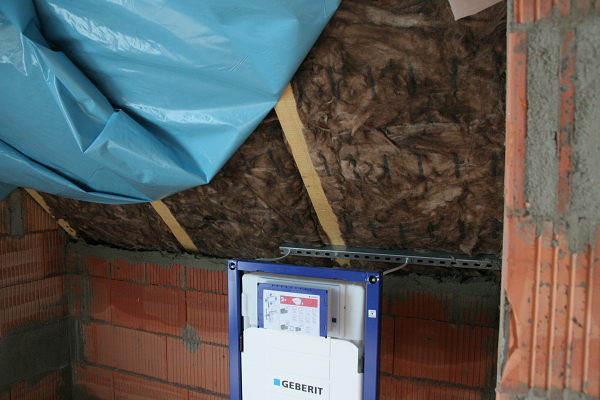
The house gets warm socks
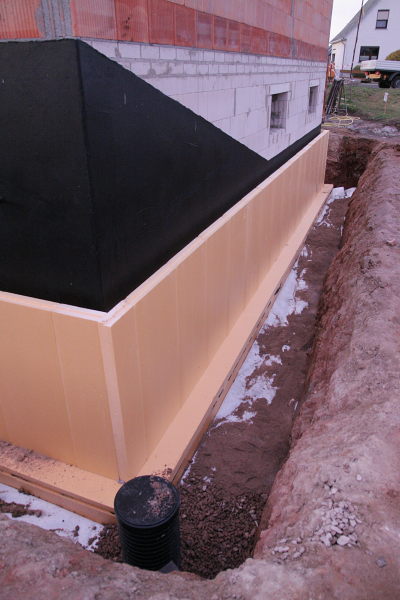
Von: Markus am 10/26/2011
Quite some stuff happened in the meantime, although we didn't have time to write. The sealing is done, so the
cellar should be water-proof now. The water that can be expected in the coming weeks will stay outside (and the
water that comes in through the staircase will stay inside, but never mind...). After some fixups the sealing is
where we want it to be. We just wrote our hints on the wall with a pen and everything worked out fine.
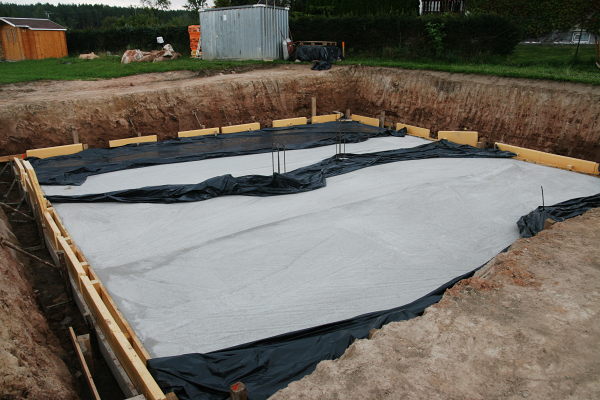
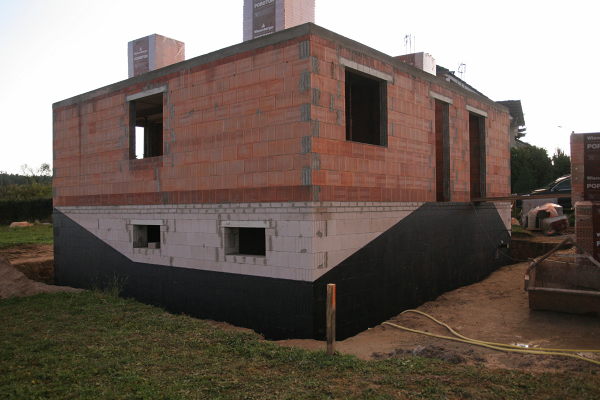
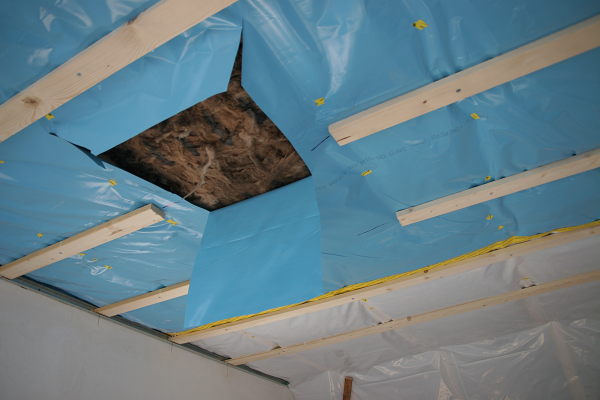
After the house is dry now it gets warm socks: the insulation for the cella is being done at the moment. The well
know orange insulation plates that were already included under the base plate shall keep the cellar warm. 160mm
should be sufficient to keep the energy inside. This will just be put in underground as those plates are
water-proof and this leads to them not being able to hold plaster. Above the ground a different type of
insulation will be used.
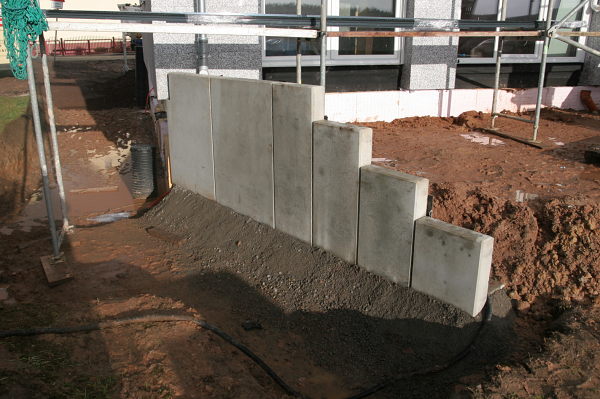
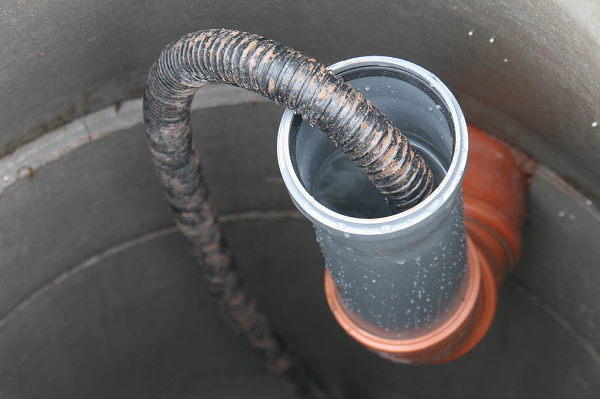
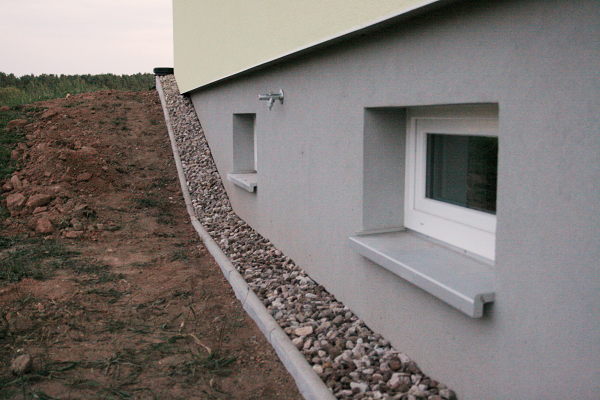
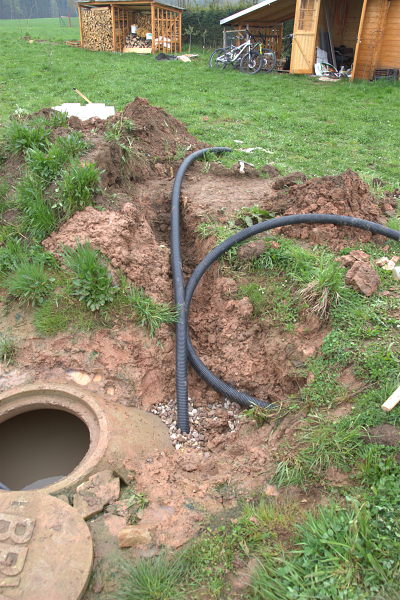
Last but not least the drainage around the house was put in today. We have a ring of pipes carrying the seepage
(says LEO again. The rain water that drains into the ground...) away from the walls and into a buffer to be
pumped of. With this we had some confusion in the last days: unfortunately we need an active system (read: a
pump) in there as the drainage is lower than our rain water cistern, so the drained water needs to be pumped up
to the tubes draining the roof. We kind of lost that out of sight and now had to decide quite fast which system
we wanted. We had an offer for a fully integrated system with pump and everything for about 1200€. Quite a bit
which we didn't plan for, but manageable. But yesterday evening the builders called and told us that the price
was an error and the thing would cost 2500€ (the other price was for an indoor system), which is a bit too much
to pay unplanned… Luckily they provided us with an alternative and now we're going to get a concrete shaft with
a normal pump inside which will be much cheaper. Our neighbours recommended to keep the drainage high enough to
no need a pump but this wasn't practical with the high cellar that we have, so we'll have to live with that…
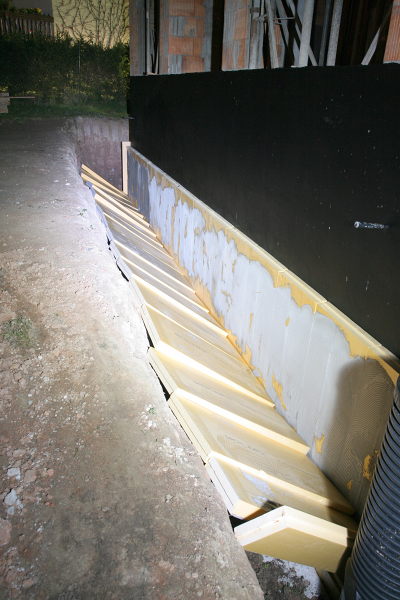
One step back…
Von: Markus am 11/01/2011
Seems like our house finds it new socks to warm. It throws them off. Out project manager already told us that if
the insulation gets too much sun, it might peal off because the glue doesn't like that. This is exactly what
happend on the south wall today: the outer layer of insulation came off. Let's hope that the ground wire which
is still missing will be delivered soon so that the pit can be filled in.
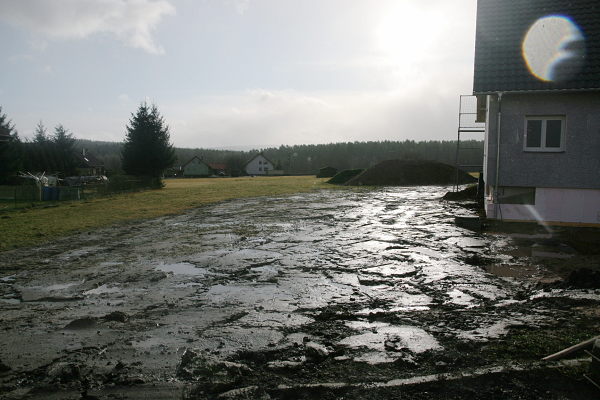
Let's fill in the pit...
Von: Markus am 11/03/2011
After a short interruption because of missing parts the builders now work again. The pit is filled in again. The
pump shaft for the drainage system was built (at least partially) and the ground wire is in also. Next week the
scaffolding should be put up, so that the work in the upper floor can continue. No pictures today as we forgot
the camera. Manu will perhaps take some pictures tomorrow during the day and put them up then.
Oh and there was a victim of the builders today: our staghorn sumac got run over by the digger and was
destroyed...
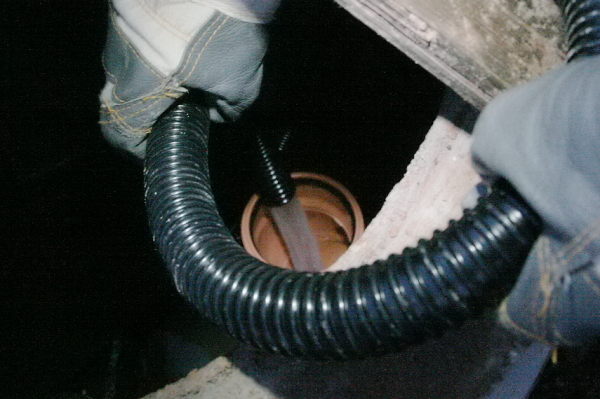
Running around the house ...
Von: Manu am 11/04/2011
... is possible now. The building hole is closed now and if you jump over the hole for the drainage shaft you can
run around the house. Even the pipe line for the rain water towards the rain buffer is prepared and its ends are
sticking out of the ground at the moment.
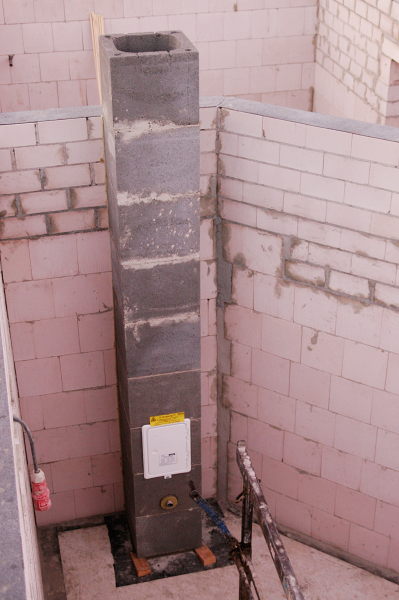
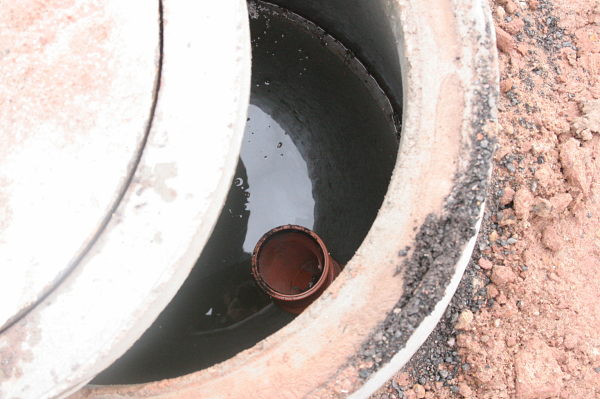
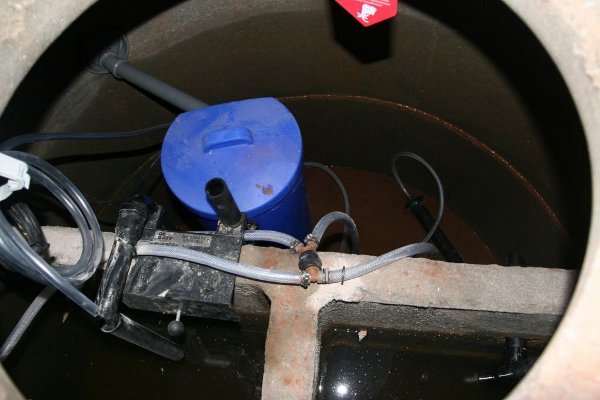
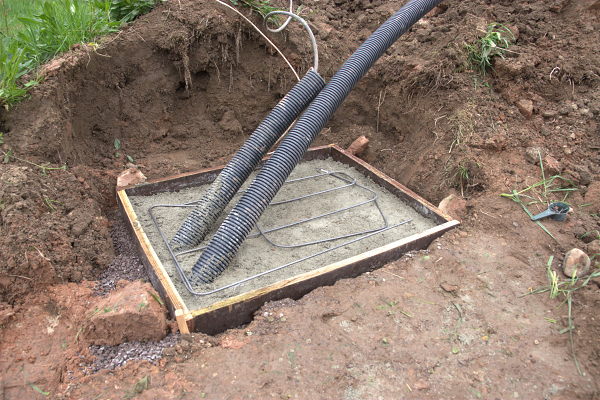
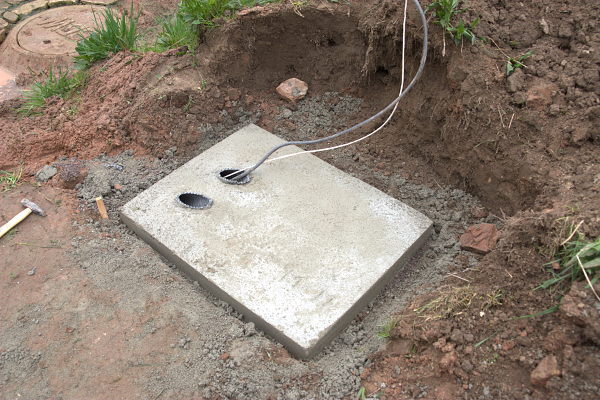
Pump shaft finished
Von: Markus am 11/09/2011
At the moment the progress is not so big as the scaffolding is still missing. This thing should arrive
tomorrow. In the meantime the pump shaft for the drainage system was finished. A massive 80cm concrete shaft where
you can climb into (well, "could" that is if it wasn't for the massive concrete cover they've put on).
scaffolding and a missed chance
Von: Manu am 11/10/2011
Today our house finally got the scaffolding and so there will be the roofing ceremony on the 17th. Because of the
tough time schedule and the building companys having really a stressy time at the moment we were not able to
have the ceremony on a weekend but celebrating on the day the roofing really happens. So the family can only
take part in a kind of after show party at the weekend when everything is over already.
By the way, some days ago when shopping for dinner we recognized our missed chance. If we had been eating some
fish filet earlier and won a Helma sun house, we would have had only the costs for the fish filet ;-)
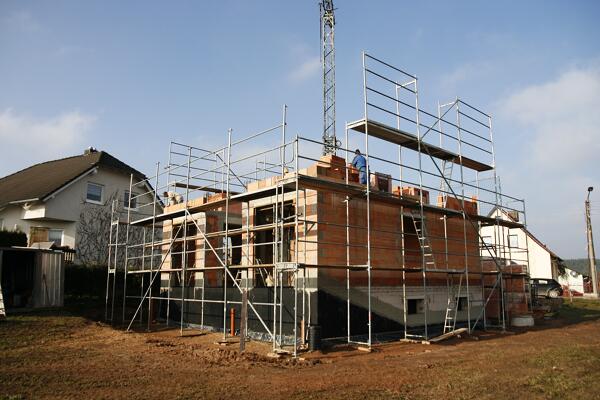
Some more scaffolding
Von: Markus am 11/11/2011
We mentioned it yesterday: the scaffolding is there. So for you to see something: here is a picture of it. With
some fantasy you can already guess what the roof will look like, as the scaffolding is on the gable also.
Ring beam finished
Von: Markus am 11/14/2011
You never stop learning. Our roof isn't just put on the top layer of bricks but rather on a concrete ring beam.
This massive thing runs on the outer walls around the house (well on the northern and southern walls mostly that
is) and will carry the roof in the end. The concrete was poured today. At the moment the boarding is still on,
but this will change until Thursday when the roof is planned to be put up.
Additionally the shoring was removed from the living room today. This makes room for the roofing ceremony on
Thursday. At the moment things are moving fast in order to close the house before winter and have it ready for
the interior work.
Some may have noticed that the blog is lacking pictures a bit for some time now. Simple reason: since we switched
back from DST it's already dark when we come to the lot after work.
The house is nearly grown up
Von: Markus am 11/15/2011
The house won't grow much further. The roof attachment points are there, the roofing ceremony should take place
as planned. The part for the roof skeleton were delivered and are ready to be put up. Looks like they will
really close the house before it rains too much again. That would be wonderful as every liter of water which is
not inside is one that doesn't need to evaporate.
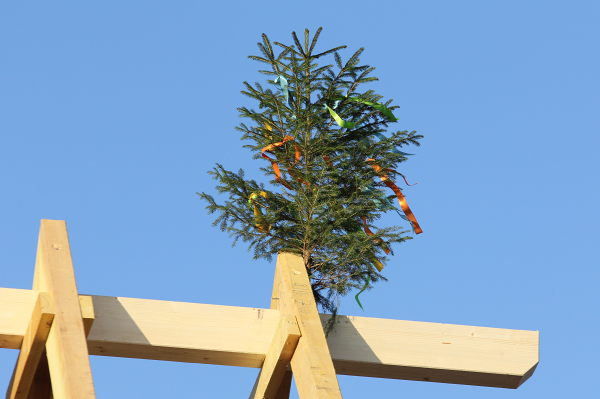
Roofing ceremony
Von: Markus am 11/17/2011
Today was the day: roofing ceremony!
We took the day off to finish the preparations and were on the plot at 10am. When we were approaching the plot we
were surprised to see the roof already quite far. You could see how it was going to look like in the end. When
we got out of the car we were greeted by loud hammering as is expected when two carpenters put up a roof
skeleton.
After many, many more hammer blows the skeleton was (nearly) done. "Nearly" because the outermost rafters could
not be put in place. The scaffolding was in the way. This will be corrected next Tuesday so that the carpenters
can finish the roof on Wednesday.
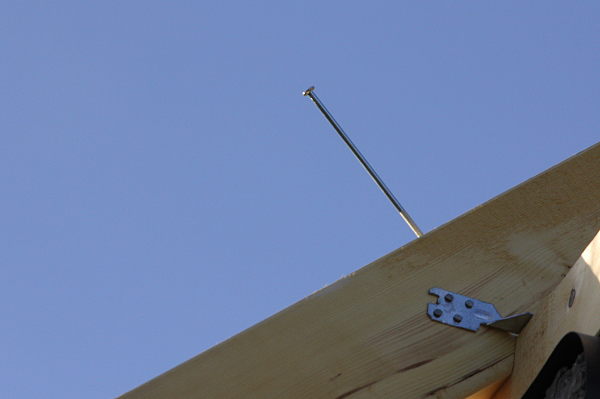
After all the builders and our friends were there the roofing ceremony commenced with the speech. Manu and I had
to climb up there as the last nail was waiting to be hammered in. As the tradition commands a glas was broken
inside the house because pieces of glass are supposed to give you luck. Afterwards I started hammering and I
have to admit: I failed. First the nail looked good:
Sadly it didn't last. After it was about halfway in, it didn't move anymore but rather bent to the side.
According to the carpenters that was to be expected: normally the first drill a hole and put the nail in there.
Well, they presented me with the bent part of the nail as a memento. I'm going to put it in a frame and hang it
on the cellar wall or so.
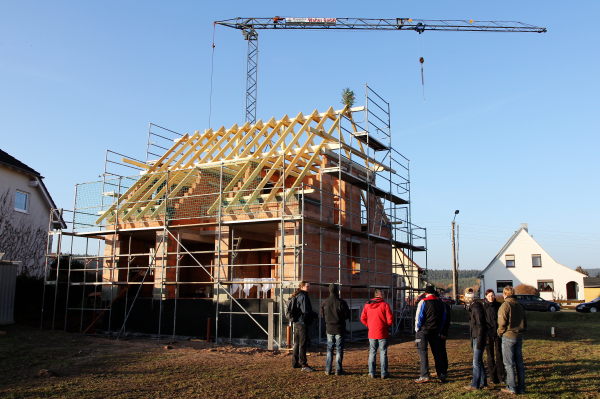
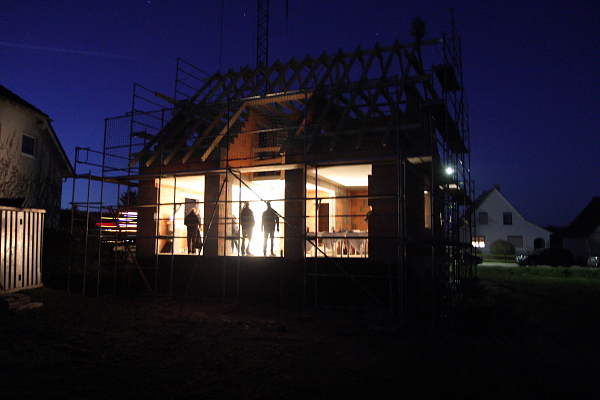
After the speech we had a little party which was joined by various neighbours at different times. They wanted to
have a look at the "awry" house (we're not parallel to the street if you remember, which in Germany is kind of
like breaking the law if you live in a village, so the people already started to ask questions…) Despite the
could the party lasted for about four hours. The gifts were mainly of alcoholic nature which leaves me out, but
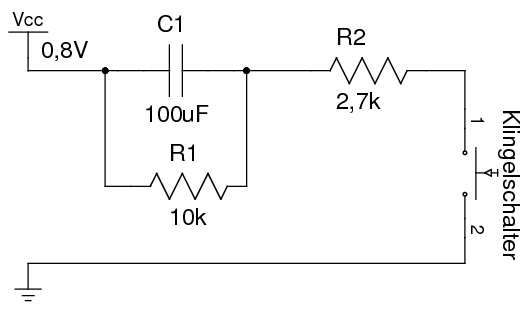
well… we have many friends. A special gift came from some of our friends: an MP3 door bell. You put MP3s on
there and if somebody rings it plays them as the ringtone. At the moment it plays Die Ärzte - Dinge von denen
(nevermind. Some inside joke. We always like to play this song if somebody tells us things we didn't want to
know about, because that's the topic of the song: things I didn't want to know about but was told anyway).
Thank you all you busy hands who made this possible so far! We hope that the rest of the process will run as
smooth as it did until now.
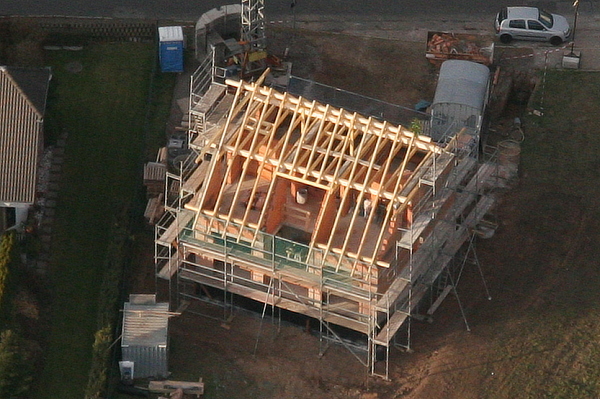
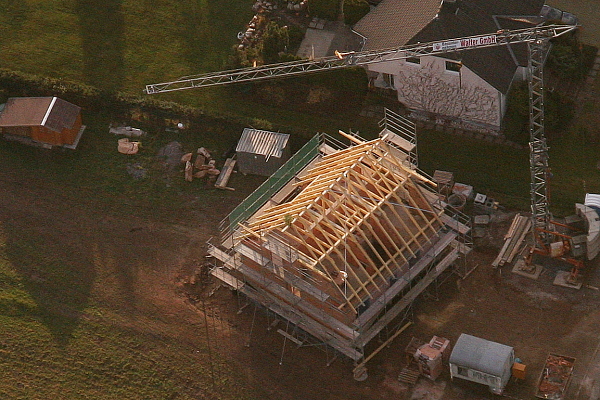
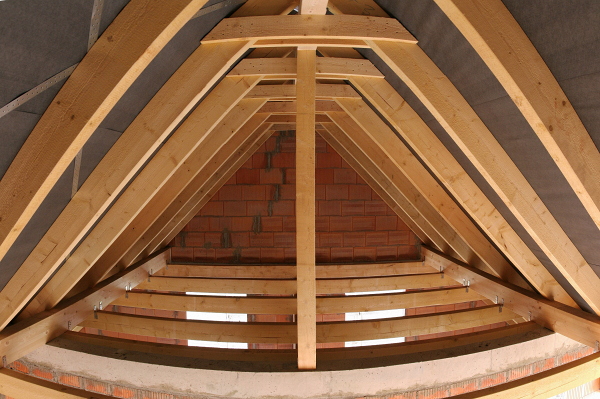
Aerial pictures of the roof skeleton
Von: Markus am 11/19/2011
Today we had beautiful weather again, so we took the chance and made som e aerial pictures to document the next
big building step: the roof skeleton.
The neighbours did by the way wonder where the aerial pictures come from (we used one on the invitation for the
roofing ceremony). They suspected that they were taken from the crane but thought this wouldn't be high enough.
After some time they remembered the little planes that sometime fly around here…
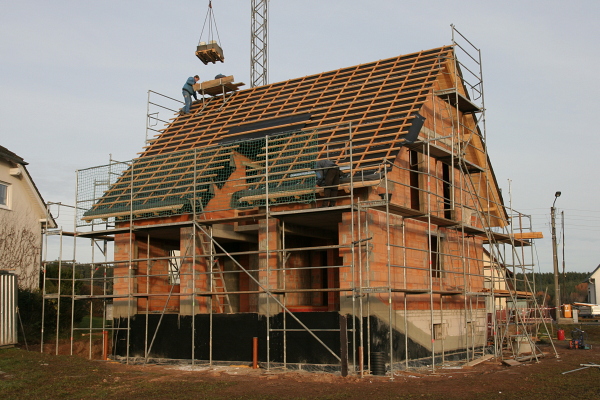
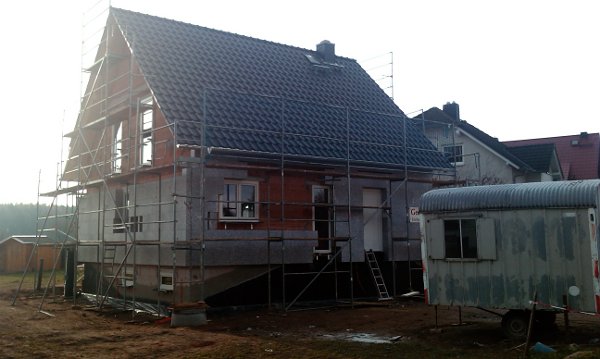
The roof is closed
Von: Markus am 11/24/2011
So, the house is (more or less) ready for the winter: the roof is closed with a foil and is thereby water proof.
Tomorrow the big glass wall will be put in and next week we'll get the sun collectors and the roof tiles. After
that we're winter-proof.
In the morning we had an appointment with the electrician for about 2.5 hours in order to decide how the wiring
will look like. We started in the cellar and worked ourselves up to the roof to place power sockets and
switches. Next week we'll see what our wishes will cost us additionally.
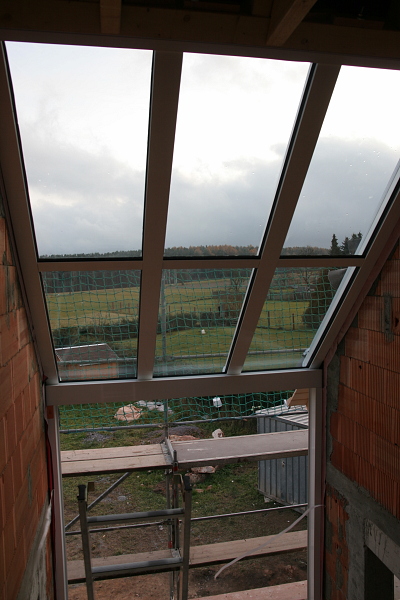
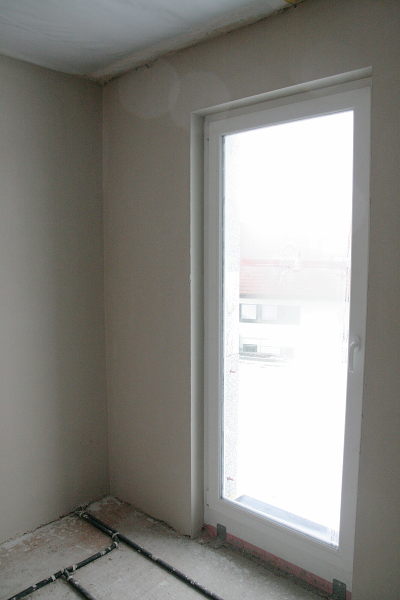
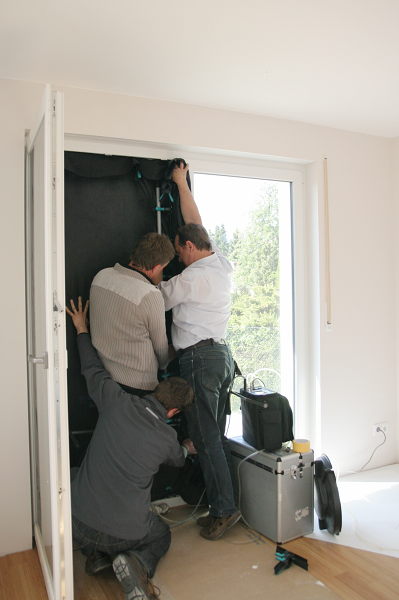
Windows and further delays
Von: Markus am 11/25/2011
The house is now water-proof at least from above as the roof part of the big glass wall was fit today. Other
windows and the wall part are still missing, but that is subject to change next week. I discovered that the
triple glazing is rather heavy. Looks like bullet-proof glas. Let's see how well it insulates from sound and
cold in the end…
To our dismay there are new delays: the supplier of the sun collectors notified us today that they can't deliver
on Monday but rather move that by two weeks. That doesn't stop the process from continueing but is annoying
anyway, especially as such a delay normally shouldn't be anticipated right before delivery. Who knows, perhaps
they dropped the collectors and broke them or something…
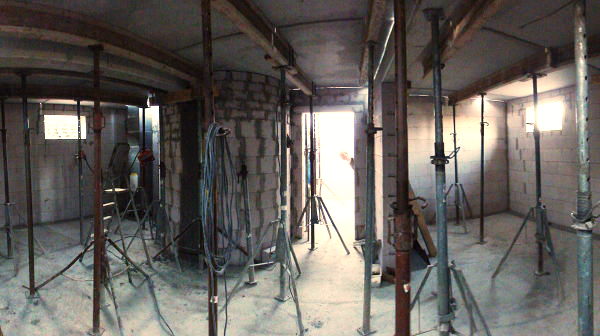
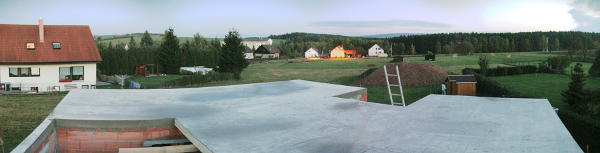
Tomorrow we'll do some pictures of the glas. For today a panorama of the attic has to do:
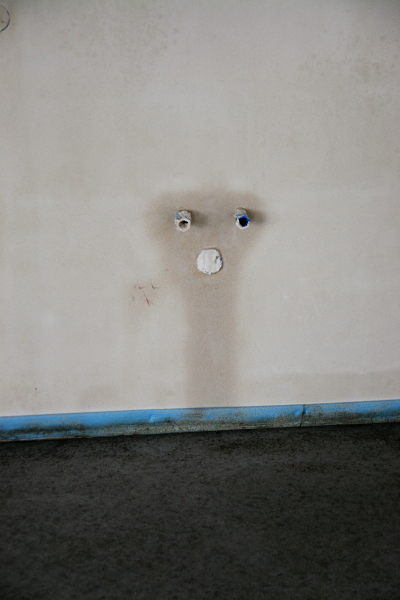
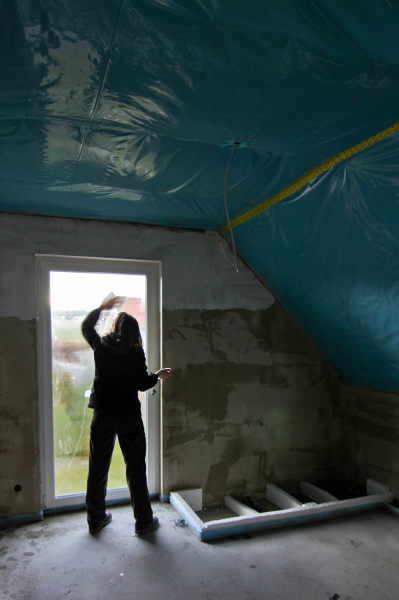
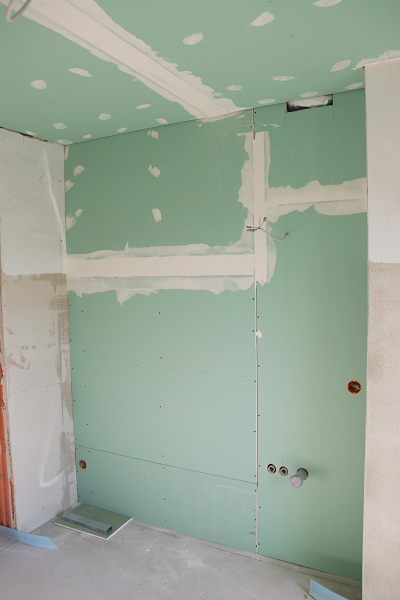
First stepts doing own work on the house
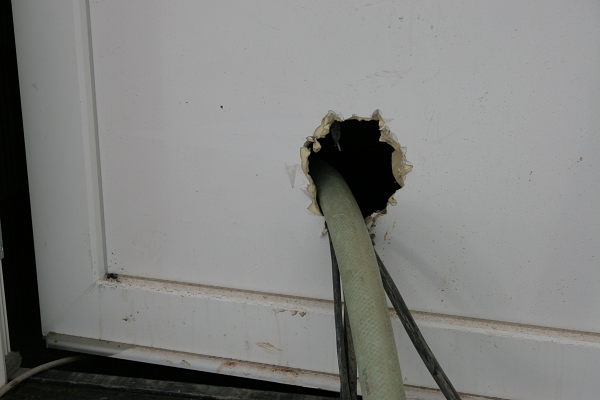
Von: Markus am 11/26/2011
So far we just had people bulding the house and had a look at it. Today we had to do our first own steps in the
process. Before the insulation will be put on next week, we wanted to have some ductwork through the outer
walls. Those tubes are supposed to exit the wall above ground, run in the insulation downward and leave the
insulation underground. This way we can get cables out later on while still keeping the cellar dry without
buying too much of those rather expensive "profi" tubes that are already in. But on the other hand that meant
drilling a hole (well, in total five that is actually) through 36,5 cm of lime sand brick. Drilling upwards at
45° that is (to stop possible humidity). I hated the idea right after I started the first hole. But well…
To my dismay I wasn't the only one not wanting to drill those holes anymore after the first one. The drill
machine of my father gave up. I smelled a bit funny and stopped working. Question: where to get a new one on a
Saturday afternoon? As we already bought a ladder in the morning (the builders took theirs after they finished,
so we had some problems getting around in the house now), we didn't want to spent more money without doing
proper research today. The local home depot doesn't rent the machines out (they for some reason want to sell
them). We didn't have time to go to the next city and check there. Luckily there are some student clubs here
which are equipped with the necessary stuff and agreed to lent it to us. Thanks again guys ('n girls)!
While Manu was going for the replacement machine, I had time to climb up the roof (rather easy with the tiles
not yet on but the foil already closed so that you don't see how high up you are) and take pictures. So today we
have a panorama view the only the chimney sweep will have later on. And of course there is a picture of the glas
roof as promised.
In the end the panorama from the roof. As this is quite big you have to click it to get the full view.

To sum it up: five tubes are in and can be covered by the insulation. A drill machine and a drill (luckily one of
the cheap, non-SDS drills) are gone (machine smelled funny, drill glowed orange. Looks like both were too warm).
I wouldn't call it a full success, but at least the goal for today was reached.
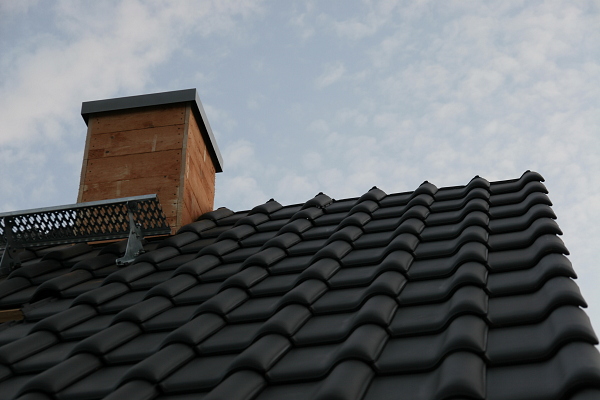
Lockout!
Von: Markus am 11/29/2011
Helma does it just like the NBA: they lock us out! Well, not on purpose: the glaziers finished the
windows and the front door and we don't have a key yet. We hope that we'll get one this week. The north side of the
roof is finished also (with all the tiles on) and on the south side we're still waiting for the delayed sun
collectors. All in all the house is nevertheless sealed now. We don't have to be afraid of rain anymore. If we get a
key this week we're really looking forward to check out the sealed house from the inside on the weekend (with
windows and without wind). The insulation was also started so that we finally get an impression of the outside
proportions of the house. There is progress…
Key search...
Von: Manu am 11/30/2011
...successful! Our project manager called me today and told where the workers hid the key for the front door.
What a pity that it was only a quite easy quest - no challenge for the geocacher in us.
Okay the key is there and what about the house now? Well, such a house isn't that cold any longer when there are
windows and doors. For my part I know only have to ensure the my honey doesn't get used to be the one and only
key owner ;-)
And last but not least: a new photo of the house - taken by the time lapse camera, because
it's already dark when we arrive at the house in the evening.
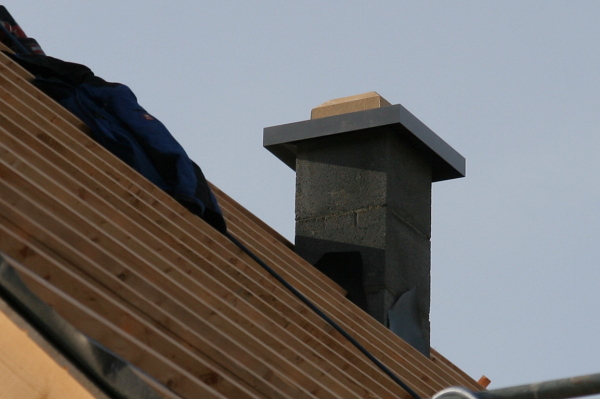
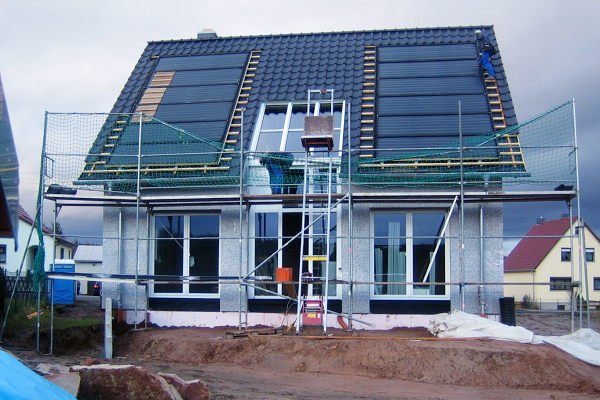
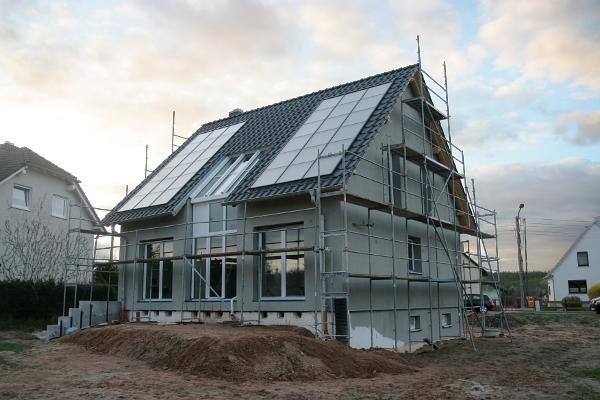
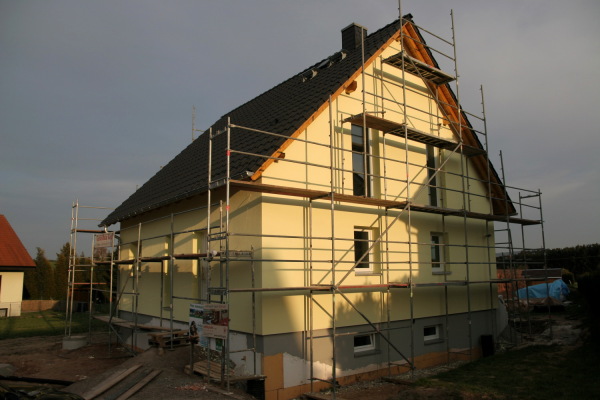
Insulation and many small things
Von: Markus am 12/01/2011
The insulation is in progress. On the south side its already done (apart from the plaster). The other walls are
progressing as well, but are being held back by a little mistake just now. The glaziers brought the wrong
"ears". That's what they call those plasic things that are at both ends of the window boards. The window boards
are silver and they brought white "ears". We'll have to wait for next week Monday to get that fixed and have the
insulation continued.
The northern side of the roof is done including the chimney, so the house looks quite ready from there. The
southern side is a different story: the sun collectors are still missing. The company that installs them told us
that the producer is missing a crucial part and can't finish the collectors. They hope to continue next week.
Let's hope for the best.
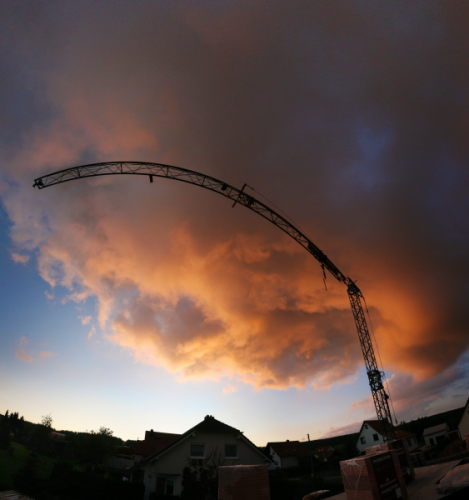
No matter when they start with the collectors they'll have to build a new scaffolding. The current one is to go
next week because it is no longer needed when the plaster is done (and Helma obviously doesn't want to pay for
it any longer because other companies are not finishing their job). Together with the scaffolding the crane,
which stood there for quite some weeks now, will leave. This is necessary so the diggers can built the water
cistern and the sewage treatment facility and connect it to the house. If everything goes as planned we'll get
the connection to the power and communications grids also. This means that the area in front of the house will
be filled to its final height and we can finally enter the house without a ladder.
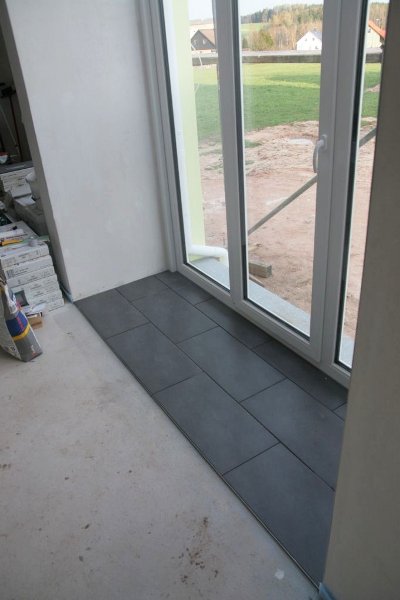
The glaziers will have to return once more. On the picture yesterday you can see a white part in the big glass
wall. There a piece of glas is missing, which presumably broke when they put it in. Additionally one of the big
windows in the upper floor is also broken and will be replaced.
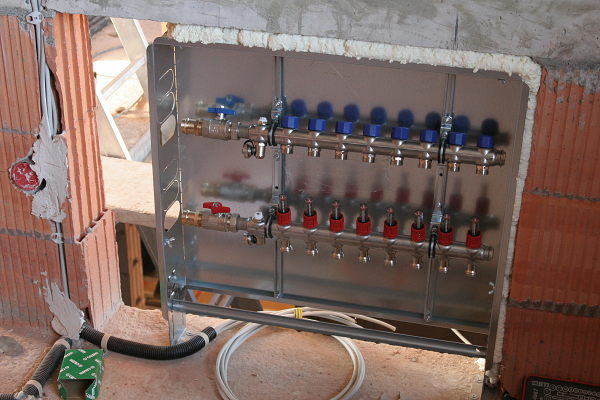
Last but not least (we're making progress, I told you) the electrical wiring and the water pipes will be put in
next week so that the inside plaster can be put on. This will finally bring the construction staircase which
means an end to the much hated (by Manu, that is) climbing of ladders.
Much progress
Von: Markus am 12/08/2011
As expected there was a whole lot of stuff going on this week. The electricians are nearly done wiring up the
house. Everywhere you see sockets, cable tubes and cables about. The insulation is done, although there will be
no plaster before the winter. Today we had a longer discussion with the diggers who are now building the sewage
treatment facility and the rainwater cistern along with all the trenches for the external wiring and the pipes.
All this has to be finished by Tuesday because… surprise: the solar collectors are expected on Tuesday. The
trenches have to be filled in by then so that the scaffolding (which was removed today) can be put up again.
The external wiring caused a longer odyssee btw. One word (well, two actually): Deutsche Telekom. Experienced
house owners will burst into manic laughter at this point. Quite some time ago we handed them the request for a
telephone line. Everything was supposed to go smooth, the cable was to be connected by e.on (the local power
provider) when they connect the power also. When things started to go the Telekom suddenly backed out and told
us they were going to connect the cable themselves. Ok… So far nothing happend (neither by the Telekom nor by
e.on) and then our crane blocked the way for some weeks. At the beginning of November when we knew that the
crane would be removed soon, we called the Telekom and asked about our request. Well, they wanted to call back
and seemed to have forgotten about that immediatly. Manu tried to push things further but in the end gave up
thinking she might be to kind for this job. She asked me to take over the "Good cop, bad cop"-game, so I gave it
a try. The woman at the hotline was quite astonished ("What? The request dates back to May and nothing happend
so far?") but couldn't really help me ("I'm going to write an email to the planning guys, but I can't tell you
when they will react.") Ehm… well…
In the meantime we asked a friend of ours who knows some things about the strange ways this company works. I
don't know what he actually did but it sure did help: he told us they would call us and deliver the necessary
cable this week. Wonderful, apart from the fact that the call never came (anybody can see the pattern?). This
was getting a bit urgend because the cable was to be put in the same seal as the fresh water pipe and this has
to be put underground soon because it starts to get cold here. The guys doing that work wanted to be finished by
next week Tuesday… So he did some magic again today in the morning and told me that they are going to call me
today. And lo and behold! calling me, they did, just in the very moment his message came. They told me that the
cable would be put in some time next week. Good, but not good enough… Tuesday is the deadline. Luckily the guy
in the planning office gave me the phone number of the company that got the contract for doing this job. After
some more calling back and forth (the guys actually doing the work are a different company still, but nevermind)
we got it fixed: they are going to provide the cable tomorrow morning and our guys are going to put it into the
house. Next week the contractor of the Telekom will show up and do the rest. Good things come to those who wait…
Thanks again to our friend who helped a lot with whatever it was exactly that he did to solve the problem!
Speaking of seals and stuff that runs through them: we had a little not so nice surprise yesterday: water in the
cellar (again). According to the electricians who discovered the water it seeps in through the sewage pipe. This
was not connected so far and obviousely is under water on the outside now. Well, the pipe is sealed now and the
water was removed today.
The sewage treatment facility was built today. Sadly the monolithic container that I wanted couldn't be delivered
on time so we'll have to use a three-part version made out of concrete. Let's hope that this stays sealed for a
looong time. The rainwater cistern was also delivered but at the moment sits in the garden in three parts. It
will be built tomorrow or start of next week.
As you can see: much ado about much in that case. We've just been to lazy to blog. I hope that I've made up for
this now. There is just one picture today: the parts of the sewage treatment facility and the water cistern on
the truck. Perhaps we're going to have more pictures on the weekend…
More work for us
Von: Markus am 12/11/2011
After an already quite busy weekend with a family and a christmas party, we had some more work today: as the
foundation for the terrace might be put in place next week we needed to get one cable through the wall before
and put it into an appropriate protective tube. Also they are going to put in the water gauge and perhaps the
electric hub on Monday, so we wanted to paint the walls in that room in the cellar before instead of having to
paint around the stuff afterwards. So we bought a bucket of white color yesterday (clay-based as we wanted to
try that out anyway) and went to work today. First we put up the appropriate amount of lights to see and have
some heating (portable floodlights come in rather handy with the temperatures we have at the moment) and put
some cables aside. A short hour later roughly 30m² of wall were painted in white.
After that we hat to put in the said cable. I already measured everything last week, so we "just" had to put it
through the wall and into the protective tube. Well… The hole in the wall was ok (although the cable was rather
stiff due to the low temperatures). The tube was a different story. Pushing the cable 20 meters through such a
tube without the appropriate tools wore me down quite a lot. Without help I would've failed quite soons. Oh the
joy when we were finished…
As promised some more pictures of the house and its surroundings. First the house in full glory without the
scaffolding:
You can image quite well how that is going to look like in the end. Next is a view into our (now closed) sewage
treatment facility. All three chamber play a crucial role in cleaning the waste water later on, although I
forgot how that exactly works. Something with aerobic bacteria eating up all the dirty stuff…
Connections put in
Von: Markus am 12/13/2011
After we've finished the odyssee with the Telekom and all the power lines are there also they finally could
finish the outside connections of the house yesterday. The water pipe now end inside the cellar instead of next
to the curb. Power and telephone line are there also, although they are not yet connected. This isn't a problem
as the intention was only to get the water line underground to prevent it from freezing. This is nearly done as
well as the insulation of the cellar is nearly finished. In the next days they can start modelling the landscape
around the house. To do so they build a small wall to protect the garden access when building the terrace. Today
and tomorrow they are going to build the rest of the solar heating system so that the roof is finished then and
we don't have to worry about the snow pressure in winter.
Only problem so far: the ground is wet so that the diggers get stuck sometimes. To quote the former owner of the
lot: "Looks like a drill ground". Especially after they brought in a chain dredger which leaves the appropriate
tracks. One thing I'm really interested in is how they are going to put on the solar collectors tomorrow: the
big crane is gone and due to the wet ground they can't drive on the lot to use a smaller truck-mounted one.
We'll see how that works out…
Cistern put in
Von: Markus am 12/13/2011
Just a short update: the cistern was built today. The garden now looks even more like after a bomb raid. As it is
raining all day (and will continue to do so tomorrow) all the soil around the house is just mud. Good news: the
water from the roof can now flow away and is collected in the cistern.
Also we know how they are going to put up the solar collectors tomorrow: they just use a lift instead of a crane.
Easier to handle in the mud I guess. The terrace was filled up today and the scaffolding returned so the work
can start tomorrow. After that we finally can prepare a time lapse of the building process.
The utilities room is quite far also: the electric hub is in place and all cables are nicely laid out on the
wall. What's missing now is the sewage treatment stuff and the heating system for the room to be nearly
completed (excluding the floor itself).
The sun collectors are on the roof
Von: Markus am 12/17/2011
Despite the storm warning in the last days the company put the sun collectors on the roof. On Thursday morning
they weren't 100% sure whether it would be possible due to the weather (the collectors themselves must not get
wet as they get spots from the water, but it was raining now an then). After this improved and so they went on.
This means that the roof is nearly closed now (minor amounts of tiles missing). Due to the way the connection
pipes from the collectors run through the house we're going to need a plasterboard wall in the bathroom and will
loose some centimeters (which isn't a big deal). This means that we really have to be careful when assembling
the washstand to not hit the tubes.
Yesterday in the evening we were quite surprised to find somebody still working. The mounting brackets for our
doorsteps were put on. Problem is the following: we have an 16cm insulation around the cellar which you would
step on and destroy when entering the house. As we can't put the load there, we had to find a different
solution. Enter the mounting brackets: they will later on carry stone plates to serve as a doorstep and thereby
protect the insulation from our weight.
Again we have some pictures. First the collectors as seen by the time lapse camera:
I also talked already about the litte wall on our terrace that is in place now:
In order to provide an idea what the weather (and the digger) did to our lot (and parts of our neighbour's): a
moon crater.
Water naturally gathers in our drainage system but can't be moved out as the pump is still missing which should
put it into the infiltration pit (although one could ask whether this will be able to take any water, seeing how
wet everything is now anyway). This is what the drainage system looks like at the moment:
Therefore we decided to buy a cheap pump today to get the water out for now. This isn't the final one that is
going into the shaft for good but it will do the job now and later on can be used for whatever pumping purposes
we have around the garden. The tube you see on the picture is the connection to the water cistern and the
infilation pit. This is where the water has to go.It doesn't look too bad until you learn that the shaft is
about 2 meters deep. The pump is said to do about 7800 liters per hour. We thought we would be done in about 20
Minutes. Would we not… In the end it took nearly one hour (the pump most likely doesn't run on full speed when
carrying the water upwards that high). The amount of water it moves is impressive nevertheless:
We're going to do this over and over again to keep the ground a bit more dry around the house. When we emptied
the shaft there was already quite some water coming in again through the inlet. In the future this will be
solved by an automatic system but for now we'll have to do this job. The water cistern is rather full now due to
the rain in the last days and our pumping today. 6 cubic meters of water that we don't need now anyway. There
are no vegetable beds at the moment and if there were they wouldn't need water anyway.
The sewage treatment facility is leaking
Von: Markus am 12/21/2011
On monday the sewage treatment facility should be finished (i.e. the devices should be built in). Everything was
ready so far: the container is built, the wall and the access tube prepared etc. The employees of ATB were there
on time and discovered that the container is full of water. So we had to pump that out first. Doing so we
discovered that the water level fell in all three chambers at the same time which is not good, because it meant
that the wall isn't water-proof so far. If you have such a small sewage treatment plant the biggest chamber has
to be seperated from the other two or the plant will never produce clean water. End of the story: the guys from
ATB assembled the control system and put in the the air tubes but left out the parts in the container. These
will be put in after the container was sealed.
Yesterday we got a call by e.on who informed us that they are going to put in the the power connection. They were
a bit surprised to find the telephone cable in the same trench and asked what to do with it. Normally the
Telekom wanted to put in in themselves but as we have all the phone number due to the problems with the cable we
could call and convince them to put in the cable today to save one trench. We're on holiday so we can't check
whether that worked out, but… fingers crossed…
Last, but not least the sun collectors should be finished today. Yesterday an employee of the company was ill, so
they postponed it to today. Can't check either, but again fingers crossed…
The roof is finally done
Von: Markus am 01/03/2012
Right before christmas the sun collectors were finished which only left some roofing tiles to do for the roof to
be ready. Those were put on now so that we can count the roof as done. Also some connection to the house were
made water-proof although there are some more things necessary. The sewage treatment container was sealed again
and is waiting for the equipment. This will be put in right before the house is finished.
The last days before christmas e.on told us that they are going to do the power grid connection. They did so but
with rather unpleasent outcome: we got a message from the neighbours on Dec. 27th that they wrecked his
entrance. They dug up a trench to put in the cable and left the once quite nice gravel road a muddy mess. Not
good, there is some work still to be done. They also left out - quite to our surprise - the telephone cable
despite other agreements before. We'll have to check what went wrong there.
Today we had quite a bit of storm here which didn't leave out site untouched. First of all it knocked over the
portaloo on front of the house and - even worse - opened one of the big windows on the back. We'll have to check
with the glaziers again as this is something that really should not happen.
Working in- and outside
Von: Markus am 01/12/2012
The last days have been rather quite in the blog but not so much in the house. Ok, last week was without any
exceptional events (we've just been pumping around water from the drainage system etc.), but this week is much
more busy. The guys from Drechsler finished the last parts of the solar system, so everything is ready for the
heating to be connected. I can now see how to kill… ehm… access the control unit. Manu already found some
solutions for Linux, so everything clear there. I don't want to program that thing (although I managed to break
a similar device at my parents in law…), just access the sensor values.
The plumbers started their work and fittet the whole house with sewage pipes. We've been at the site yesterday
and discussed details regarding positions of different things. We've also – finally – decided for a wash stand
for the upper bathroom. I did like that one from the start, but Manu didn't like the price. Luckily they hat a
special offer just now at the local bath dealer so I finally could persuade her and it'll now be the one I
wanted.
Our odyssee with the Deutsche Telekom (and their contractors) now has another episode: Manu went out to the lot
to check some details with the plumbers (not knowing that they wouldn't be there today). Suddenly I get a call
from her if she could pick me up. You have to know: I have the key for the house at the moment. With the
plumbers not there Manu didn't need to enter, but the guys from the Telekom contractor that were there to
connect the phone line. I don't know what they thought, but not showing up after making promises two time
("We'll do that next week!") and then showing up without prior notice and wondering when nobody's there to open
the house… Strange people. Had Manu not been on the site by coincidence, they'd just gone again, because: they
didn't have our phone numbers either… Anyway: we have a connection now (hardware-wise, that is), so we can sign
off that problem for now.
Last but not least some pictures. Please excuse the quality. They're done using my mobile phone and trying to
take a picture in the dark cellar.
Snow, wine and some technics
Von: Manu am 01/14/2012
Snow has covered the house and the lot and the sun is shining bright. So it's the best time for the next wine
picture:
... and some more picture of the house and the technical stuff around the buffer:
Wow, time flies!
Von: Markus am 01/20/2012
That's what you could say seeing the time laps of the building process. Four months collapse to 6 minutes. The
boss of the builders even thought of giving his guys a raise when he saw them running in the video. Now the
house is a bit further than at the end of the video. For the small things visible outside I didn't have the
camera running. I'll switch it on again when the plaster comes on.
Update 2012/10/10: The video now shows the complete process.
(The video needs a bandwidth of about 1600 kBit/s)
Inside insulation and plaster
Von: Markus am 01/21/2012
We've been not all that chatty lately which was due to lazyness on our side rather than lazyness on the builders'
side. They've been really busy. The plumbers put in all the water and sewage pipes as well as the risers for the
heating system. In the upper floor the insulation and moisture barrier are ready, so the fettlers can get going.
They do so and how they do: we're thrilled! The plaster is smooth like a baby's skin. Technically we pay for
quality level Q3 which means we can put wallpaper on. Looking at what we get so far that would be more like
level one: we won't need wallpaper. Very good…
We did some pictures today for you to get an impression of what's going on. Let's start at the entrance. The
fettlers made a hole in the door for their equipment. Good that the door will be changed later on.
We switch to the guestroom. There we have one of the two heating hubs in the house. How this will work exactly in
end I have yet to find out.
To get a picture of what keeps the house warm in the upper floor: the insulation with the moisture barrier.
The other walls carry interior plaster which we like quite well as said before. Manu even goes as far as to say
that you don't even need to put paint on if you like that capuccino color.
Last but not least let's go outside again: when the water cistern overflowed between Christmas and New Year's Eve
we discovered something bad: the ground around the cistern is higher than the tube at the drainage shaft. This
caused the water to flow back into the drainage instead of into the meadow as intended. Luckily the inlet is
already pointing upwards so we just had to extend it to fix this. We did so today and tried it out immediately.
Works like a charm: the water flows into the meadow and not back into the drainage system.
The overflowing water had a funny effect in the snow. Due to the relief if looked just like a huge eigth note.
A tour through the (nearly completely) plastered house
Von: Markus am 01/29/2012
We already wrote that the interior plaster is being done at the moment. For you to get an impression we did some
pictures yesterday. Still missing are the bathrooms (different type of plaster, will be done last), one side of
the entrance and the cellar (only the staircase and the buffer walls). This is supposed to happen next week. You
can clearly see now that plaster contains quite an amount of water: everything that is a bit cooler than the air
(windows, ceilings etc) is full of condensate. We wiped that up yesterday and opened the windows and we're going
to do the same again today. The water needs to get out there…
Ok, on to the pictures:
Last, but not least, a view of the living room. This one is a bit bigger so please click on the preview to get
the full picture.
It's cold outside...
Von: Markus am 02/04/2012
... and inside, at least for now. They started putting in the floor insulation for the heating system, so in no
time we will be able to heat the house. Until then the winter shows its muscles and everthing around the house
freezes. According to plan the screed was to be put in next friday. Looking at the weather this won't work. It
wouldn't be a problem to heat the house up to the temperatures necessary but the machine preparing the screed
will stand in front of the house and freeze. We'll have to wait for warmer weather.
Yesterday we had a little surprise: in front of our lot we have a traffic sign or more to the point: we had a
traffic sign. It's still there but no longer vertical. Somebody (we're not quite sure who) ran it over. Directly
above the ground it now make a 90° turn and lies flat in out lot. There is a truck track on the left and on the
right. We still have to find out what exactly happened there and tell the administration.
Holdup and appeal
Von: Markus am 02/12/2012
As you could see there is no progress that we could write about. The insulation for the floor heating is laid out
but everything else came to a stop. It's just too cold. According to the forecast this will stay for a while, so
we'll have to wait.
To keep us busy we had to appeal the notification of charges of the local water works operator. They would like
to charge us 2€ per month for the discharge of rain water, which is nice and all but: we just don't do this. Our
cistern keeps on overflowing at the moment because it has no connection to the sewage pipe. Ok, would be just
12€ per year but after all we're some of those nit-picking Germans that you've read about!
The mandatory wine picture - now with plaster on the walls
Von: Manu am 02/18/2012
Started with the heating system
Von: Markus am 02/20/2012
Finally more progress! As it has been a bit warmer now the plumbers started working again and put in the heating
pipes. The upper floor and one of the children's rooms is done so far. The pipes are rather close to each other.
I'd expected them to be more seperate.
They explained to us that the main factor when calculating the system is the length of pipe that has to be put
into one room. This influences how much energy can be transferred into the room. That can be a problem if you
have rooms with little floor space (e.g. the bathroom with the tub etc. blocking space). There they have quite
some problems putting in the necessary meters.
For you to see what I'm talking about:
The floor is in
Von: Markus am 02/27/2012
After the sand pits are open again (they were frozen lately) the company put in the floor last Thursday and
Friday. We couldn't get into the house until yesterday when we did some first, very careful walks around (not to
damage anything) and had a first look. The house is turning into a greenhouse with water dripping from every
ceiling. That'll be fun in the next weeks when we start to fire up the heating.
During winter we had some unwanted guests in our garden shed. Ok, we could've guessed it: you just don't put
bird seed where mice can reach it.
Getting the heating going and more progress
Von: Markus am 03/07/2012
There is more progress to report! After the floor can be stepped on again the comapnies are back and continue
working. The electricians put in the sockets and switches. The furnace is installed and connected to the heat
buffer (although it's not working so far). To do so they drilled a huge hole into the floor of the living room.
The furnace needs an extra air supply from the outside which is running below the cellar ceiling and then up
through the floor into the furnace.
Today the heat buffer got filled with water and already collected (according to the computer) 1,7kWh of heat
which leads to a water temperature of 18°C in the upper part. There are two huge equalising tanks in our
entrance which are supposed to be connected to the buffer. This is a bit of an issue as we did only plan with
one. We'll have to think about how to fit the second one in without loosing the space for the washing machine.
The builders started putting in the scaffolding for the drywalls. They've been a bit enthusiastic in the
bathroom, so one of the walls is too far from the actual wall blocking the space for the furniture now. That
needs to be fixed.
The progress is good so far and we're rather optimistic regarding the move date. Our rental contract is cancelled
end of May, so we hope everything works out well. There is a bit too much moisture in the house right now, but
we'll get rid of that soon.
38°C
Von: Manu am 03/09/2012
 ... and it's
getting warmer ....
... and it's
getting warmer ....
At our house summer has begun - at least inside our solar heat puffer. Since Wednesday it's collecting the power
from the sun - regardless of the winter's intermezzo yesterday.
It's getting warmer
Von: Markus am 03/15/2012
While the buffer heats up (51°C after a sunny day today) everything else is being prepared so that we can start
to heat up the screed. The heating system in the cellar is in place and working and the heat shield behind the
furnace was built. Tomorrow the furnace will be put in his place again and we can start to heat up (assuming we
get the chimney sweep to OK the thing). So time for some more pictures:
The sauna is open
Von: Markus am 03/20/2012
We should open the house to the public. At the moment we have a steam sauna in the house. 35°C and 100% humidity
are rather impressive. Every cold surface is soaking wet. We mop the water up and let in fresh air to dry out
the house.
On the weekend we tested the furnace. We don't need it right now due to the nice weather which gives us enough
sun energy, but it's good to know that it works. Next weekend the floor is supposed to heat up to 50°C and we're
not 100% sure if the sun gives enough energy for that. Firing up the furnace is a bit complicated so far. We
need more experience to reach maximum efficiency. Much easier with the sun…
We also did some stuff with the sand stones that we got from the excravated material. When opening the cistern
the lid always collects a whole lot of mud and dumps it into the water. To prevent this we used some of the sand
stones to build a pavement next to the lid. Some practice for the terrace later on.
Sauna-mode is over
Von: Markus am 03/28/2012
What an interesting last week! If you have to heat up the whole house to 50°C and keep it there for three days
the sun just isn't enough. Our problem: we "used" the buffer wrong. The heating system only takes energy from
the lower 4 layers of the buffer. The furnace on the other hand heats up the top level first (hot water going up
there. Physics etc.). End of the story: you have to heat up the top level first until it starts propagating
down.
We didn't know that and just relied on the power of the sun. That worked as long as the heating system just
needed 30-35°C. Thursday/Friday and over the weekend was a different story. The energy in the buffer just wasn't
enought and we didn't reach the desired temperatures. Unfortunately it's not enough to fire up the furnace just
once and be done if you have to heat up such a tremendous amount of water. Fortunately my job allows me to work
from home sometimes and that's what I did Thursday morning: I stayed in the house, kept the fire going and
programmed stuff for the university. Due to the high temperatures I did so in the cellar, the only rooms that
were ok. No mobile phone, no Internet, no distractions. I really did get stuff done… Went to work in the
afternoon and continued heating after that for the whole evening. We hoped that the buffer would be enough until
Friday, but sadly: no. When we came in Friday morning the temperature was 45°C instead of the desired 50°C.
Well, back to the fireplace and the same thing again. I again worked from my cellar (with the house reaching the
50°C quite fast, this was again the only area where you could work, albeit with a jacket on) and kept the fire
going. 50°C and 100% humidity… quite a combination. In the evening we again put log after log in the fire so the
buffer temperatures kept on crawling up and up. Especially the lower layers were warm now, so we could ease the
heating routine a bit. As of Monday the fire is no longer necessary. The temperatures are supposed to go down
again and the sun can keep up so far. We burned up about 1 stere of wood in the meantime.
Speaking of wood: we bought some three big bags of dry wood (relatively expensive) to heat up the house. Well…
big bags are water-proof and therefore totally inappropriate to store wood over a longer time. According to our
moisture meter condensation brought the once dry wood up to about 21%, making it totally unsuitable for burning.
Lucky for us: the "fresh" wood that we bought earliers wasn't so fresh after all and already dried to about
13-16% moisture. That worked quite well.
The furnace is a rather fascinating thing (if used right). Some minutes after starting the fire the
post-combustion chamber gets going. This burns the remaining things in the exhaust fumes with really high
temperatures, leaving only steam to come out of the chimney. If the outside temperatures are above 5-10°C you
don't even see this anymore. This is totally different from the rather smokey exhaust of a classic wood fire.
As we opened the windows quite regularly during the heating period a big part of the moisture is out now. The
walls are nearly completely dry and the "film test" (stick a pieve of plastic foil to the floor to see if water
condenses) is good so far. Some more drying and we can have the guys over measuring the residual damp to check
if the floor tiles can go on.
As the house is not only supposed to be ready on the inside, the plasterers are back. The interior plaster was
fantastic already and we're really looking forward to the outside. They put on the base layer in the next days
and continue with the colour next week. We settled for a very light green-yellow.
Here are some pictures to get an impression of the heating:
Thanks to André for the pictures by the way. I'm kind of lazy in the last weeks and he like to play with his
new toy.
Exterior plaster and floor tiles in the cellar
Von: Markus am 03/31/2012
As I already wrote the plasterers were there and put on the base plaster on the insulation. Our house looks a bit
dull grey now until the color comes on. For you to get an impression here's a picture:
In related new the best of all wifes (and the stubborn sometimes as well) finally gave in and we bought floor
tiles for the cellar. The store room, staircase and heating room are to be laid out with tiles. I don't expect
them to be super-beautiful but rather ok-ish and not too expensive. The local home depot has its 30th birthday
this year so they have all kinds of offer, including – hooray! – cheap floor tiles at around 5€/m². Took me some
time to convince Manu, but finally: grey 30x30cm² tiles. Exactly the right stuff for the cellar. Not too
expensive and ok-ish. Fit both requirements. So today we took two roundtrips to transport 520 kg of floor tiles
to the house and into the cellar afterwards. We build some kind of makeshift crane to get the down (still no
stairs). I will have severe muscle ache tomorrow (and be complaining loud about that fact).
We had some loss along the way: 3 tiles broke. Not due to the crane but rather my carelessness which left one
package falling to the ground. Luckily it just destroyed 3 of the 18 tiles in the packet.
Let there be light!
Von: Manu am 04/05/2012
This week nothing really happened besides the fact that the house is now independent from the special power
supply for the building site. Tuesday our electric meter got install and the electricians got all the electrical
outlets ready for usage. So we went bought some cheap bulb holders today and now: you can come into the house
and switch light on without fumbling in the dark until reaching the building light.
Here comes the color
Von: Markus am 04/10/2012
Just a short update (it's late already…)
Weekend was photo time again in the house. This time without the wine:
Today the plasterers started putting on the first coat for the final plaster. This is already in the final color
so we can see whether we like it or not (we do). Please excuse the bad photo quality. Mobile phones suck (not
only a picture taking, but especially there…):
Last but not least we had the screed measured today. We need to know whether the residual moisture is low enough
to get going with the tiles etc. And… guess what… it is. The measurement said 1.8% residual moisture. The
measurement is rather interesting: you chisel a small amount of screed out (50g) and put it into the measurement
bottle. You add a glass vial with calcium carbide and two iron balls and close the whole thing with a pressure
gauge. Then the bottle is shaked to have the iron balls destroy the glass vial. The calcium carbide will react
with the residual moisture in the screed to form acetylene. The resulting pressure increase is transformed into
a reading of the residual moisture by the pressure gauge. 1.8% is nearly perfect. The floor tiles etc. can come…
Floor tiles and the stairs
Von: Markus am 04/12/2012
The best of all wives is really happy tonight. Finally we do have stairs so she doesn't have to climb ladders
anymore:
The floor tiles for the bathroom and the ground floor were delivered yesterday. We carried about one tonne of
tiles into the house. Good for us that the next batch will only arive tomorrow.
At lot is happening at the moment
Von: Manu am 04/19/2012
The last days quite a lot of different craftsmen are working at our house.
The plaster at the outside is finished now and the guardrails made out of special steel got placed at the windows
in the upper floor. At the moment the house is looking like this:
Furthermore the company call ATB has installed the last devices for our sewage treatment facility. But we will
bring it into server not until we are moving because otherwise the bacteria inside would starve.
My cousin is working at our house, too. He is placing all the tiles at the at the floor an at walls in the
bathrooms. Here is how the shower and the back entrance already look like:
The scaffolding is finally gone
Von: Markus am 04/22/2012
At least that's the plan. The scaffolding finally went on Thursday and you can see the house in its full glory
now. The guardrails are in place, so apart from some landscaping everthing on the outside looks nearly finished
(ok, some gras etc. is still missing but this will take some time to grow).
Inside the drywall builders have been busy. The ceilings are finished and the upper bathroom is done. Progress is
good, so we can hope to move in at the end of may.
Time for the floor
Von: Markus am 04/24/2012
Today our floor tiler had the house to himself. He did the entrance which means that you can't access neither
cellar nor upper floor. The other guys stayed at home to prevent chaos. In the meantime the bathroom has wall
tiles and around the furnace and in the entrance the floor tiles took their place. Progress!
We've been shopping today and were quite happy about our car: 10 wooden poles of 3 meters, 8 2,6x0,6 m² drywall
boards and a bunch of related stuff were no problem. We also bought the incredients for our painting and
paperhanging plans on the weekend.
White ceilings, barbecue, helping hands and currants
Von: Manu am 05/01/2012
We used the weekend and the holiday to get a lot of things done at the house - with helping hands from Markus'
parents and some friends. The result - a lot of things are done:
- the lowered ceiling in the kitchen
- kind of white fleece wallpaper at the ceilings in all rooms upstairs except the bathroom, in the living and
the dining room as well as in the kitchen
- primed walls nearly everywhere
- electricity for the drainage pump and the garden shed
- lights for the terrasse
- white currants flowering (ok, we have done nothing for that)
... and finally some more pictures:
A flood of pictures
Von: Markus am 05/05/2012
The last few days have been quite exhausting for us. If you're normally just sitting in an office, thinking,
painting a house is more than just unusual for your body.
There has been much progress: the bathroom tiles are in (pictures will follow as soon as I took some), the
ceilings are covered with wallpaper and paint. The best of all wives came up with a concept for the wall colours
and testet it in the cellar. Now we need to put it on the walls. Thanks to quite some help of good friends
progress is good so far. We bought the cork plates for the floors in most of the rooms and can hopefully start
laying them next week. All in all: much work, but also good progress.
The surroundings of the house should look nice and clean also, so the diggers are back and fill in the rest of
the pit. Mount Brückner is nearly completely gone and distributed around the house. The terrace has its final
form. The rather messed up neighbour lot is nice and level again so the neighbour is also happy. We need to sow
some grass soon.
So, following the flood of work descriptions, now a flood of pictures:
Many, many pictures and still no view from the outside… This will follow as soon as I took some of the
finished work today. The diggers will drop by once again and finish some stuff. The doors will also be put in today.
I don't like it when they have to work on Saturday but they say they won't make it otherwise…
Good and bad news
Von: Markus am 05/08/2012
Let's start with the good ones. A picture is worth a thousand words:
Yesterday the bamboo parquet came. We really like the look and feel so far. Exactly what we imagined it to be.
The picture is from today as we couldn't enter the room yesterday. I'll put up the time lapse of the building
process up as soon as I anonymized the guys working there.
In other news we bought a garden pump so I can water the (future) lawn. So far the weather took care of this but
now it looks like the ground is going to dry up which isn't good for the newly sowed lawn.
Well, the bad news: our plan with just painting the walls is not going to work. The color simply won't form an
even surface. The plaster has a sintered skin in some places which I would have to remove first. Sadly the
sintered parts are distributed in a way that I would have to polish all the walls, what I simply can't do until
end of May. So with some dismay we decided to put wallpaper on the walls and paint this. First we'll start with
the kitchen tomorrow because the furniture is supposed to arrive in two weeks. Luckily we have quite some
hard-working friends who help us. We just wanted to say "Thank you!" for that.
Bathroom facilities and other little bugs
Von: Markus am 05/10/2012
Just a short update: the plumbers were there and tried to get the final touches done. Sadly there was some
communication screw-up and they had the wrong type of facilities with them. This has to be resolved in the
coming days. Another annoying thing: the glaziers left ugly black stripes on the parquet. We'll have to see how
we can remove this. Last, but not least the door frame of the living room entrance buckled when they put in the
parquet so the door no longer closes. All in all some little annoyances that have to be fixed.
On a brighter note: the kitchen wallpaper is finished and we have a new entrance door. We're on the final
stretch, although there's quite some work left.
Progress, progress, progress!
Von: Markus am 05/12/2012
After we've decided to put wallpaper everywhere we have quite some progress. The bedroom and kitchen are done
(the kitchen is already painted). Today we took to some of the more complicated parts: the buffer and the
gallery in the living room. With 3,70 m on the short site the gallery isn't the longest piece of wallpaper
(that's the gallery ceiling with more than 5 meters), but it's the highest. I might have a pilot's license but
my flying abilities without a plane are rather limited. So we had to come up with another solution to reach the
glass ceiling. Luckily me and my big ladder are just big enough to get up there, so this part was rather easy.
Handling the long sheets of wallpaper is another story, but we managed to do this together. After some hard
work and at least as much explicit language the wallpaper is on and can be painted. The buffer was also quite
challenging: the round wall and some small irregularities in the plaster make it impossible to join the
wallpaper pieces flawlessly. I managed this with the double cut, a tip we got from the guy that sold us the
wallpaper. You overlap two pieces, cut them both and remove the cut off parts. Perfect fit. (This is the short
version of the stoy. The long one includes a fit of rage on my side which led Manu to leave me alone for quite
some time and the buffer having a footprint in a place where normally no foot would go)
Just to show what we've done some pictures. Not really spectacular but this is our day's work:
In other news: we got the final front door.
It's ours!
Von: Markus am 05/17/2012
Well, and the banks... As of the day before yesterday we're owners of the three only keys for the house. Helma
handed it over to us. There are some minor things left, but all in all it's done. We have some more work to do
(hanging wallpapers, painting, putting in floors etc.) The TÜV (german organization doing all kinds of technical
certifications and tests) had a look and did the Blower-Door-Test. The house did well: not so sealed that we
have to expect mould but much better than the specification says (for the experts: the n50 value is 0.9, i.e.
that with a pressure difference of 50 Pascal between inside and outside the house will exchange 0.9 times its
total contained air volume in one hour. The specification tolerates up to 3.0).
The test was rather complicated. A plastic sheet is put into an open window. The sheet contains a ventilator
which creates the necessary high and low pressure. Our windows have something called a softline profile (i.e.
the edges are rounded), which makes it quite hard to attach the plastic sheet. Long story short: in the end it
took three people to hold the sheet in place in order to finish the test.
We don't want to be bored so we continue to amuse ourselves with the interior of the house. To see something
other than wallpapers for a change we decided to put the cork floor into the bedroom. Before that the floor has
to be level. For this we use levelling compound. Not easy, not at all... Before the floor was more or less even,
afterwards not so much. I went back to the store and asked them about what to do. They said to try again and so
I wanted to do. In the evening I just was about to mix the levelling compound when the boss of the store
knocked. It was him that did the moisture measurements so he knew where we live. He just wanted to have a look.
His tip: some grinding and the floor will be ok. Well, we tried and lo and behold! It worked! Thanks for that.
It took us until 1:30 pm but now the sleeping room is done.
A small detail shows that we're going to move in soon: we have a mail box. We can start to switch addresses
everywhere.
A last minor thing: the grass starts growing. Woohoo!
A lot to do ...
Von: Manu am 05/22/2012
We have done a lot of work in the last days and there is still quite a lot to do. So photos instead of many
words.
Oh, there is one thing we have no photo of: We have swallows nesting under our roof already. But the started
building their nest right above our front door, so we have put some net under the roof there to keep them away.
2m to left they may still build their nest.
Our kitchen!
Von: Manu am 05/24/2012
I packed a box and in I put:...
Von: Manu am 05/30/2012
... a washing machine, a porcelain sheep, a broken power supply, wine glasses, a plant pot, a monitor, some
brushwood, a piggy bank, a lot of picture postcards, a bed, a Gyrotwister, a pepper grinder, a canister of
destilled water, sticking-plaster, a Vuvuzela, gift wrap paper and a trampoline.
Well, our hardworking friends have packed all the other stuff, too and brought 99,7% without damange into the
house. Congrats to them - all the boxes are signed well and we nearly find everything after a while. Thanks a
lot to friends and family! They packed stuff, removed rubbish, cleaned, schlepped things (aah, I need to use
that word, because it really comes from the German word schleppen), prepared meals, assembled furniture and
provided their cars. You are great!
Meanwhile we have phone and internet in the house, have been cooking in the new kitchen and had a bath in the new
bath tube. Unfortunatelly we have to clean and paint the flat, so that we can get rid of it. That's why we
cannot do that much in the house.
But now .... some impressions from the move:
Ein- und Ausblicke
Von: Manu am 06/07/2012
Since some days we have moved to the house and get used to living in here. Our swallows made themselves
comfortable under our roof, too. I guess they will be breeding soon.
Our kitchen and living room already look like ready, all boxes full of clothes have move into the wardrobe and
one more room got it's cork flooring.
Last week our house consultant came around and brought some cured fish as a moving-in-present ... Yummy!
Furthermore with the stored sun power we already took some warm baths - nice when the wheather is ugly like the
last days. ... and maybe there will be some data from our heat system in the next days because my honey is
programming that stuff at the moment.
Amendment: Helma's present for moving-in
Von: Manu am 06/17/2012
Finally, there are two pictures of the present we got from Helma when den handed over the key for our house:
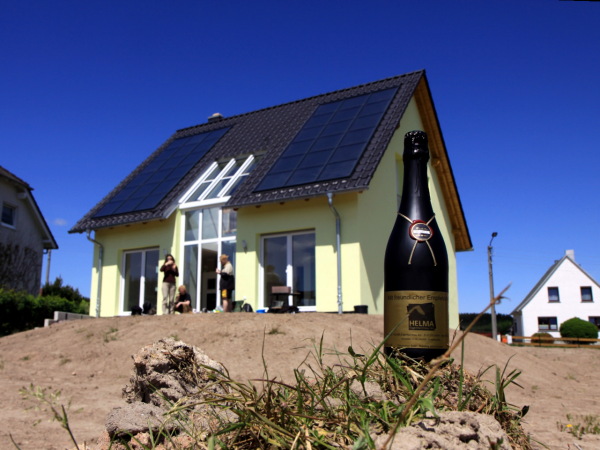
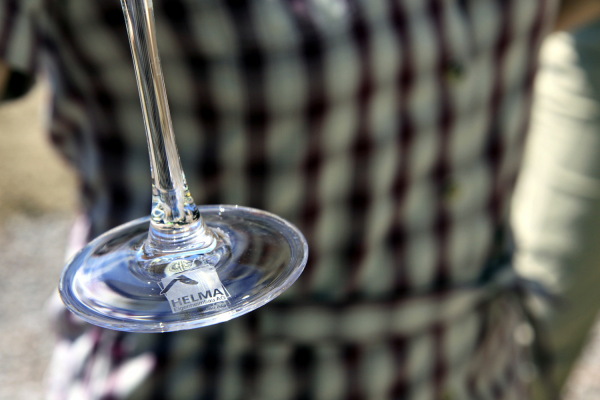
Nature at home
Von: Markus am 07/08/2012
We're sitting in the (quiet) living room when Manu notices a bird chirping. After a short while we
located the noise coming from the furnace. How on earth? Down in the cellar we opened the maintanance cover and lo
and behold: a white wagtail sits behind the cover, freezing when it sees us. I couldn't catch it with a glove. It
preferred to escape and fly around panicking in the cellar. Luckily it accepted the open window as an exit. We're
not quite sure how it got there. Perhaps the wind tipped it over yesterday or so.
Warm feet in winter
Von: Markus am 08/07/2012
As the best of all wives is prone to get cold feet we did some woodworking today and built a seat next to the
furnace. The cover is still missing (we bought some additional of the bamboo flooring to have the same look as
the floor), but it can be used anyway.
More room for firewood
Von: Markus am 08/11/2012
After two days off and thanks to two awesome guys we now have much more room to store firewood. If Helma's
estimations are correct we should now have enough room to store wood for more than three years. The store came
out very well even though – quote – "a computer scientist planned it, a banker and a media engineer built it".
In the end we had some tasty stuff from the grill. We should be building more of those things. Back to the
drawing board…
Preparing for rain and snow
Von: Manu am 09/10/2012
The end of summer comes closer (with temperatures about 30°C) and it's time to prepare for the colder season
(anyway they already sell lebkuchen since two week). Firewood was delivered last week and has found its place in
the new wood shelter - and the driveway next to house is now truck approved.
Today my father-in-law arrived and is working outside despite the hot temperatures. The result: the splash guard
for the wall is already finished at the eastern side of the house - and it looks quite nice.
Curtains and new boots
Von: Manu am 09/23/2012
Because my old boots got really bad during house building time, I got new ones yesterday. So this was also the
right reason for taking the last picture showing me at the glas front - the one before was taken just when the
plaster was ready (some months ago).
Furthermore we have been very busy in the last two days and besides a cut lawn, cleaned windows and a workbench
in the cellar, the two rooms upstairs have got curtains, finally - as well as the kitchen got a roller blind.
Let's build a house in approx. 15 minutes!
Von: Markus am 10/10/2012
Well, if it was that easy... But they were fast nonetheless. I finally found the time to finish the time lapse of
the whole building process from start to end. The small camera did its job and took many thousand pictures. In
the end they form a video of around 15 minutes. Due to my obliviousness (anybody wondering that I actually had
to look up this word?) and some problems with the memory cards, there are some minor parts missing (like the
building of the buffer wall in the ground floor). Speaking of the cards: we killed three of them in the process.
The file allocation table is written in the same place over and over again, which kills the memory cells quite
fast. You have all kinds of weird effects like broken filenames and camera errors, so you know it's time to
change the card again. But overall the system worked quite fine.
So, without further ado: the resulting video.
The stove bench is finished
Von: Manu am 10/18/2012
The seat bench next to our furnace is finished. Excellent - and made out of bamboo parquet. (
How it began...)
Now we are looking forward the first time making fire. But it seems that this will still take some time - our
solar puffer ist well filled and every sun beam brings new energy for the floor heating and hot water.
First snow on the solar collectors ...
Von: Manu am 10/26/2012
... and already gone. Making some strange noises the first snow has slipped down from the collectors.
And a little snow cat has come to rest at our table outside:
Let's start the fire...
Von: Manu am 11/10/2012
...at our fireplace. Yesterday we could enjoy the first time making fire - together with friends, wine, ice-cream
and comforting heat. And today the same again: a snugly evening with asparagus soup, wine and muffins. And
finally our solar puffer has enough heat again for the next days.
Fiddling with the door bell
Von: Markus am 11/16/2012
More and more stuff get's done. Today: the door bell. Friends of ours gave us an MP3 door bell some time ago.
That thing is normally triggered via a remote control and plays an MP3 file, that you put on it. I don't really
like the remote control. It needs batteries and doesn't fit to the door, so I wanted to use the normal bell
switch. Some fiddling with the multimeter and I had found the two pins that needed to be short-circuited in the
device. Bad news: if you close the circuit too long, the bell switches off. Directly connecting it to the bell
switch was out of question. Hm…
I needed a circuit which allow a high current for a short time, but limits it later on (thus creating a short
impulse). I could've used digital circuits like the NE555, but I didn't want to. So: try to remember the basics
of electrical engineering (which took quite some effort and help of friends) and build an RC circuit like this:
The thing labelled "Klingelschalter" is the switch. If that is closed, the current crosses 0.17 mA (the minimum
current viewed as "closed" by the device) for some time. As the capacitor charges, the current drops until it
reaches < 0.06 mA in the steady state (thereby being "open" to the bell). When the switch is released, the
capacitor discharges via R1, resetting the circuit for the next round. Works so far. Let's see how robust it is.
Thanks to all the friends and colleagues who helped in figuring out the right values for the circuit. That was
beyond my knowledge so far.
We had an appointment with the press
Von: Markus am 12/15/2012
Three weeks ago our house guy called us and asked whether we would do an interview for one of the local news
papers. They had approached him, as they wanted to do an article about a sun house. Two weeks ago they showed up
with one reporter and a photographer (who took wonderfully posed pictures, but nevermind).
I have to set something right here: I did not (repeat: did not) explain the heating to my wife (one of
the pictures is labelled to that extend). She's perfectly able to kill that thing without my help. In general
the interview was rather interesting. The reporter was quite interested and had us explain how the house works.
The article reflects that: it naturally stays on the surface, but doesn't contain technical errors. If you want
to read it yourself (sorry, german only): Die
Sonne stellt noch keine Rechnung.
Current state of the heating system
Von: Markus am 12/15/2012
As I'm in the writing mood, let's add some info about the current state of the heating:
- First heating day: 9.11.
- Days so far: 12 (5 in November, the rest in December)
- Amount of firewood used so far: 530 kg (That's a bit hard to calculate because it depends largely on the
moisture of the wood, but it equals to about 1 stere.). That equals to approx. 2200 kWh of energy.
- Solar return since November 1st: 389 kWh (the main part with 340 kWh in November)
As you can see, the heating mainly rests (especially in December) on the wood furnace. The values so far are in
the expected range. Let's see how it looks at the end of the heating period. We still need to learn how to use
the furnace properly. That thing has a massive amount of power. This already caused the emergency valve to
trigger three times now, which is inefficient, as it not only wastes energy, but also water by using cold fresh
water to cool down the furnace. Some more practice needed.
Something that you can't measure: the evenings in front of the fire. Very nice :-) Oh and the fascinating
technology: the furnace works without any electronic control. Just clever air flow. Nice toy.
Merry Christmas...
Von: Manu am 12/23/2012
...to everyone following our blog. Enjoy the time with your loved ones.

...and now: Purple!
Von: Manu am 01/18/2013
I'm not quite sure what it was that my sweetheart traded off for the purple room during the house planing - but
it's getting to be nice.
A bar in the snow
Von: Markus am 01/20/2013
As we're not busy enough inside the house (just the few thousand things we want to get done before spring…), we
did some work outside yesterday. We've bin planning to put up a snow bar at the back of the house for quite some
time now. As we had to shovel the snow yesterday anyway, we took the opportunity and built a 2 meter long, 90 cm
high bar table. Today we tried it out for the first time with the neighbors. We had built a ditch into the
table, so that we could put on the pot with hot wine punch on a heater plate. So we had some hot wine punch,
tea, chips, meat balls and sweets. The whole scenery was lighted by some colorful light. In the end we got
somewhat snowed in, but that was worth it.
The kitchen lights...
Von: Markus am 01/22/2013
...are in the cellar at the moment, but at least they've been assembled. After I mounted the last parts today,
the LEDs are now driven by their own power supply (and no longer the big one in the lab). The board was designed
by a colleague, whom I shall thank, as I wouldn't be able to do this on my own (I failed electrical engineering
101 multiple times for a reason). The board could drive either 16 low power of 8 high power channels. I use two
at the moment to drive the spot lights for the countertop. Later on a micro controller should drive the whole
thing, making complex light pattern possible. For now it's just in the "power on = light on"-mode.
That's what it looks like at the moment (the chaotic cable connections will be replaced before it is mounted in
the ceiling):
Now just mount it in the ceiling and we should finally have decent light in the kitchen.
Finally a real shower
Von: Markus am 02/05/2013
There was still something left... we were looking for a shower cabin for quite some time (well, actually we put
off the descision, but nevermind...). That gave us the opportunity to make up our minds as to how the thing
should look like and it came out quite differently than initially planned. Instead of a closed cabin with an
entry at the edge (which wouldn't have worked anyway due to a collision with the door), we now have an open
shower with just two freestanding glass walls. But as always: a picture is worth a thousand words...
Some more things are getting done
Von: Markus am 02/19/2013
They always say that you are never really done with your house. Well, I start to believe them somewhat, but
nevertheless I want to continue step by step. This time on "things that are being finished": the guest room and
parts of the kitchen lights.
Interesting side-effect of the power supply: when you switch of the lights, it takes about a second to
discharge all the capacitors, so the light always stay on for a short time.
Let's build a vegetable patch
Von: Markus am 04/21/2013
After this long winter we finally wanted to do something in the garden. Last year everything was rather minimal
with just the occasional lawn mowing being done, to save the effort for doing stuff around the house. This year
the plans are a bit more elaborate with the patch being the first step. We did some research about the topic and
quickly decided, that it would be a raised bed. Problem is: we do have quit some root voles here, so a raised
bed is much easier to pretect against their hungry teeth. Bit more effort on the building part though.
As usual is a picture more than a thousand words:
The first heating period is over
Von: Markus am 04/27/2013
We're quite sure, that we don't have to burn any more wood this heating period. This winter has been the worst
case test. Exceptionally long, exceptionally dark (about halve the sun hours as usual or so we've read) and the
house is still drying (which is supposed to increase the amount of energy you need. We didn't notice any high
humidity levels though).
These are the results of the first heating period (sorry for the german texts. The brown bars are the used wood
in kg, the yellow ones is the solar energy, we harvested. Below it gives the number of days we heated in the
respective month and on the bottom you see the first an last heating day, the overall wood used and the overall
amount of solar energy harvested):
In short: we're happy. We burned about 2053 kg of wood (that is about 3.5-4 ster or 2.5-2.8 bank meters). That's
in the lower range of what Helma promised. This might increase if we had kids, as 4 people need more warm water,
than two, but I wouldn't expect too much of an increase. We fired up the furnace on 47 days (which makes 43
kg/day on average). If you think, this is much: we notived that the furnace is most efficient when heating it up
and burning quite some wood in one run instead of multiple smaller ones (it's a big beast anyway). We took to
burning the whole store next to the furnace in one run, which results in those numbers on average.
Things we've learned:
- We need to get used to getting the next batch of wood in on time. Taking it in, right when you need it, is
too late. The moisture in the air immediately condenses on the wood, making it hard to ignite. It's better
to have it in the house for one day at least before burning it.
- Speaking of the ignition: we're still experimenting. Depending on the weather, it can be necessary to put in
quite some paper first to get the chimney going. Otherwise it's just producing smoke and has a hard time
getting the wood to burn.
- Size of the wood: the first batch, we had delivered, had the wood split up too much. This results in a
larger surface area, increasing the power of the furnace quite a bit (makes for a nice flame, though). This
isn't a problem, but you have to look out to not overheat the furnace. We tested the emergency valve three
times this winter. Works.
- Wood creates dirt. You should keep that in mind if you think of having a furnace in the living room. We
don't mind, but we have to admit, that we underestimated the amount of dirt, that creates. It's mostly
limited to the furnace area, so it's easy to sweep up, though.
- We could've invited people over every time we fired up the furnace. Apparently we're not the only ones
enjoying the flames.
Heating with the furnace keeps the overall temperature of the buffer lower, as when the sun is joining in. You
just don't burn that much wood, to get the temperatures up. You can see this quite good in the diagram of the
buffer temperatures for the last year:
The "Speicher unten" sensor (the blue-purple one) shows quite well when the sun was there. This part of the
buffer (the lowest zone) can not be heated with the furnace, to keep a spare in case you can get in some solar
energy. Everytime that goes up, the sun helped a bit.
To sum up: we would do it again. I didn't like getting in the wood everytime, but overall it's really good.
Yummy ... our first crop
Von: Manu am 05/17/2013
Today it was time for the first two radishes to be testet - yummy and slighly hot.
P.S. The rest of our crop is being watered extensively at the moment because it's raining cats and dogs here.
Bad weather brings new visitor
Von: Markus am 05/30/2013
As I was just opening the window to get in some fresh air, something took a fright above my head in the
roof. The bad weather obviously caused a kestrel to take refuge under our roof. Now he's sitting one beam further
away and seems to want to complain about the rain. I'd offer him a place to sleep, but he doesn't seem
interested...
Small and larger works in the garden
Von: Markus am 06/22/2013
Since we moved in, the rate of news went down quite a lot (as was to be expected). But now we have some things.
We did some stuff in the garden an built a pump room.
Initially we planned to build a foundation with a beam pump on top. Somehow we cancelled that plan and Manu
instead thought of burying the pump in the ground. To understand this, you have to know: since we had the water
cistern excavated, there was a little hill left, which the flora conquered step by step. At some point Manu
decided, that this is kind of cool and that the hill was there to stay. So the idea was obvious to build the
pump room into the hill. I didn't like the idea, that we would have a nice, rolling hill with a square door. So
think "Lord of the Rings" or more specific "Hobbits" and, well, we built a hobbit dwelling (it kind of got out
of hand...)
We built a potato tower some weeks ago. We were a bit late, but hope, that it will work out anyway. The idea is
simple: you plant potatos and once they're out far enough (about 15 cm), you put some soil on them, only leaving
the top leaves out. They grow again, you fill in again etc. The trick is: at every branch, that you cover, the
plant grows a potato, which should give you quite some potatos in the end. We'll see. Seems to work so far. All
potatos are growing.
That the work in the garden pays of is clearly shown by our raised bed. It's full. No space left, as all the
plants are growing. We harvest radish every now and then, and the kohlrabi, broccoli, carrots and strawberries
look quite nice too.
Terrassenbau
Von: Markus am 09/28/2013
How you turn this:
via this:
into that:
...I'll show you in a time-lapse, as soon as my spine an me are on speaking terms again.
Zeitraffer vom Terrassenbau
Von: Markus am 09/29/2013
Like I promised: this is how you turn a rough terrace into something more elegant and comfortable. And it only
takes three days...
First project for the winter: putting in the floor tiles
Von: Markus am 10/20/2013
As the weather is getting worse (although we had a lovely day yesterday, which will push back the first heating
for this year quite some days), it's time to think about the projects for the winter. To do so, my workshop in
the cellar needs to be finished, meaning: the floor tiles need to be put in. First of all, that meant putting
everything out of there and cleaning up...
A short while later.. (actually: a rather long while and plenty of back pain later... I highly respect people
doing that for a living!)
Last thing missing: jointing the tiles. Those open gaps are not the most beautiful thing aroudn. That meant
another evening of work. This time with plenty of water. my hands are still dry and rough the next day.
Yeah! Just another 2 rooms (with less simple floor shapes) to go...
Preparing for winter
Von: Manu am 10/10/2013
The sun is getting lower and lower and gingerbread starts to conquer the food stores. We also do last
preparations for winter - as the pictures tell.
Building more stuff
Von: Markus am 12/26/2013
It's been quite some time since I bought some nice beech wood panels to build a cupboard. I was missing time and
tools to do even the basic things like e.g. cutting in a straigth line with a 90° angle... But, a few weeks ago,
I bought a nice Makita track saw, so now it's finally done:
I got some tricks from some interesting YouTube channels, where people show their work and explain, how it's
done. This leads to an interesting problem: I have trouble using the right german words (e.g. when buying
stuff), as all those channels are in english. This became appearant, when I was buying a respirator: the filters
are labelled totally different in the US, than in Germany.
The next project is already planned. I just have to calculate the amount of material needed and go shopping. So
expect more things in this theater...
Spring 2014
Von: Manu am 03/10/2014
Spring is starting quite early this year and so after some minor changes in the house even nature is now starting
for the new year. But as always: A picture is worth a thousand words:
Let's dig everything up again...
Von: Markus am 03/24/2014
It has been so nice during the construction... We couldn't get used to having a clean outside and not having our
shoes dirty with red mud all the time, so today we had everything dug up again. This time, it's going to be for
the garage and driveway.
The access to the house is over a plank again. The garage will be delivered later. For now it's just the
foundations and the driveway.
New paralsol foot
Von: Markus am 04/08/2014
The existing foot of our huge parasol wasn't all that perfect. As the parasol has a rather large diameter, it is
quite susceptible to wind and even the metal cross with the four large concrete plates wasn't enought to hold it
in place. I wanted to change this for quite some time now. Our advantage: the parasol is constructed in a way,
to make this easy. The big metal cross and the rotary disc are held together by four M10 screws, so you can
easily mount that onto something else. The plan: dig a hole, fill it with concrete, embed four M10s at the right
places and you're done. That's, how it went:
Things were a bit more complicated as I wanted the main part of the foundation to be underground. Only the actual
mounting plate should be visible later on. That's what this little part of the formwork in the middle is for.
That is also where the four massive M10 threaded bars are going to sit, that are keeping the parasol in place.
In the middle you can see (well, if you're looking really hard) the 4 M10 threaded bars with the nuts on which
the rotary disc sits later. Positioning them correctly was surprisingly easy: I just screwed them to the rotary
disc and mounted the whole package onto the formwork (you can see this package on the first picture above lying
to the right of the formwork). This ensures the right position and guess what: the rotary disc slides on and of
easily. I did, however, totally miscalculate the amount of concrete needed and had to go out and buy some more.
This is, what the final result looks like. The main part of the block will be underground later. The top of
the small extension on the top will be level with the ground. The thing passed the first test and withstood the wind
last weekend.
Garage foundation and some plants
Von: Manu am 04/23/2014
The foundation for our garage ist ready - the garage itself will take some more weeks until it arrives - so here
is a photo of the foundation:
Furthermore some parts of our garden are starting flowering quite well:
And last but not least: We got an Easter Snowball Bush for Easter from Markus' grandma and it has already got its
place at our new created stony slope besides the tearrasse.
A new raised bed
Von: Markus am 05/03/2014
The raised bed from last year was more or less an experiment. Not too much effort (neither work, nor money), as
we weren't too sure, whether this is for us. It is, it turns out. So this year, we did another one to double the
space for vegetables. Thankfully our neighbours knew about our plans and thought of us, when they removed one of
their shrubberies in the fall. Using this, our christmas tree, some twigs from grandma's (former) pear tree, the
gras from last year and our half-rotten compost so far provide the long-term fertilizer. The upper half is
filled with the well-tested mixture of compost (from the nearby communal compost) and soil and finally covered
with a layer of plant soil. There you have it: two square meters of easy-to-use (and fertile, as last year
showed) vegetable patch.
Enough text, here are the pictures:
The design is inspired by a book we borrowed from our neighbours. We did rather simplify the design, so that only
two different lengths of beam had to be cut.
Connecting the beams at the edge is done using perpendicular M8 threaded rods. There are three of them at each
edge. The one directly at the corner connects the two adjecent walls, while the others keep the recessed beams
in place. Many holes to be drilled. So many, that I built a template to speed up the process.
The beams are kept apart by two washers and a 2 cm piece of aluminium pipe a each rod. To be exact: 108 of them
in total. That was a lot of cutting. Readymade spacers or just much more washers would have been a lot easier,
but also just as much more expensive.
In the end, the whole construction is pulled together by two nuts at each end. So far it looks rock solid. We'll
have to see, if the wood moves a bit in the future.
This picture shows quite nicely the construction with the threed rods at the corner. Simplifying the construction
saved us quite some effort when cutting the wood. We just bought 27 45x70x2000 mm douglas fir beams. 9 of them
were cut in the middle to make the short sides. Together with the spacers, the nine rings result in a height of
79 cm (+ approx. 2 cm for the top rail missing in the picture). The ideal height for working standing up.
Overall the construction is a bit more expensive, then last years, but it is supposed to last for 15-20 years in
the ideal case. We're going to check on that claim (although we're most likely not blogging about the result
;-)). I really like the visual appearance. I just like this change between light and dark colour.
Summary Heating Period 2013/2014
Von: Manu am 05/04/2014
The month April is over and so is the time periode that is included in the summary of our heating period. We
proudly present the supposed minimum of heating because the winter wasn't one. After we could experience the
heating maxium in the last frosty winter without much sun the following graphic now shows the low price heating
winter 2013/2014.
For comparison the values of last year (see also the article of the last year):
First Heating: 9th November 2012
Last Heating: 9th April 2013
Wood used: 2053 kg
Solar energy harvested: 1980 kWh
The nuclear reactor sprung a leak!
Von: Markus am 05/27/2014
I was aware of our decadence having an open nuclear fusion reactor as the base of our heating system. What was
news to me however, is that there seems to be a leaky nuclear reactor under our raised bed. That would at least
explain the monster radish, that we're currently harvesting.
The garage is there!
Von: Markus am 06/09/2014
Yeah, finally the car and the motorbike no longer have to rust outside, but can continue to do so in the garage!
And more important: the bikes have left the garden shed and I can finally access the lawn mower again without
having to move everything around.
For you to get an idea, what the delivery looked like, I did a video:
And the garage has a new color...
Von: Markus am 06/13/2014
We had the garage delivered with white plaster in order to paint it ourselves. It's just much cheaper that way.
The plasteres left us a bucket with the colour code of the house, so we could go to our local painter and have
the matching house paint mixed. I spent the last two days on and around the garage in order to put the paint on.
Looks nice (althought it's not 100% finished yet):
Some green stuff
Von: Markus am 08/27/2014
Some news from the garden this time. We planted some stuff. We had a voucher for plants from my colleagues, so we
went shopping and bought some plants for the east side of our terrace:
The hill is my personal reminder of one of the nicest lodges we stayed in for our holiday in New Zealand a few
years ago. Little Earth Lodge near Whangarei had something similar (although bigger) on their land:
In a related note we grew some kiwi plants over the winter. It's actually rather easy: you clean the little seeds
from residual pulp (otherwise it might mold), plant and water them and they develop into quite large plants.
They are supposedly able to withstand freezing temperatures. We'll see, because we planted two of them next to
our garage:
That's where the power comes from...
Von: Markus am 09/07/2014
From our terrace you can observe how they build a new power line. They just started pulling in the lines. When
these are new, they shine in the sun instead of just being black lines in the landscape. Must nicer view that
way. Sadly they don't stay that way.
Extension of our wood store
Von: Markus am 10/18/2014
Before winter hits I had some tinkering to do in the garden. We decided that our wood storage needed an
extension. Thing is: we don't need that much wood to burn, but we buy freshly cut lumber (it's cheaper), so we
have to store it for 2-3 years to dry. That takes up quite some room, so an extension was in order.
Well, long story short: Manu's berry bushes had to move (that's why I started so late into the fall: waiting for
the harvest...). This time I hopefully did everything right on the foundation to keep the mice from digging up
earth into the wood.
The challenge this time: use only hand tools (and a cordless screwdriver. I really didn't want to by a hand drill
just for this one project). Some weeks ago I bought a nice set of japanese hand saws, that can now show off
their talents. Let's see::
All in all it was worth the effort. Now for the repairs of the older part and we're ready to receive the next
batch of wood.
Unwanted guests for dinner
Von: Markus am 10/18/2014
As I'm in the mood to write: we seem to have unwanted guests on our lot. Instead of eating the wonderful, fresh
grass, they seem to prefer the strawberries. We'll have to do something about it in the winter, before they kill
them. The fence is due next year.
The few vegetables that are still left outside are having a hard time either. A full-blown cabbage butterfly
infestation. I'm picking them off, as I can, but they seem to regrow faster than expected.
When the new landline kills the heating system...
Von: Markus am 11/13/2014
It's getting cold in Germany. This is not really a surprise for this time of year. What was a surprise, however,
is that out living room was getting cold also. In the end: that's exactly what we bought the heating system for
(or rather: against). For the last few days, the room was a bit chillyand the floor was noticably cooler, than
the kitchen. Those are two different circuits, so I expected the worst: the thermostat, the valve, something
that would be expensive...
Well, today the best of all wives had the right idea: we have a new landline since mid of October. With this came
a new router (it's a VoIP solution based on ADSL2+, something the old router just couldn't do.) Due to the way,
the cables are running, the router is located in our living room. It's one of those shiny, white Telekom
Speedport W724V anyway. Well, such a router produces quite some head, so you shouldn't hang it just below the
thermostat for the room. Shouldn't...
New couch at 3rd Advent
Von: Manu am 12/14/2014
Our new couch has arrived and we just had tea and Lebkuchen (similar to gingerbread): enjoying the 3rd Advent
Sunday.
The new couch has a bed function making a big relax area. Furthermore it has a drawer down at the left side,
where we can store Max' toys in the future.
Upgrade Relex area
Von: Manu am 01/14/2015
The wall behind our new couch has been looking quite empty. That's why we now have a big photo there which brings
a bit of New Zealand to our living room.
Sun house and a solar eclipse
Von: Markus am 03/20/2015
What does a sun house do in a solar eclipse? Well, the same as on any day with clouds: patiently waiting for the
sun to return. It is quite interesting, though, to oserve the collector temperature during the eclipse.
Our house entering the penumbra coincided with the start of the pump for today, so the curve is a bit strange.
The spike is nothing special for today. This happens everytime, the fluid starts flowing: first a high spike as
the hot water in the collectors rushes by the sensor (it's sitting at the output of the collector for obvious
reasons), then a sharp drop when the first cooler water from the pipes reaches to output and the system reaches
(more or less) equilibrium. This is the point labeled "Beginn". Afterwards you can quite nicely see the decline
of the temperature as we go deeper into the penumbra (the pumps don't have a say in this. The system detected
more or less right away, that the energy input is to small and switched off).
I marked the point of the largest overlap. As you can see this doesn't coincide with the minimum temperature. The
collector has to get rid of the stored energy first (as the pumps are off), so the temperature follows the
overlap by about 15 minutes. The point I marked as "Ende" isn't really the end of the eclipse. It's just the
point where the system switches on again and the temperatures do no longer clearly depend on the overlap.
In the end just a little picture of how the eclipse looked like from our house:
I'd like to see a total eclipse over our house, but this won't be in my lifetime. The next is on September 3rd, 2081. I'd be over
100 by then...
Driveway (nearly) done
Von: Markus am 04/28/2015
Since we moved in the house had to be entered via over an area of gravel. That introduces quite some dirt into
the house and is rather ugly to clean in the winter. Therefore our plan has been for quite some time, to get
that paved. Some time ago our contractor called us and told us, that we're to be the first project after the
winter. We like the result: